> ## Documentation Index
> Fetch the complete documentation index at: https://ship-jskiller1404-add-ommiting-private-fields-feature.mintlify.site/llms.txt
> Use this file to discover all available pages before exploring further.
# Digital Ocean Apps (IaC)
There is a simplified deployment type without Kubernetes. This type is **recommended** for most new applications because it allows you to set up infrastructure faster and doesn't require additional DevOps knowledge from the development team. You can switch to a more complex Kubernetes solution when your application will be at scale.
It's a step-by-step Ship deployment guide. We will use the [Digital Ocean Apps](https://www.digitalocean.com/products/app-platform) and [GitHub Actions](https://github.com/features/actions) for automated deployment. [Mongo Atlas](https://www.mongodb.com/) and [Redis Cloud](https://redis.com/try-free/) for databases deployment, [Cloudflare](https://www.cloudflare.com/) for DNS and SSL configuration and [Pulumi](https://www.pulumi.com/) for Infrastructure as Code
You need to create [GitHub](https://github.com/), [Digital Ocean](https://www.digitalocean.com/), [CloudFlare](https://www.cloudflare.com/), [MongoDB Atlas](https://www.mongodb.com/cloud/atlas/register) and [Redis Cloud](https://redis.com/try-free/) accounts.
Also, you need [git](https://git-scm.com/) and [Node.js](https://nodejs.org/en/) if you already haven't.
## Setup project
First, initialize your project. Type `npx create-ship-app init` in the terminal then choose desired build type and **Digital Ocean Apps** as a cloud service provider.
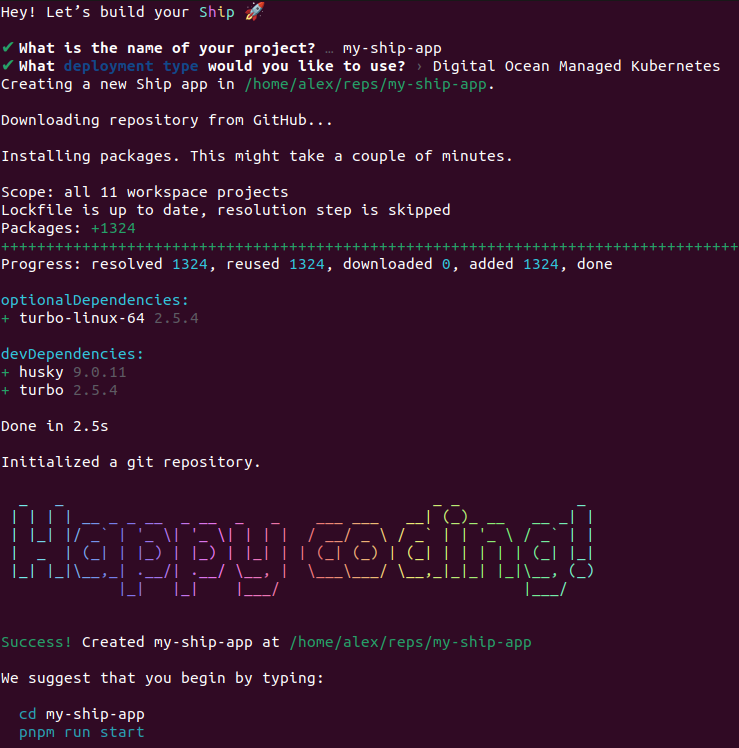 You will have the next project structure.
```shell theme={null}
/my-app
/deploy
/apps
/web
/api
/.github
...
```
Create GitHub private repository and upload source code.
You will have the next project structure.
```shell theme={null}
/my-app
/deploy
/apps
/web
/api
/.github
...
```
Create GitHub private repository and upload source code.
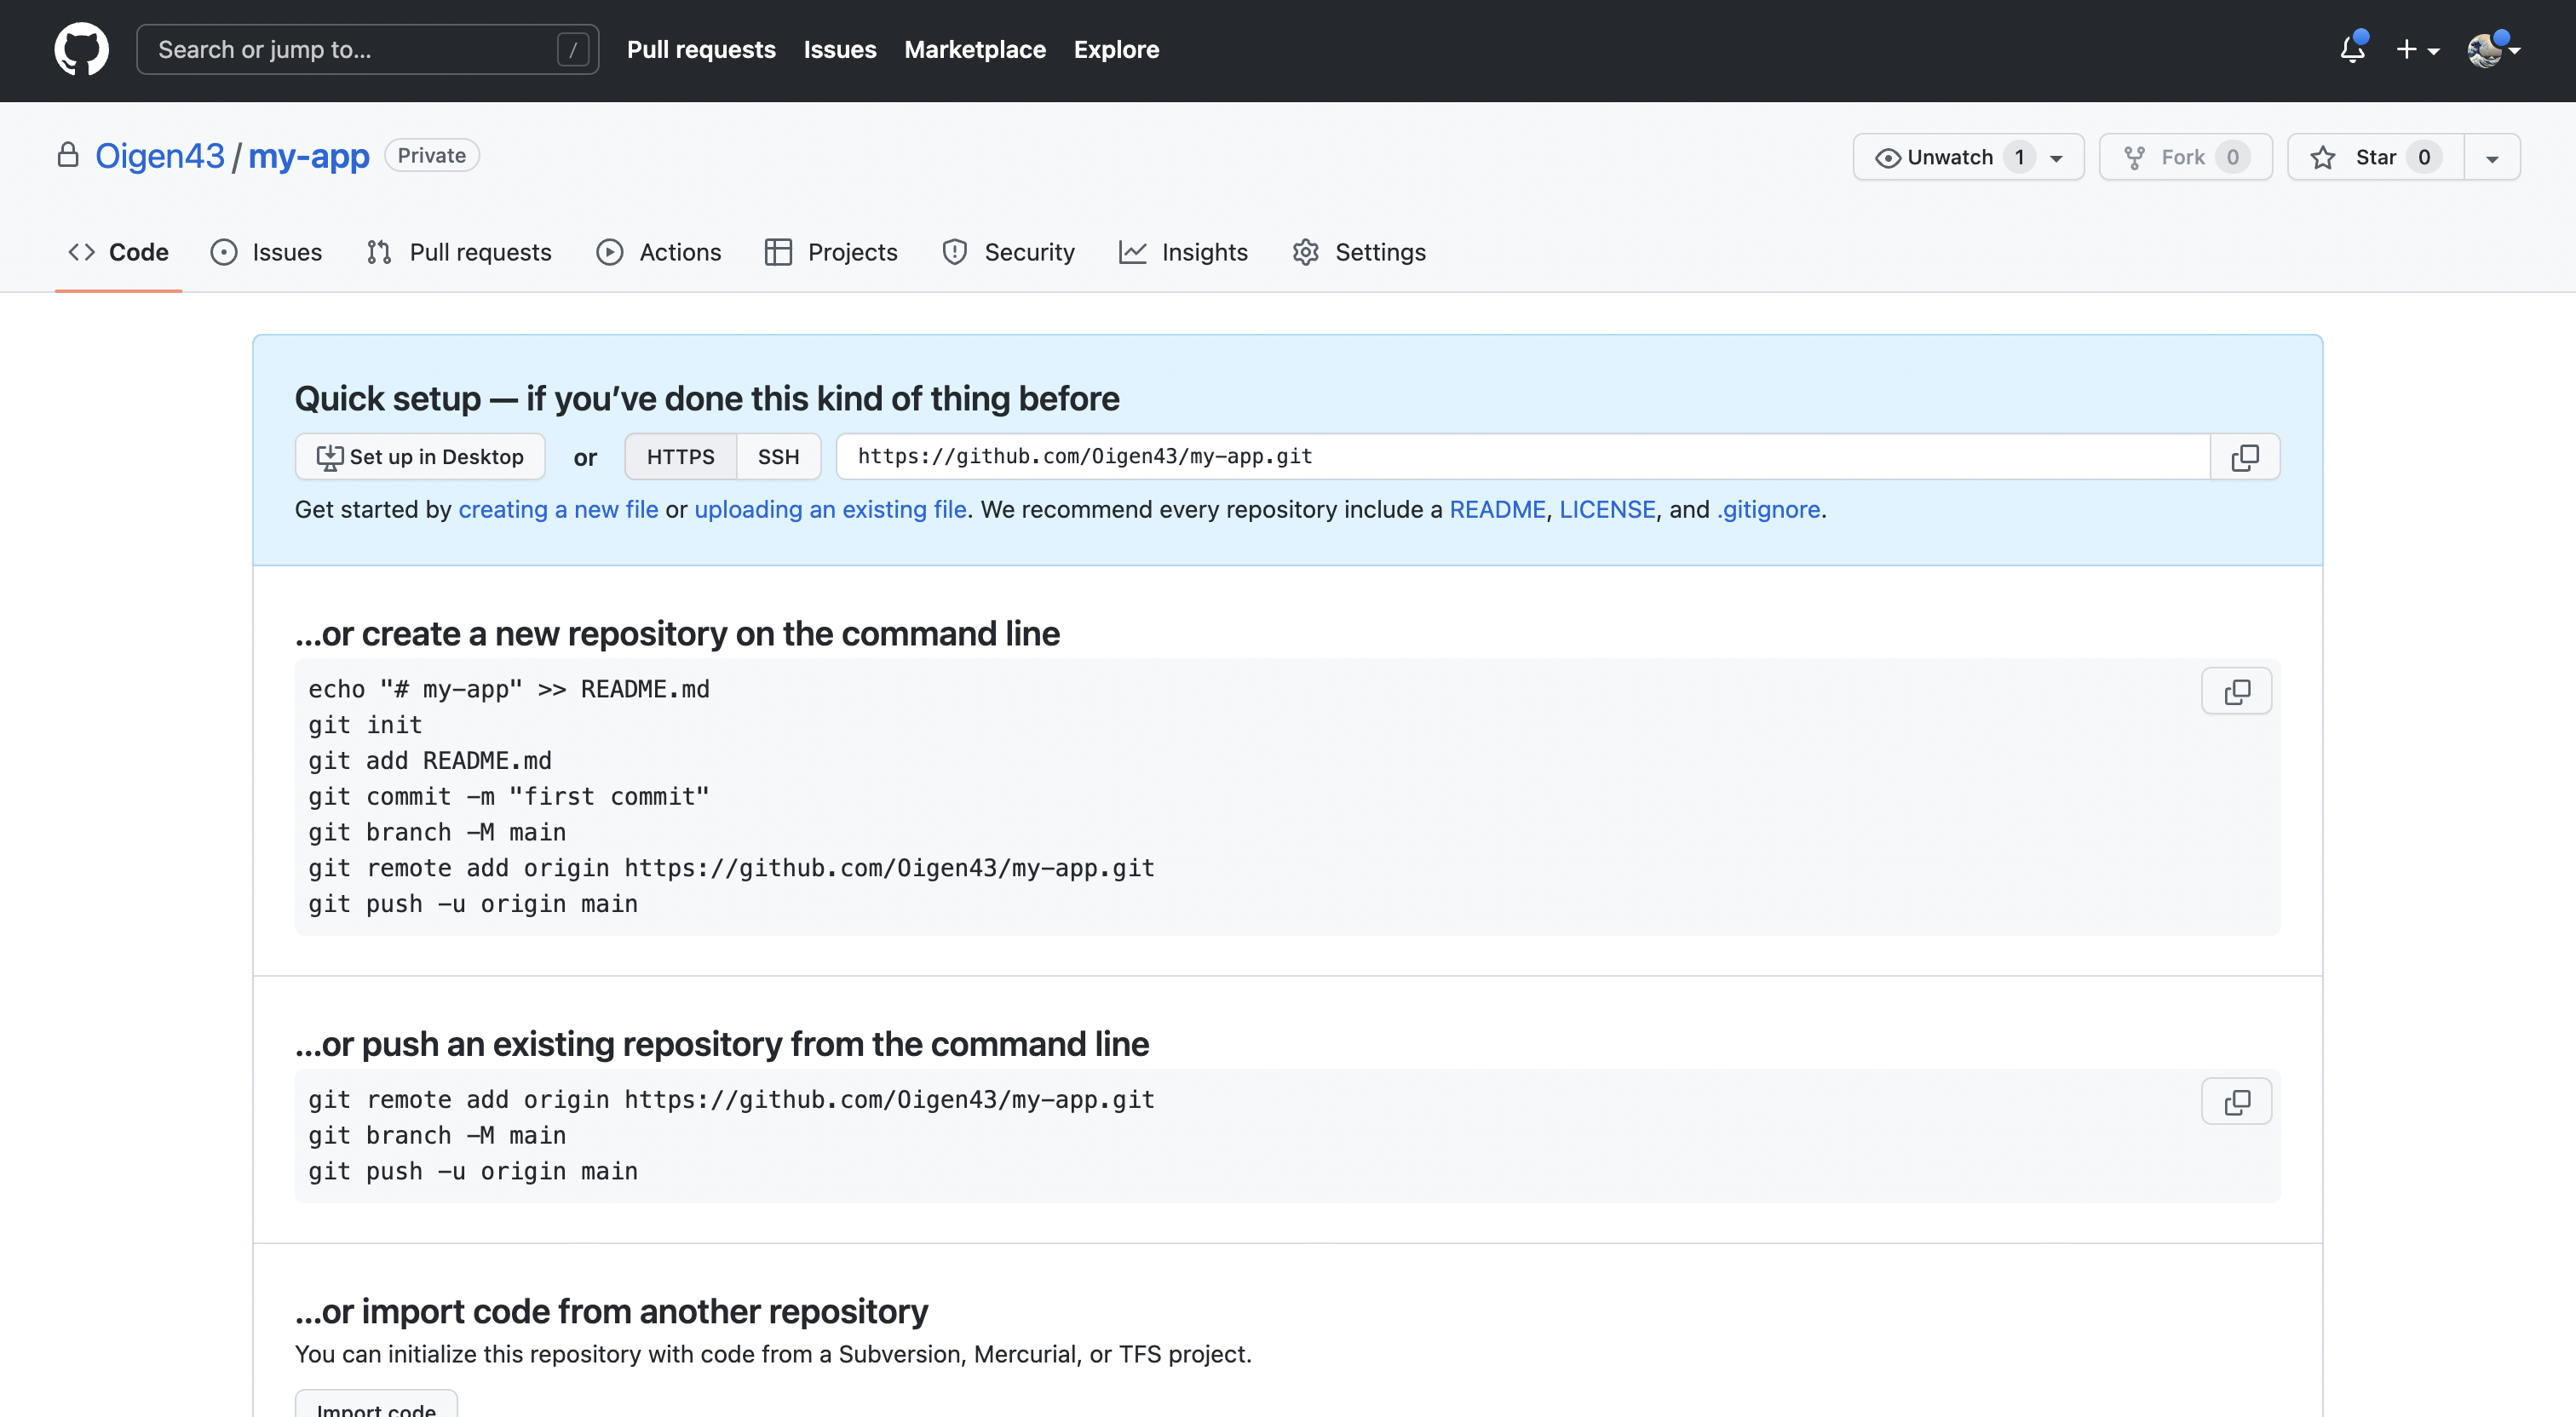 ```shell theme={null}
cd my-app
git remote add origin https://github.com/Oigen43/my-app.git
git branch -M main
git push -u origin main
```
## MongoDB Atlas
Navigate to [MongoDB Atlas](https://cloud.mongodb.com/), sign in to your account and create a new database.
### Database creation
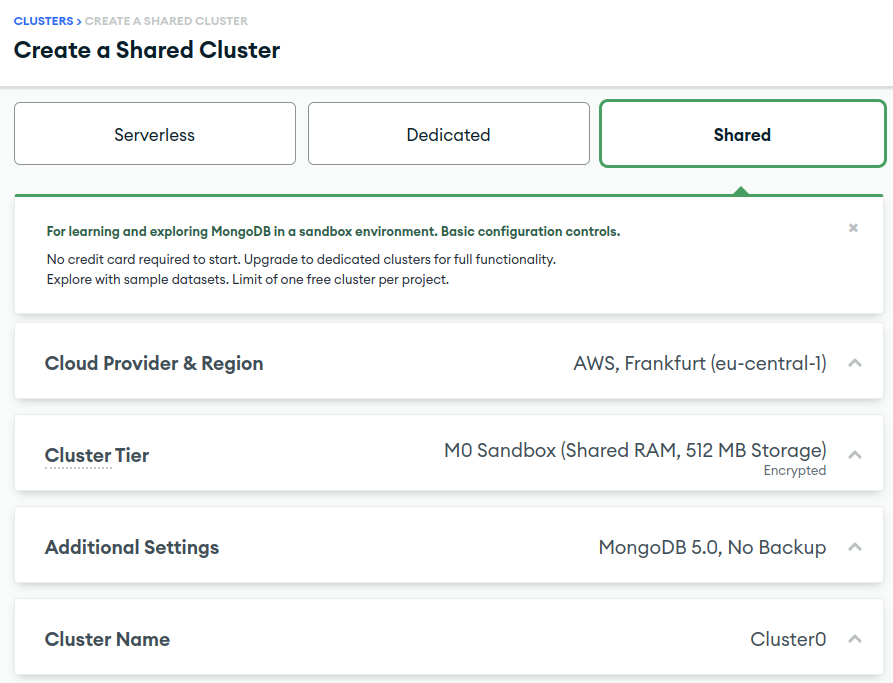
1. Select the appropriate type. Dedicated for a production environment, shared for staging/demo.
2. Select provider and region. We recommend selecting the same or closest region to the DO application.
3. Select cluster tier. Free M0 Sandbox should be enough for staging/demo environments. For production environment we recommended selecting the option that supports cloud backups, M10 or higher.
4. Enter cluster name
```shell theme={null}
cd my-app
git remote add origin https://github.com/Oigen43/my-app.git
git branch -M main
git push -u origin main
```
## MongoDB Atlas
Navigate to [MongoDB Atlas](https://cloud.mongodb.com/), sign in to your account and create a new database.
### Database creation
1. Select the appropriate type. Dedicated for a production environment, shared for staging/demo.
2. Select provider and region. We recommend selecting the same or closest region to the DO application.
3. Select cluster tier. Free M0 Sandbox should be enough for staging/demo environments. For production environment we recommended selecting the option that supports cloud backups, M10 or higher.
4. Enter cluster name
 ### Security and connection
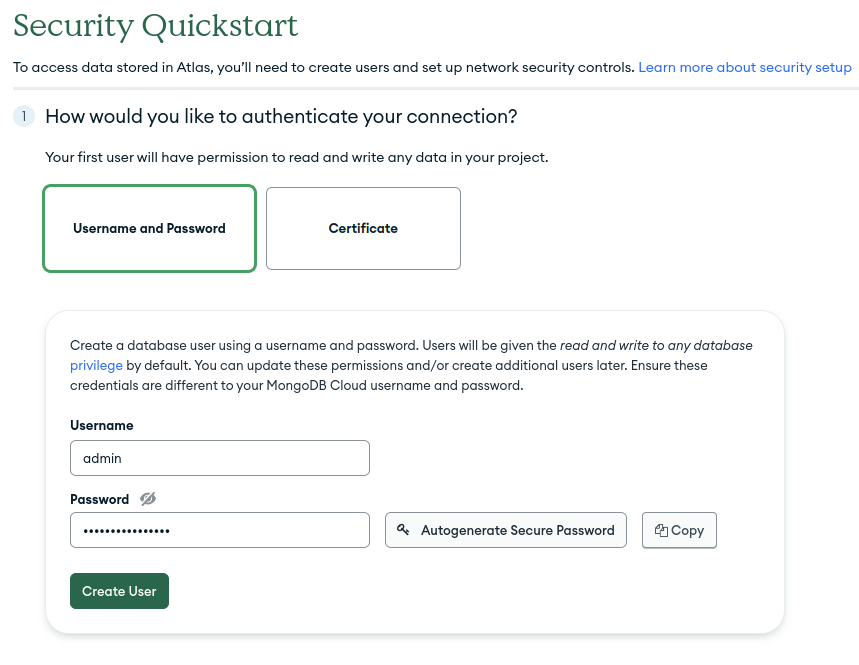
After cluster creation, you'll need to set up security. Select the authentication type (username and password) and create a user.
### Security and connection
After cluster creation, you'll need to set up security. Select the authentication type (username and password) and create a user.
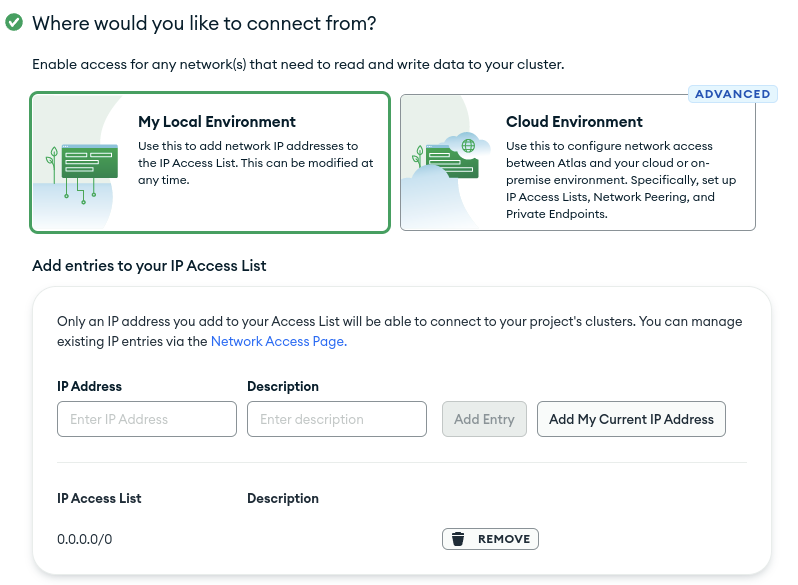
 Add IP addresses list, which should have access to your cluster. Add 0.0.0.0/0 IP address to allow anyone with credentials to connect.
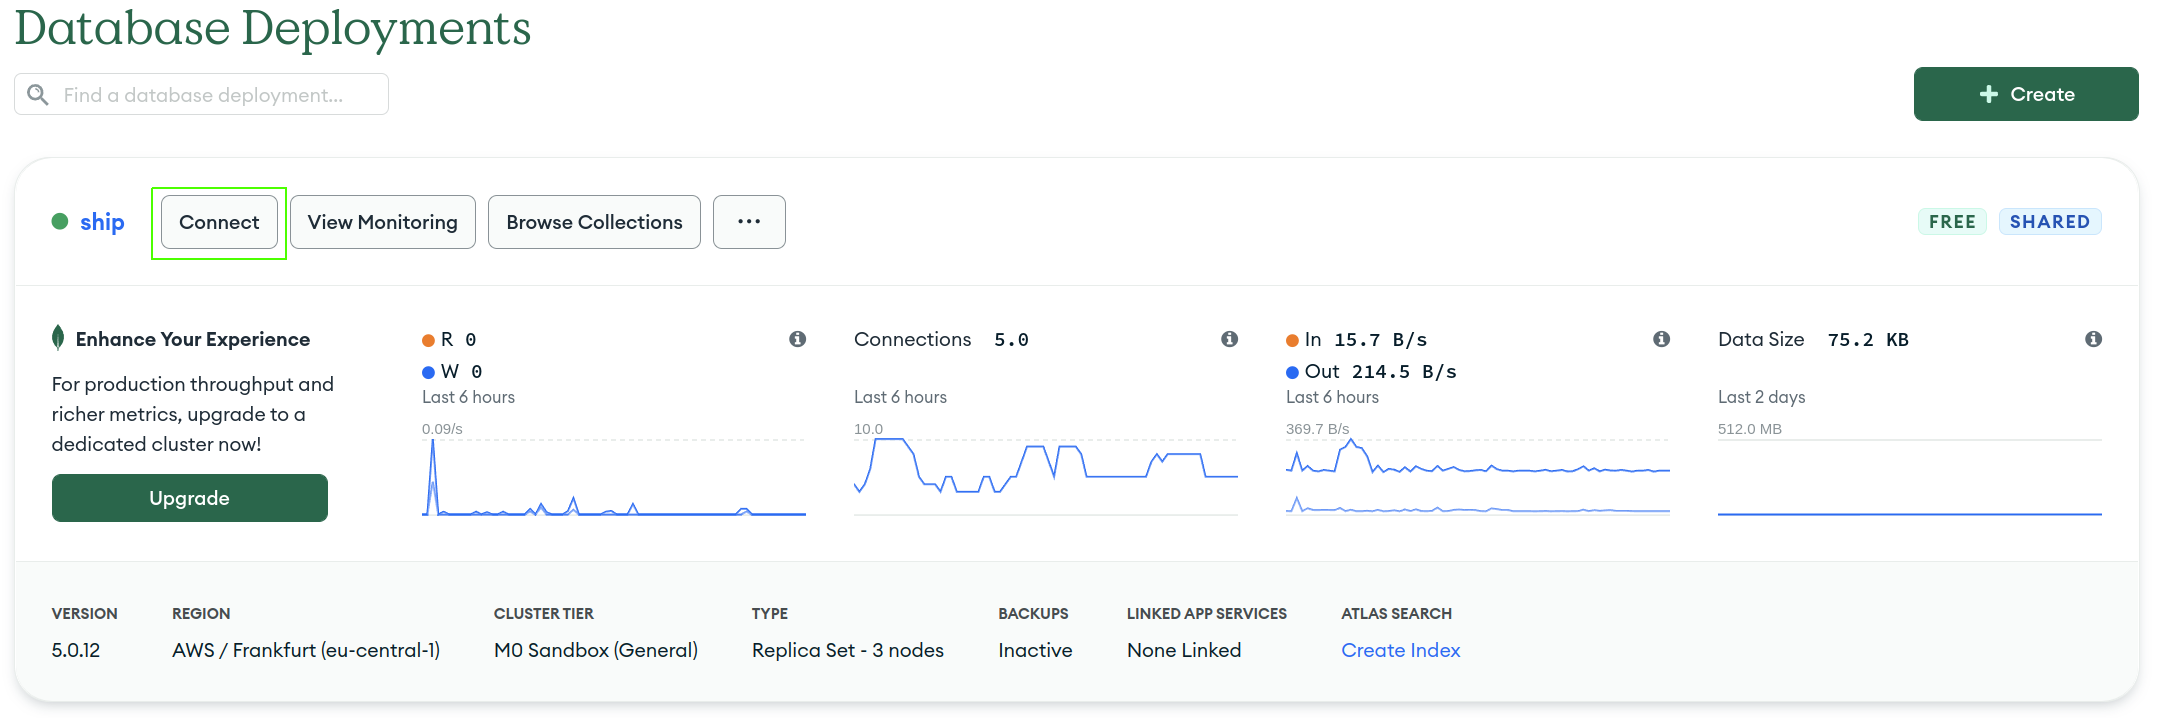
 After database creation, go to the dashboard page and get the URI connection string by pressing the `connect` button.
 Select `Connect your application` option. Choose driver and mongo version, and copy connection string. Don't forget to replace `` with your credentials.
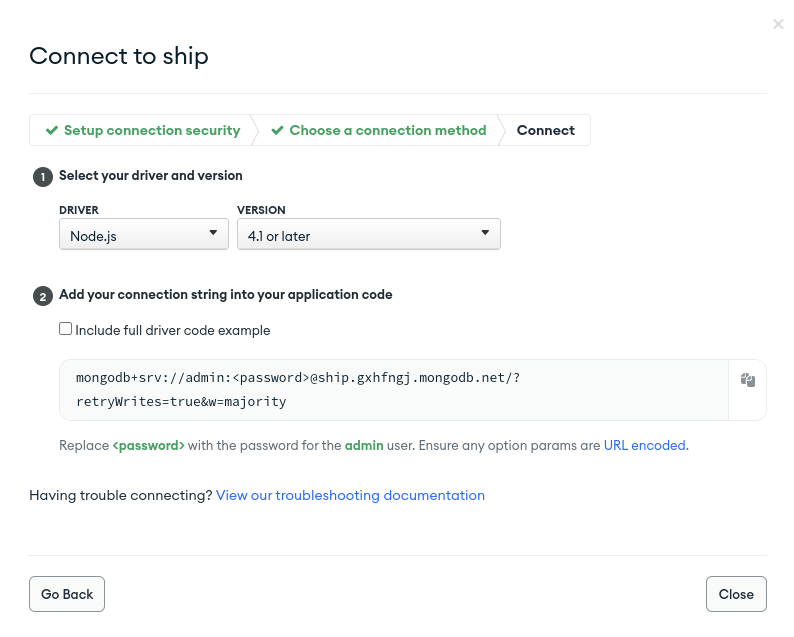 Save this value. It will be needed later when creating the app in Digital Ocean.
Before moving to production, it's crucial to set up [MongoDB backup methods](https://www.mongodb.com/docs/manual/core/backups).
This ensures that you can reliably restore your data in the event of unforeseen circumstances.
## Redis Cloud
Navigate to [Redis Cloud](https://redis.com/try-free/) and create an account. Select cloud provider and region, then press `Let's start free` to finish database creation.
Save this value. It will be needed later when creating the app in Digital Ocean.
Before moving to production, it's crucial to set up [MongoDB backup methods](https://www.mongodb.com/docs/manual/core/backups).
This ensures that you can reliably restore your data in the event of unforeseen circumstances.
## Redis Cloud
Navigate to [Redis Cloud](https://redis.com/try-free/) and create an account. Select cloud provider and region, then press `Let's start free` to finish database creation.
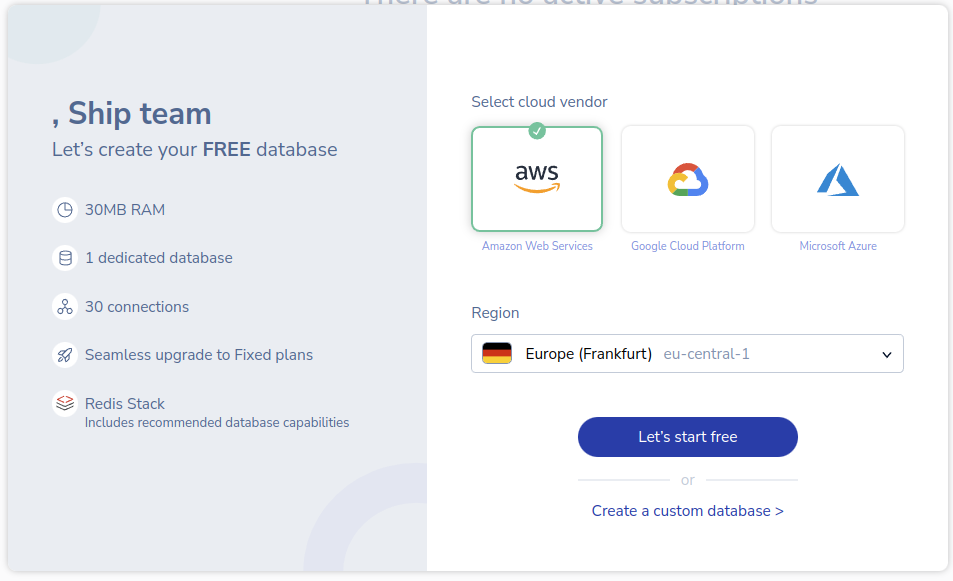 Open database settings and get the database public endpoint and password.
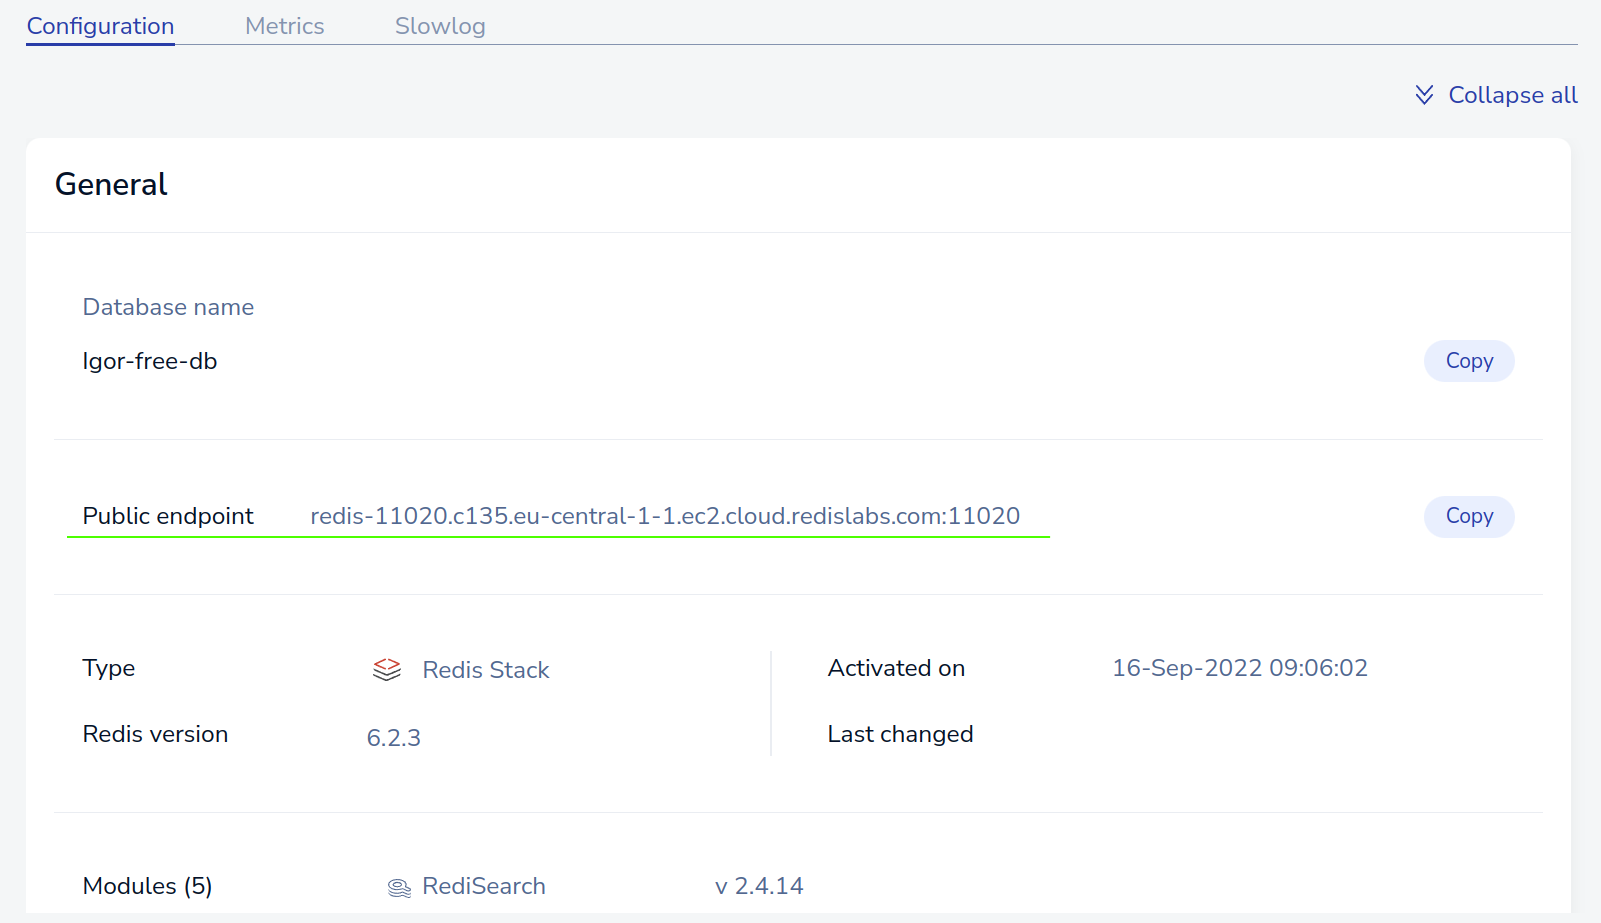
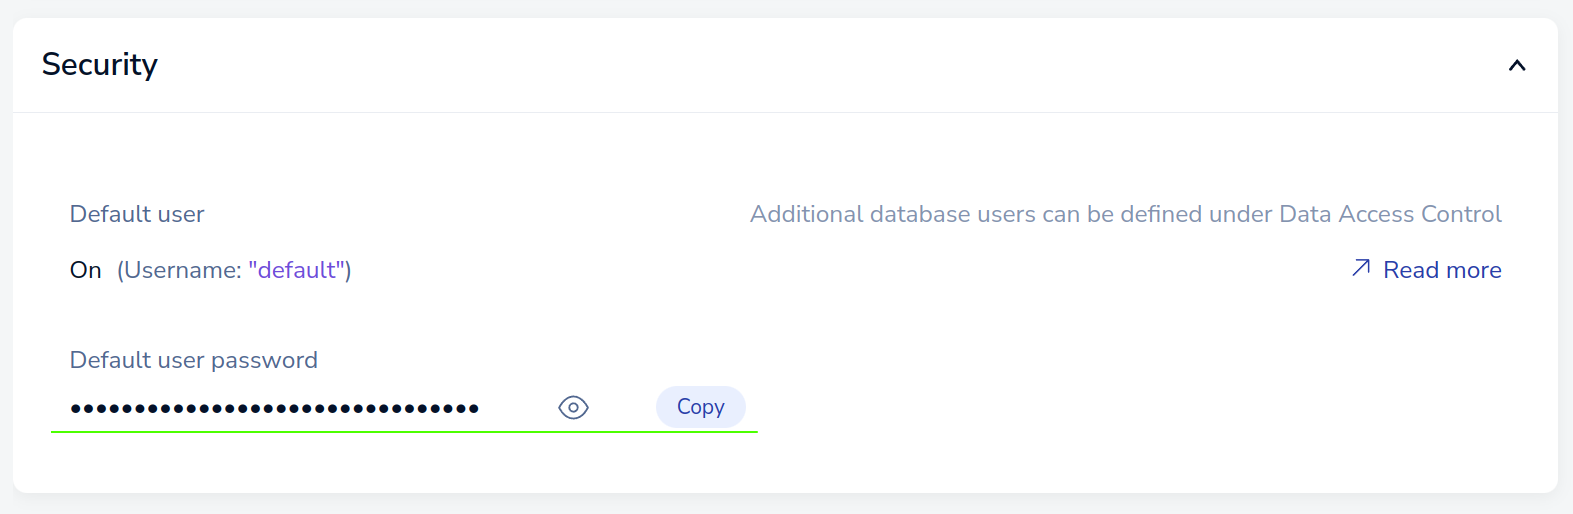 Form Redis connection string using public endpoint and password `redis://:`. Save this value. It will be needed later when creating the app in Digital Ocean.
## Environment variables
The `APP_ENV` environment variable is typically set based on the environment in which the application is running.
Its value corresponds to the specific environment, such as "development", "staging" or "production".
This variable helps the application identify its current environment and load the corresponding configuration.
For the web application, by setting the environment variable `APP_ENV`,
the application can determine the environment in which it is running and download the appropriate configuration file:
| APP\_ENV | File |
| ----------- | ---------------- |
| development | .env.development |
| staging | .env.staging |
| production | .env.production |
These files should contain specific configuration variables required for each environment.
In contrast, the API utilizes a single `.env` file that houses its environment-specific configuration.
This file typically contains variables like API keys, secrets, or other sensitive information.
To ensure security, it's crucial to add the `.env` file to the `.gitignore` file,
preventing it from being tracked and committed to the repository.
So just specify the environment variables that will contain the values of your secrets.
For example, if you have a secret named `API_KEY`,
create an environment variable named `API_KEY` and set the value of the corresponding secret for it.
## Digital Ocean via Pulumi
[Pulumi](https://www.pulumi.com/) is an open-source [Infrastructure as Code (IaC)](https://www.pulumi.com/what-is/what-is-infrastructure-as-code/) platform that allows developers to define and provision cloud infrastructure using familiar programming languages.
Form Redis connection string using public endpoint and password `redis://:`. Save this value. It will be needed later when creating the app in Digital Ocean.
## Environment variables
The `APP_ENV` environment variable is typically set based on the environment in which the application is running.
Its value corresponds to the specific environment, such as "development", "staging" or "production".
This variable helps the application identify its current environment and load the corresponding configuration.
For the web application, by setting the environment variable `APP_ENV`,
the application can determine the environment in which it is running and download the appropriate configuration file:
| APP\_ENV | File |
| ----------- | ---------------- |
| development | .env.development |
| staging | .env.staging |
| production | .env.production |
These files should contain specific configuration variables required for each environment.
In contrast, the API utilizes a single `.env` file that houses its environment-specific configuration.
This file typically contains variables like API keys, secrets, or other sensitive information.
To ensure security, it's crucial to add the `.env` file to the `.gitignore` file,
preventing it from being tracked and committed to the repository.
So just specify the environment variables that will contain the values of your secrets.
For example, if you have a secret named `API_KEY`,
create an environment variable named `API_KEY` and set the value of the corresponding secret for it.
## Digital Ocean via Pulumi
[Pulumi](https://www.pulumi.com/) is an open-source [Infrastructure as Code (IaC)](https://www.pulumi.com/what-is/what-is-infrastructure-as-code/) platform that allows developers to define and provision cloud infrastructure using familiar programming languages.
Instead of using domain-specific languages or YAML templates, Pulumi leverages existing languages like TypeScript, Python, Go, and C#.
Go to the `/deploy` directory at the root of your project and proceed to the next steps:
Ensure you have [Pulumi CLI](https://www.pulumi.com/docs/get-started/install/) installed.
After installing, verify everything is in working order by running the pulumi CLI:
```shell theme={null}
pulumi version
```
[Login in pulumi](https://www.pulumi.com/docs/cli/commands/pulumi_login/) for managing your stacks:
```shell theme={null}
pulumi login --local
```
Create your [Personal Access Token](https://docs.digitalocean.com/reference/api/create-personal-access-token/) and [Access Keys](https://docs.digitalocean.com/products/spaces/how-to/manage-access/#access-keys) for DigitalOcean
Add DigitalOcean Personal Access Token and Access Keys to your configuration file: `.zshrc` or `.bashrc`
First you’ll need to enter the `.zshrc` or `.bashrc` file in editing mode:
```shell .zshrc theme={null}
vi ~/.zshrc
```
```shell .bashrc theme={null}
vi ~/.bashrc
```
Insert the following variables at the end of the configuration file:
```shell theme={null}
# DigitalOcean start
export DIGITALOCEAN_TOKEN=dop_v1_...
export SPACES_ACCESS_KEY_ID=DO...
export SPACES_SECRET_ACCESS_KEY=...
# DigitalOcean end
```
To reflect the changes in the bash, either exit and launch the terminal again.
Or use the command:
```shell .zshrc theme={null}
source ~/.zshrc
```
```shell .bashrc theme={null}
source ~/.bashrc
```
Grant DigitalOcean access to your GitHub repository using [this link](https://cloud.digitalocean.com/apps/github/install).
Initialize your stack using the command:
```shell theme={null}
pulumi stack init organization/{project-name}/{environment}
```
Substitute `{project-name}` with the actual name of your project and make sure to update it in `Pulumi.yaml` file.
Replace `{environment}` with the desired environment: `staging` or `production` values are allowed.
Duplicate the `.env.example` file to create a new environment-specific file using the command:
```shell staging theme={null}
cp .env.example .env.staging
```
```shell production theme={null}
cp .env.example .env.production
```
Populate the new file with the necessary environment variables.
Ensure that you set the necessary variables in your web application.
Edit the .env files accordingly and remember to push these changes to your remote repository.
Install the required dependencies using the command:
```shell theme={null}
npm i
```
To create the resources in the initialized stack, execute the command:
```shell theme={null}
pulumi up
```
Finally, you will observe the following output:
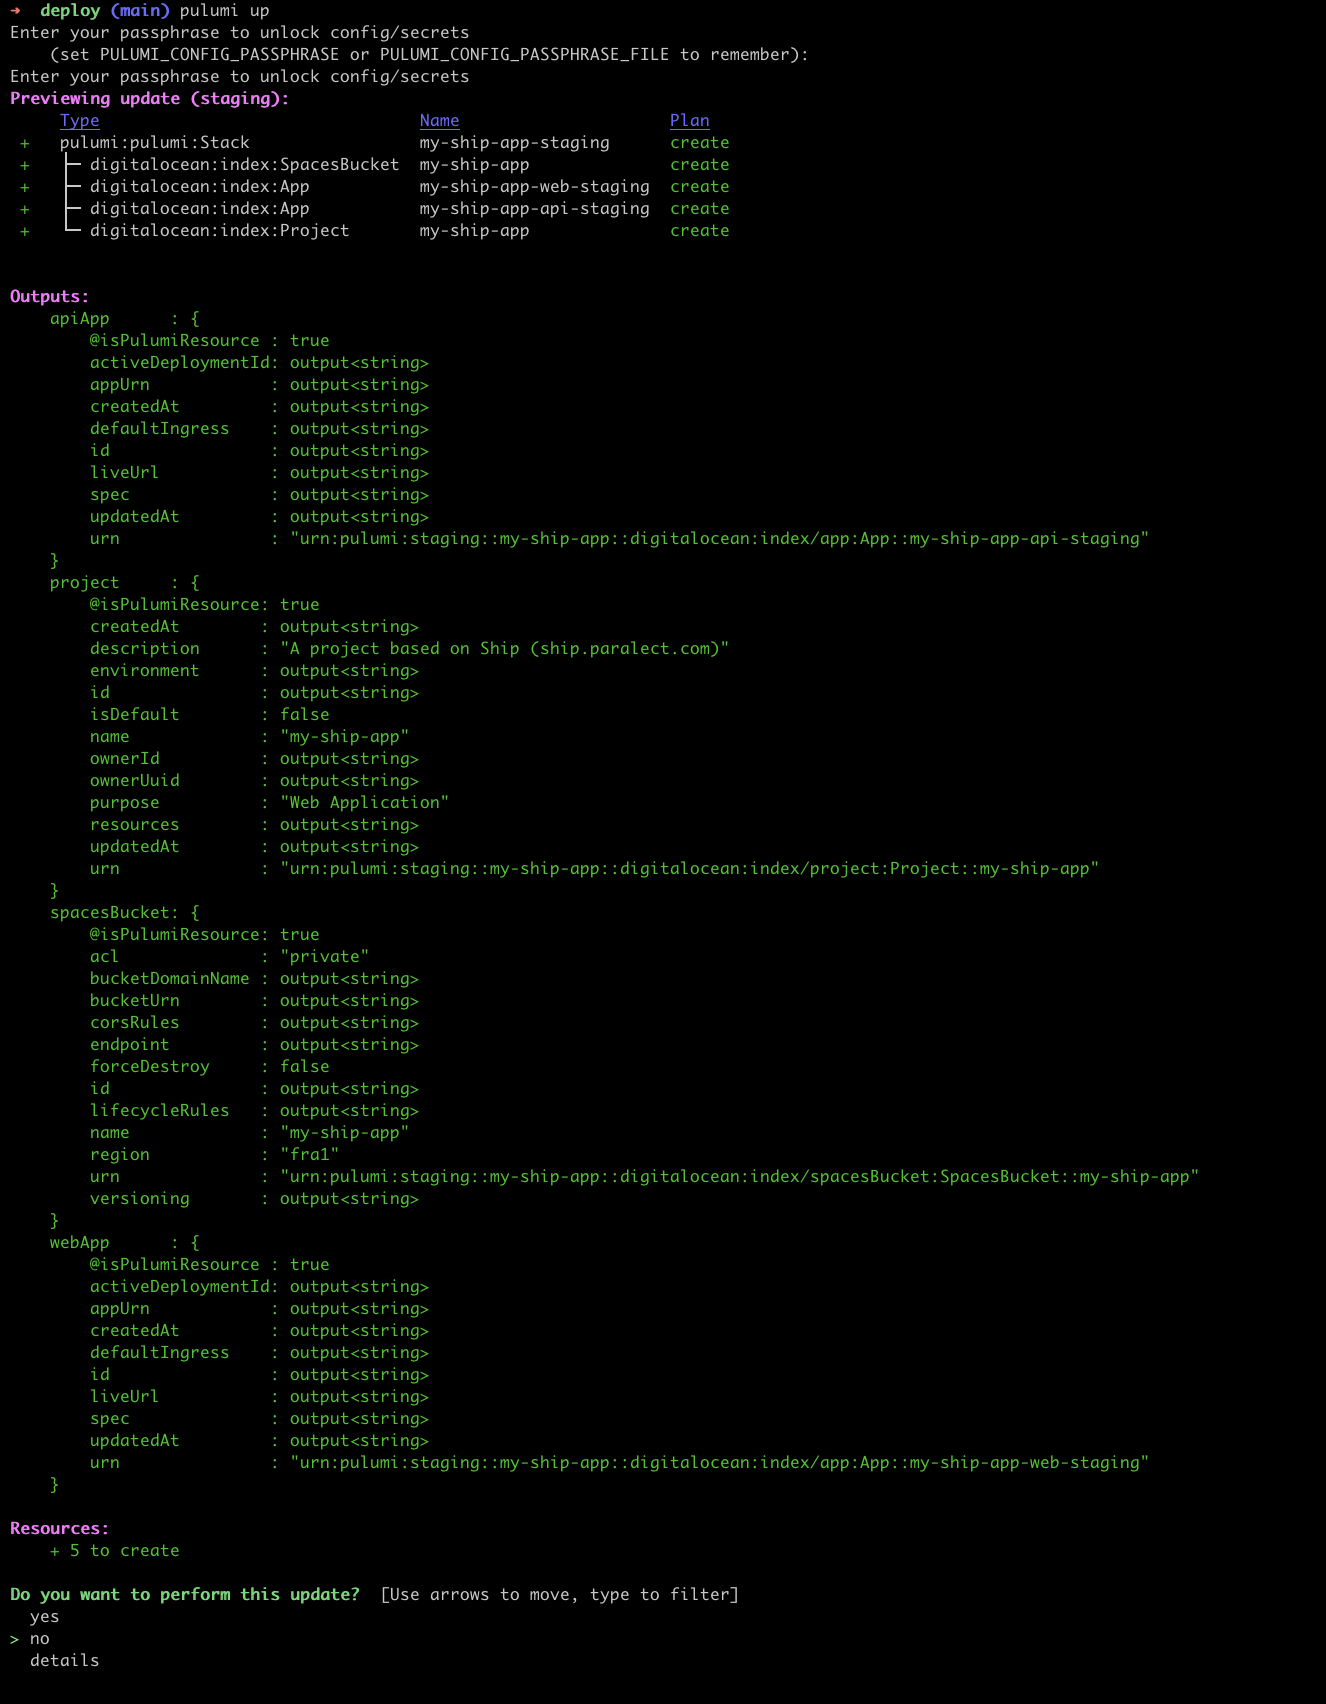 Review the planned resource creation and proceed with the resource update.
This process may take a few minutes to complete.
## Cloudflare
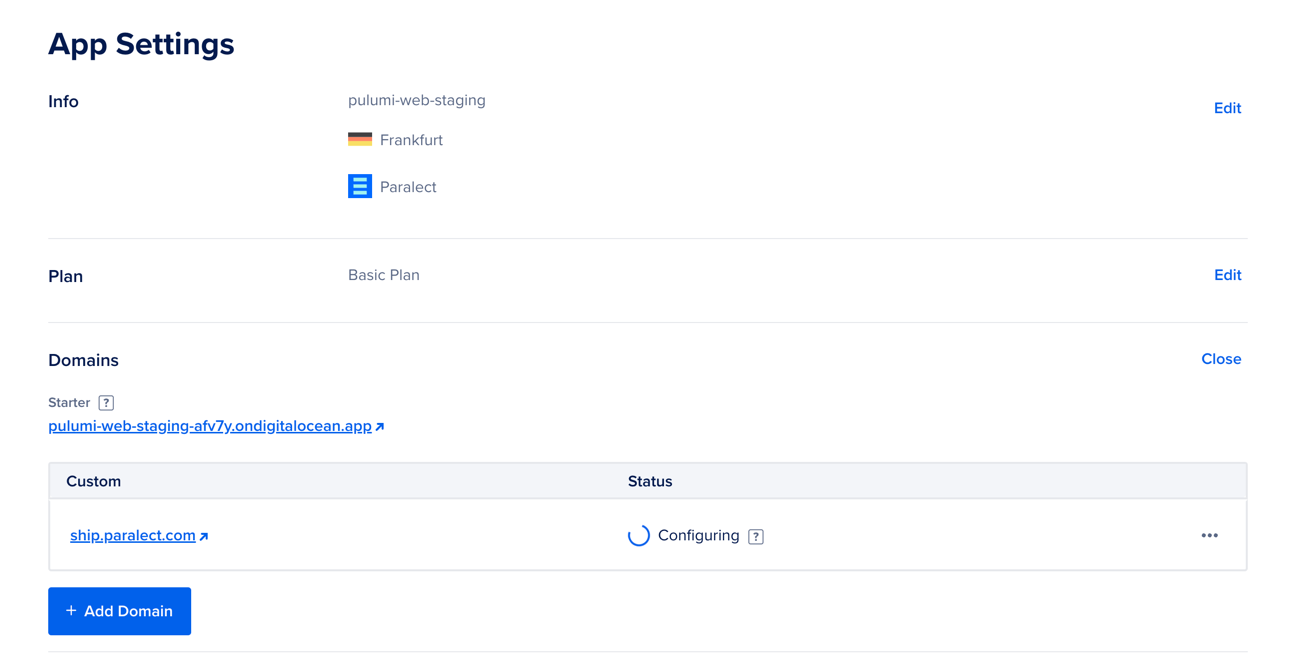
Navigate to your Digital Ocean application and open `Settings` tab.
Navigate to `Domains` row to open domain settings and copy starter domain of application.
Review the planned resource creation and proceed with the resource update.
This process may take a few minutes to complete.
## Cloudflare
Navigate to your Digital Ocean application and open `Settings` tab.
Navigate to `Domains` row to open domain settings and copy starter domain of application.
 Navigate to [CloudFlare](https://dash.cloudflare.com/) and sign into account.
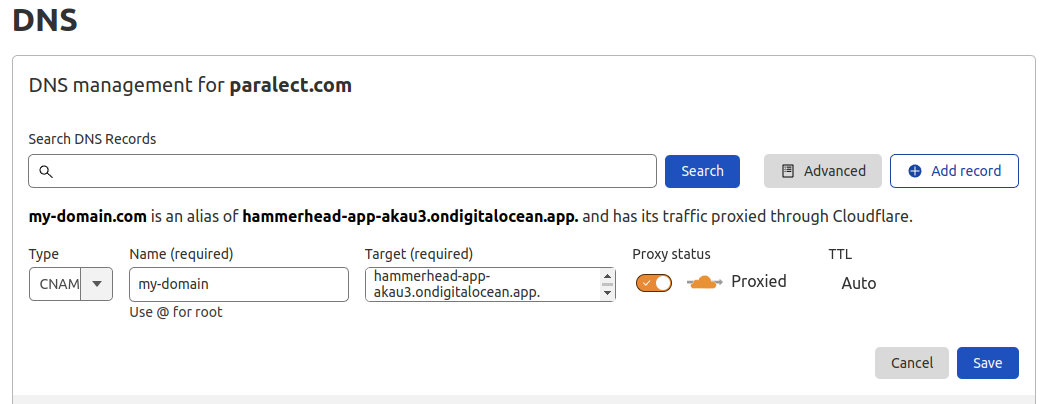
1. Go to `DNS` tab and create a new record.
2. Click `Add record`. Select type `CNAME`, enter domain name (must be the same you entered in digital ocean settings) and paste alias into `target` field.
Make sure `Proxy status` toggle enabled.
3. Save changes
Navigate to [CloudFlare](https://dash.cloudflare.com/) and sign into account.
1. Go to `DNS` tab and create a new record.
2. Click `Add record`. Select type `CNAME`, enter domain name (must be the same you entered in digital ocean settings) and paste alias into `target` field.
Make sure `Proxy status` toggle enabled.
3. Save changes
 Now go back to digital ocean and submit form. It usually takes about 5 minutes for digital ocean to confirm and start using your new domain.
Once domain is confirmed, application can be accessed by new address.
## GitHub Actions
You can find two GitHub actions in the `.github/workflows` folder, responsible for triggering deployment when you push changes in your repository. If you chose frontend or backend on the initialization step, you'll have one github workflow for the selected application type.
These actions require a [Digital Ocean Personal Access Token](https://docs.digitalocean.com/reference/api/create-personal-access-token/) and application ID.
Respectively these are `DO_ACCESS_TOKEN` and `DO_API_STAGING_APP_ID`/`DO_WEB_STAGING_APP_ID`/`DO_API_PRODUCTION_APP_ID`/`DO_WEB_PRODUCTION_APP_ID`.
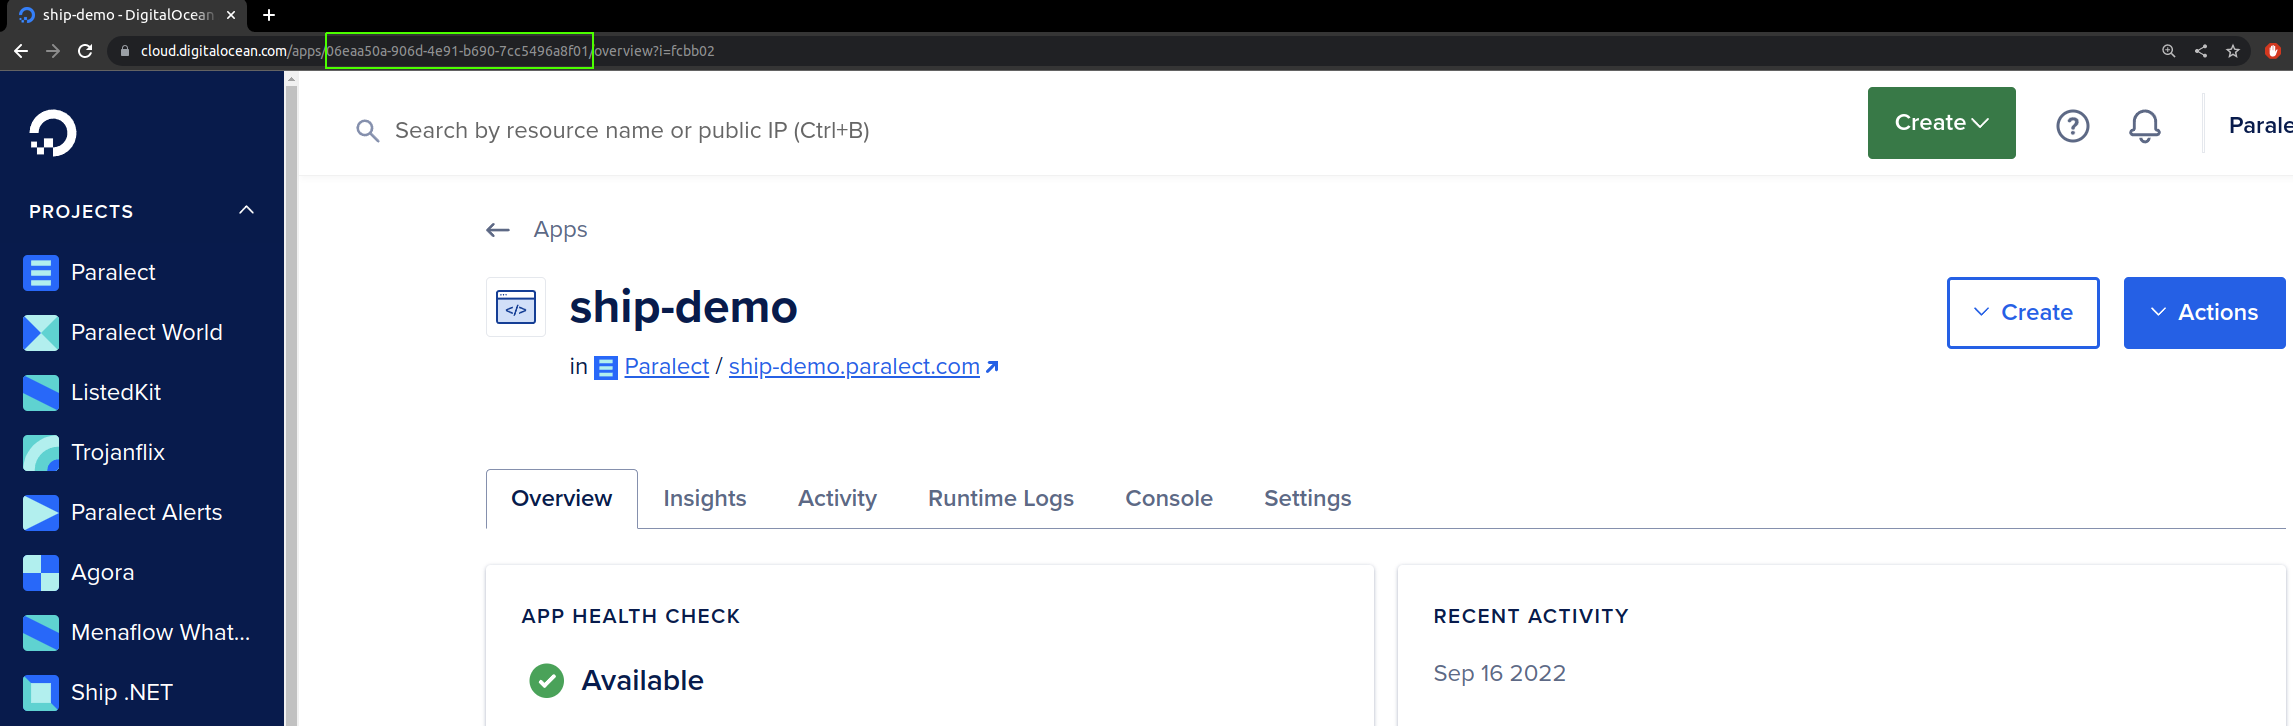
Next, navigate to the **Apps** tab in the left sidebar and open your Digital Ocean application. You can find the id of your application id in the browser address bar.
Now go back to digital ocean and submit form. It usually takes about 5 minutes for digital ocean to confirm and start using your new domain.
Once domain is confirmed, application can be accessed by new address.
## GitHub Actions
You can find two GitHub actions in the `.github/workflows` folder, responsible for triggering deployment when you push changes in your repository. If you chose frontend or backend on the initialization step, you'll have one github workflow for the selected application type.
These actions require a [Digital Ocean Personal Access Token](https://docs.digitalocean.com/reference/api/create-personal-access-token/) and application ID.
Respectively these are `DO_ACCESS_TOKEN` and `DO_API_STAGING_APP_ID`/`DO_WEB_STAGING_APP_ID`/`DO_API_PRODUCTION_APP_ID`/`DO_WEB_PRODUCTION_APP_ID`.
Next, navigate to the **Apps** tab in the left sidebar and open your Digital Ocean application. You can find the id of your application id in the browser address bar.
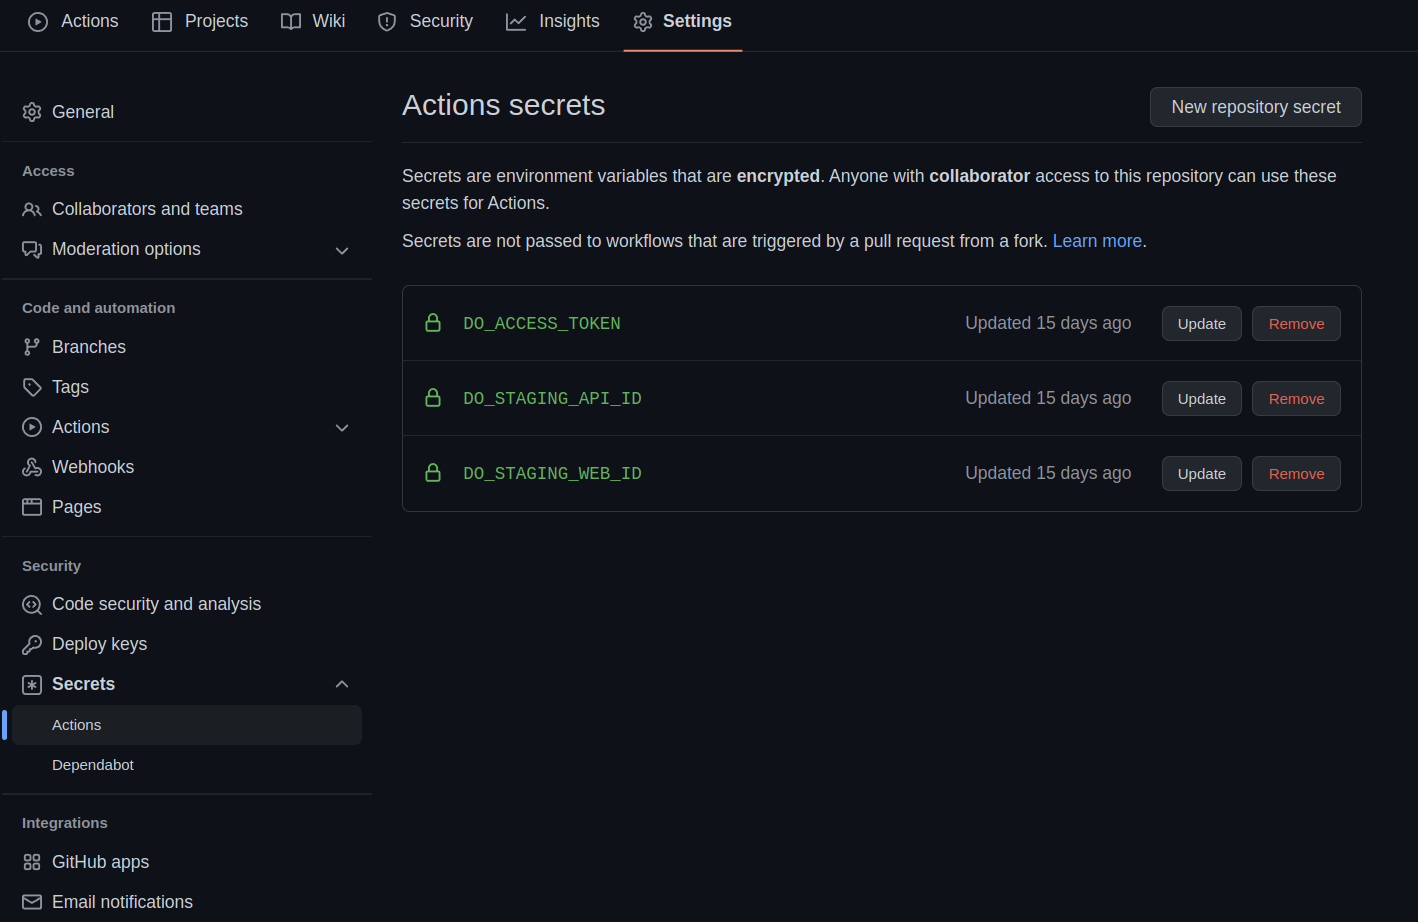
 Now you can add these keys to your GitHub repository's secrets.
Navigate to the GitHub repository page, and open the **Settings** tab and these values. You have to be repository **admin** or **owner** to open this tab.
Now you can add these keys to your GitHub repository's secrets.
Navigate to the GitHub repository page, and open the **Settings** tab and these values. You have to be repository **admin** or **owner** to open this tab.
 Done! Application deployed and can be accessed by provided domain.
 ## Logging (optional)
### Build-in
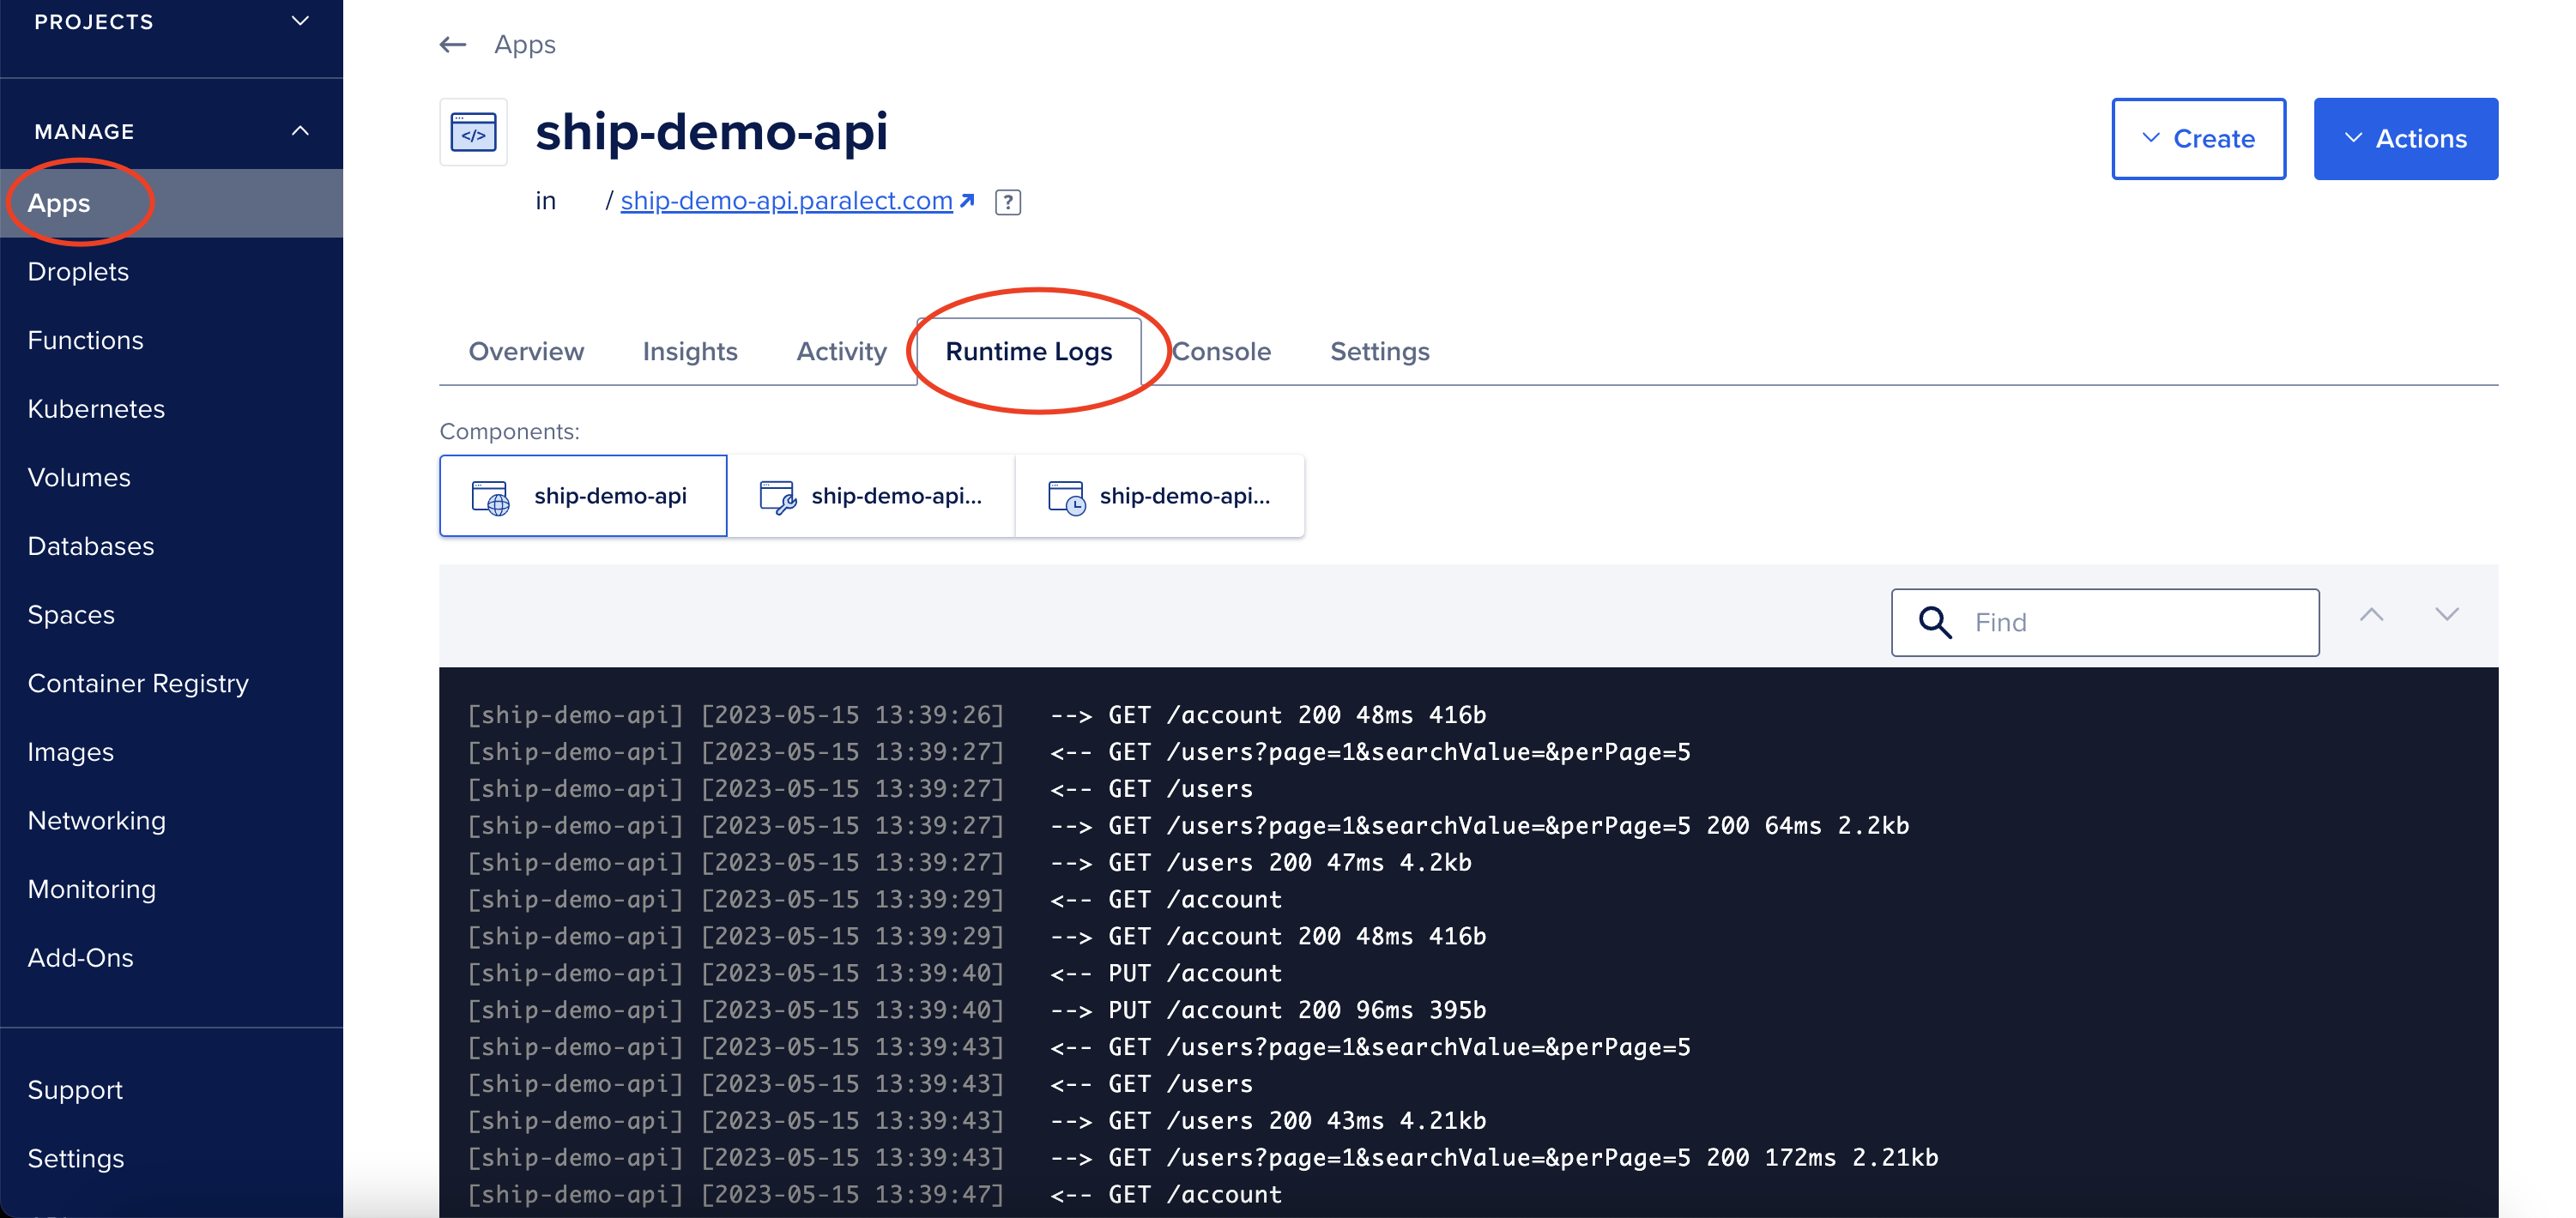
Digital Ocean has built-in logs in raw format. It will gather all data that your apps will produce.
In order to view them, follow these steps:
1. Log in to your Digital Ocean account.
2. Click on the Apps tab in the left-hand navigation menu.
3. Click on the name of the app you want to view the logs for.
4. Click on the Runtime Logs tab in the app dashboard.
5. You will see a list of logs for different components of your app. Click on the component you want to view the logs for.
6. You can filter the logs by time, severity, and component. Use the drop-down menus provided to select your filter criteria.
7. You can also search for specific keywords in the logs by using the search bar at the top of the page.
## Logging (optional)
### Build-in
Digital Ocean has built-in logs in raw format. It will gather all data that your apps will produce.
In order to view them, follow these steps:
1. Log in to your Digital Ocean account.
2. Click on the Apps tab in the left-hand navigation menu.
3. Click on the name of the app you want to view the logs for.
4. Click on the Runtime Logs tab in the app dashboard.
5. You will see a list of logs for different components of your app. Click on the component you want to view the logs for.
6. You can filter the logs by time, severity, and component. Use the drop-down menus provided to select your filter criteria.
7. You can also search for specific keywords in the logs by using the search bar at the top of the page.
 ### Integrations
Currently, Digital Ocean Apps supports only 3 integrations: [PaperTrail](https://marketplace.digitalocean.com/add-ons/papertrail), [Logtail](https://marketplace.digitalocean.com/add-ons/logtail) and [Datadog](https://www.datadoghq.com/). You can find detailed instructions on how to set up these logs at this [link](https://docs.digitalocean.com/products/app-platform/how-to/forward-logs/).
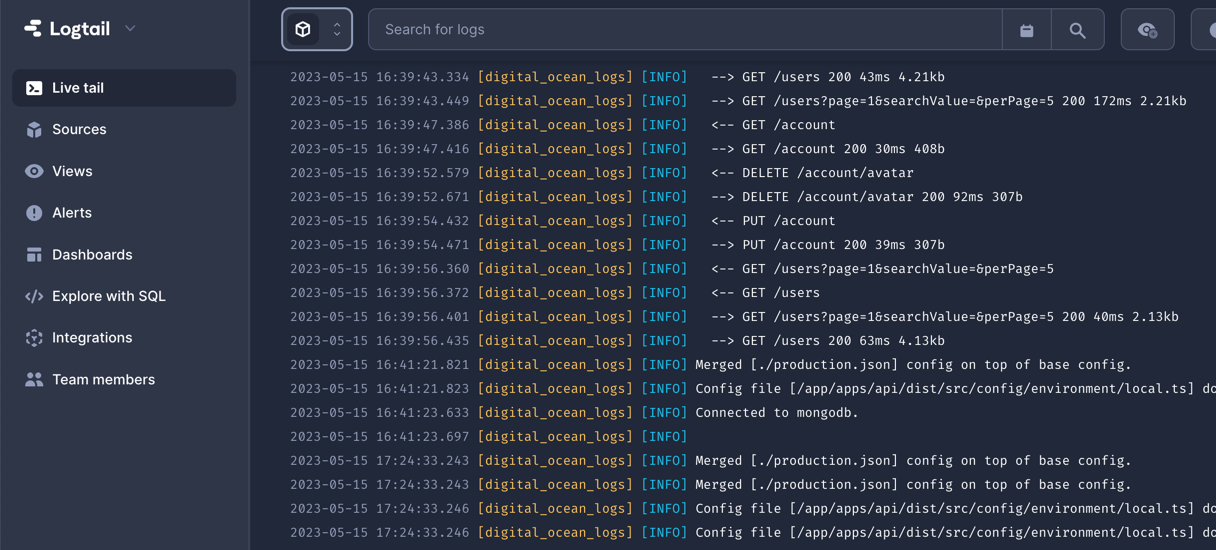
### Example Integration Logtail
To configure Logtail follow these steps:
1. Create account on Logtail
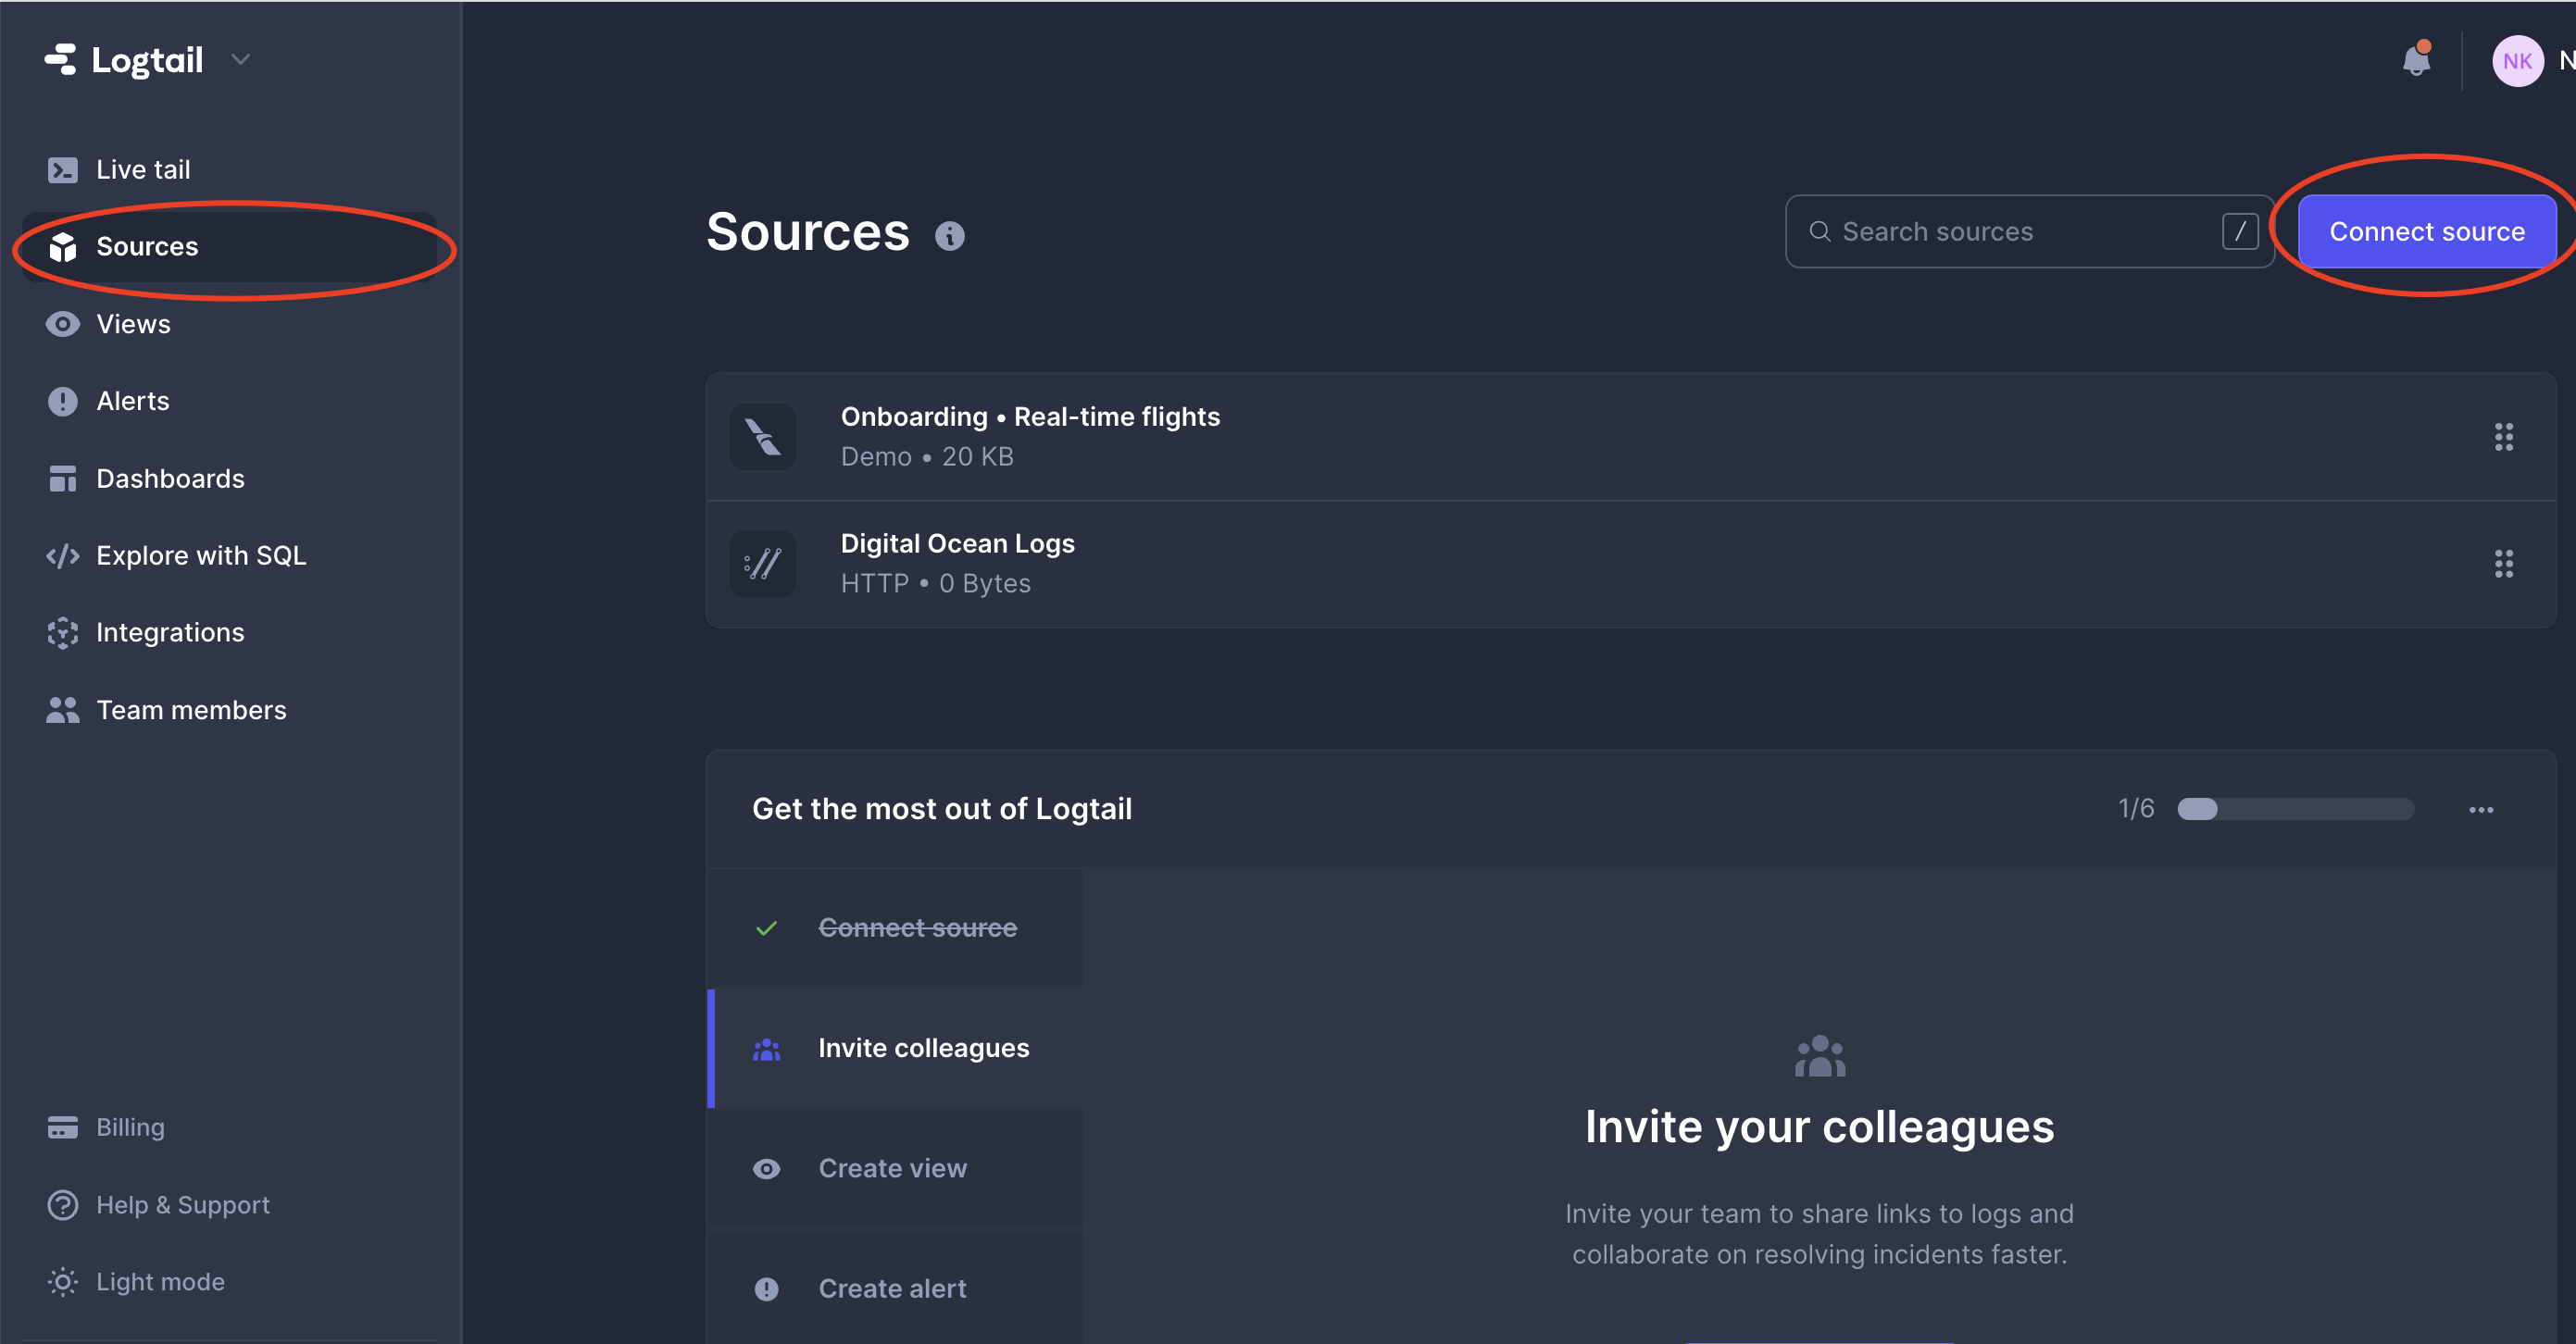
2. Open Sources on the left sidebar.
3. Create new source by clicking "Connect source" button
### Integrations
Currently, Digital Ocean Apps supports only 3 integrations: [PaperTrail](https://marketplace.digitalocean.com/add-ons/papertrail), [Logtail](https://marketplace.digitalocean.com/add-ons/logtail) and [Datadog](https://www.datadoghq.com/). You can find detailed instructions on how to set up these logs at this [link](https://docs.digitalocean.com/products/app-platform/how-to/forward-logs/).
### Example Integration Logtail
To configure Logtail follow these steps:
1. Create account on Logtail
2. Open Sources on the left sidebar.
3. Create new source by clicking "Connect source" button
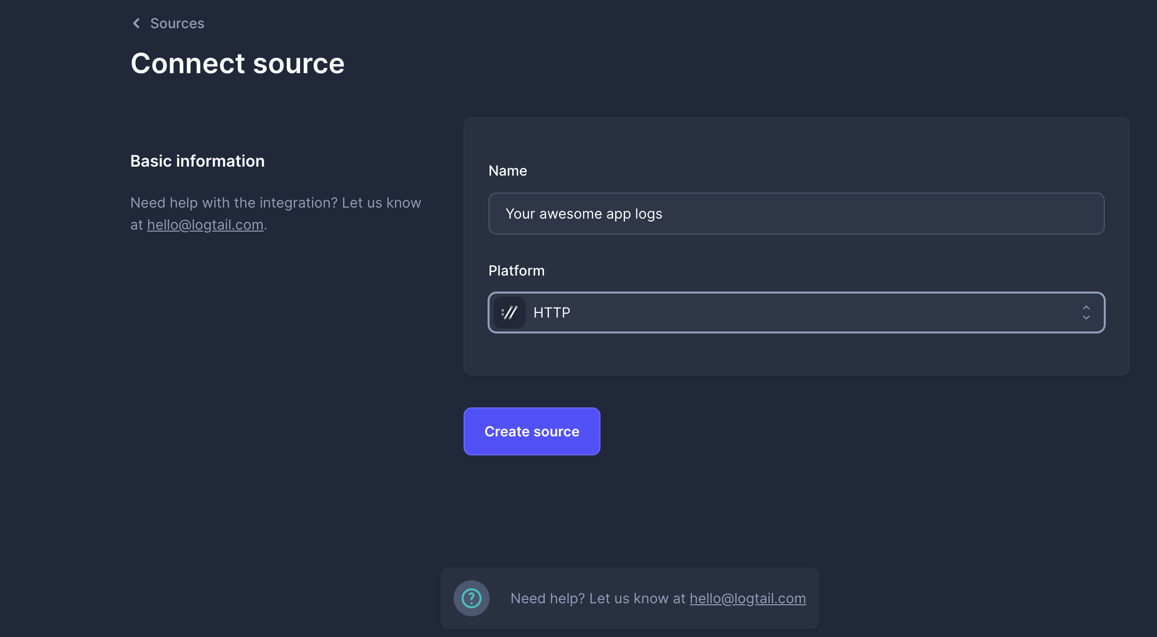
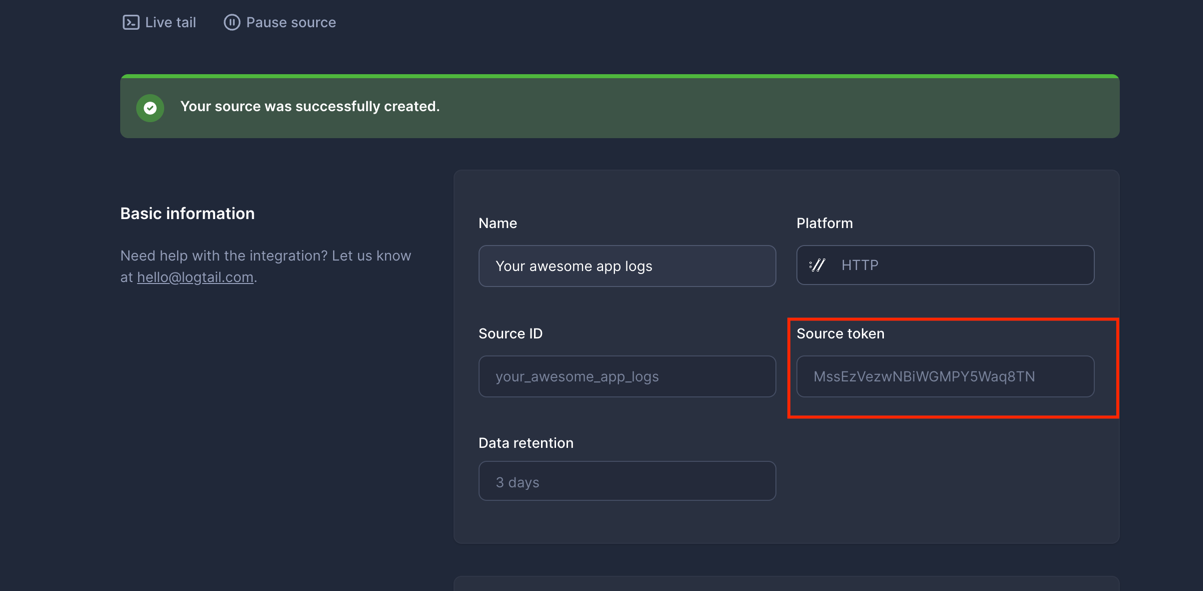
 4. Select HTTP source and specify name for this connection
 5. Copy source token
 6. Open Digital Ocean Apps
7. Select Settings tab for your application
6. Open Digital Ocean Apps
7. Select Settings tab for your application
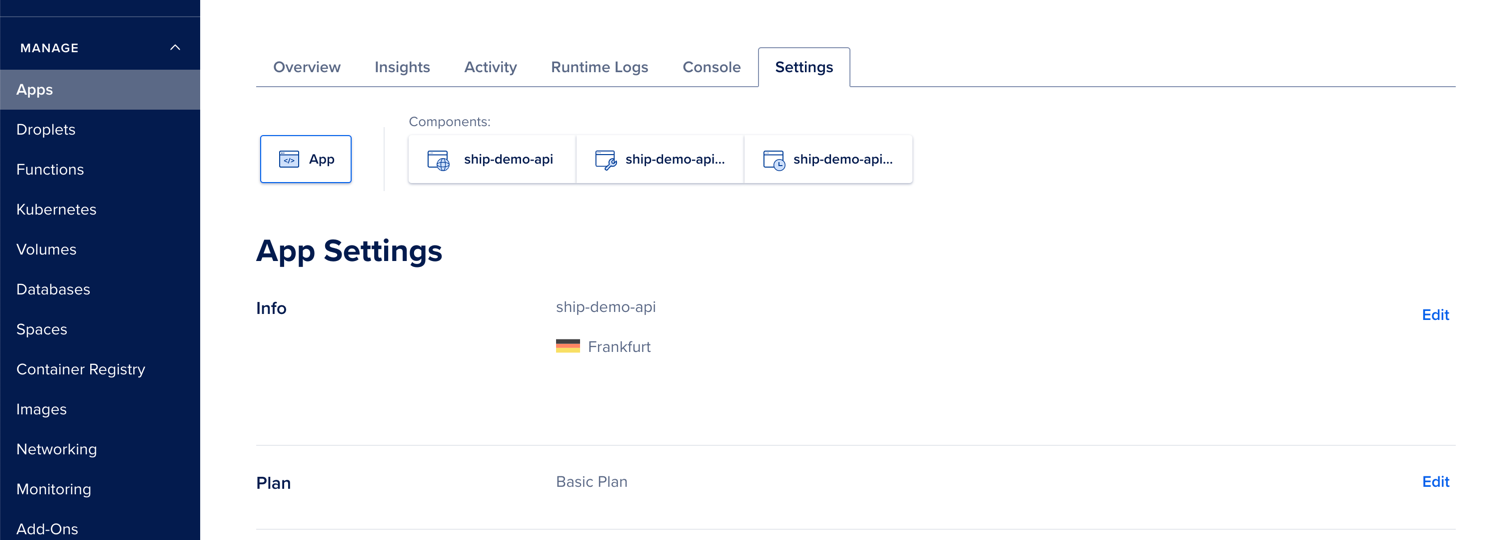 8. Select Log Forwarding and then press "Add Destination"
 9. Fill information with token that we retrieved from Logtail
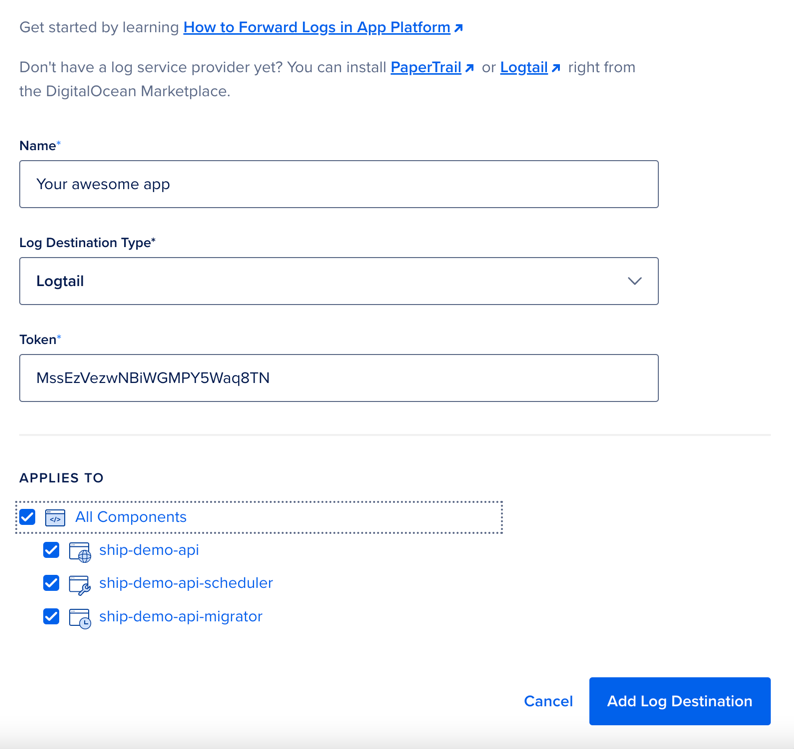 10. That's it! In couple minutes your app will send the latest logs to Logtail