> ## Documentation Index
> Fetch the complete documentation index at: https://ship-jskiller1404-add-ommiting-private-fields-feature.mintlify.site/llms.txt
> Use this file to discover all available pages before exploring further.
# Digital Ocean Apps
There is a simplified deployment type without Kubernetes. This type is **recommended** for most new applications because it allows you to set up infrastructure faster and doesn't require additional DevOps knowledge from the development team. You can switch to a more complex Kubernetes solution when your application will be at scale.
Explore our method of deploying Ship to DigitalOcean Apps using [Infrastructure as Code](https://www.pulumi.com/what-is/what-is-infrastructure-as-code/).
For a detailed guide, check out our [documentation on this approach](/deployment/digital-ocean-apps-iac).
It's a step-by-step Ship deployment guide. We will use the [Digital Ocean Apps](https://www.digitalocean.com/products/app-platform) and [GitHub Actions](https://github.com/features/actions) for automated deployment. [Mongo Atlas](https://www.mongodb.com/) and [Redis Cloud](https://redis.com/try-free/) for databases deployment, and [Cloudflare](https://www.cloudflare.com/) for DNS and SSL configuration.
You need to create [GitHub](https://github.com/), [Digital Ocean](https://www.digitalocean.com/), [CloudFlare](https://www.cloudflare.com/), [MongoDB Atlas](https://www.mongodb.com/cloud/atlas/register) and [Redis Cloud](https://redis.com/try-free/) accounts.
Also, you need [git](https://git-scm.com/) and [Node.js](https://nodejs.org/en/) if you already haven't.
[Migrator](/migrator) and [Scheduler](/scheduler) will run in a Docker container for API. Unlike [Kubernetes](https://github.com/docs/deployment/kubernetes/digital-ocean.md), where separate containers are used for them.
## Setup project
First, initialize your project. Type `npx create-ship-app init` in the terminal then choose desired build type and **Digital Ocean Apps** as a cloud service provider.
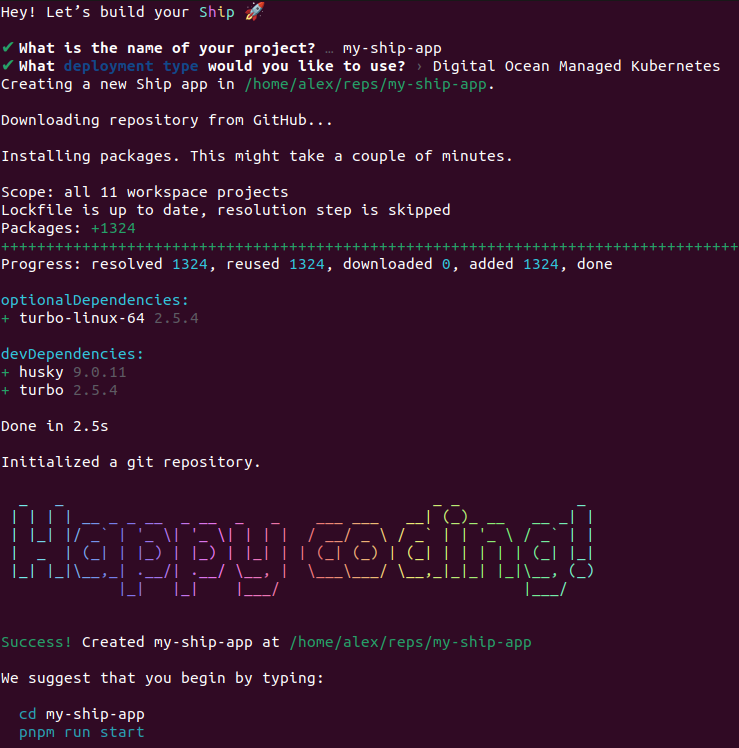 You will have next project structure.
```shell theme={null}
/my-app
/apps
/web
/api
/.github
...
```
Create GitHub private repository and upload source code.
You will have next project structure.
```shell theme={null}
/my-app
/apps
/web
/api
/.github
...
```
Create GitHub private repository and upload source code.
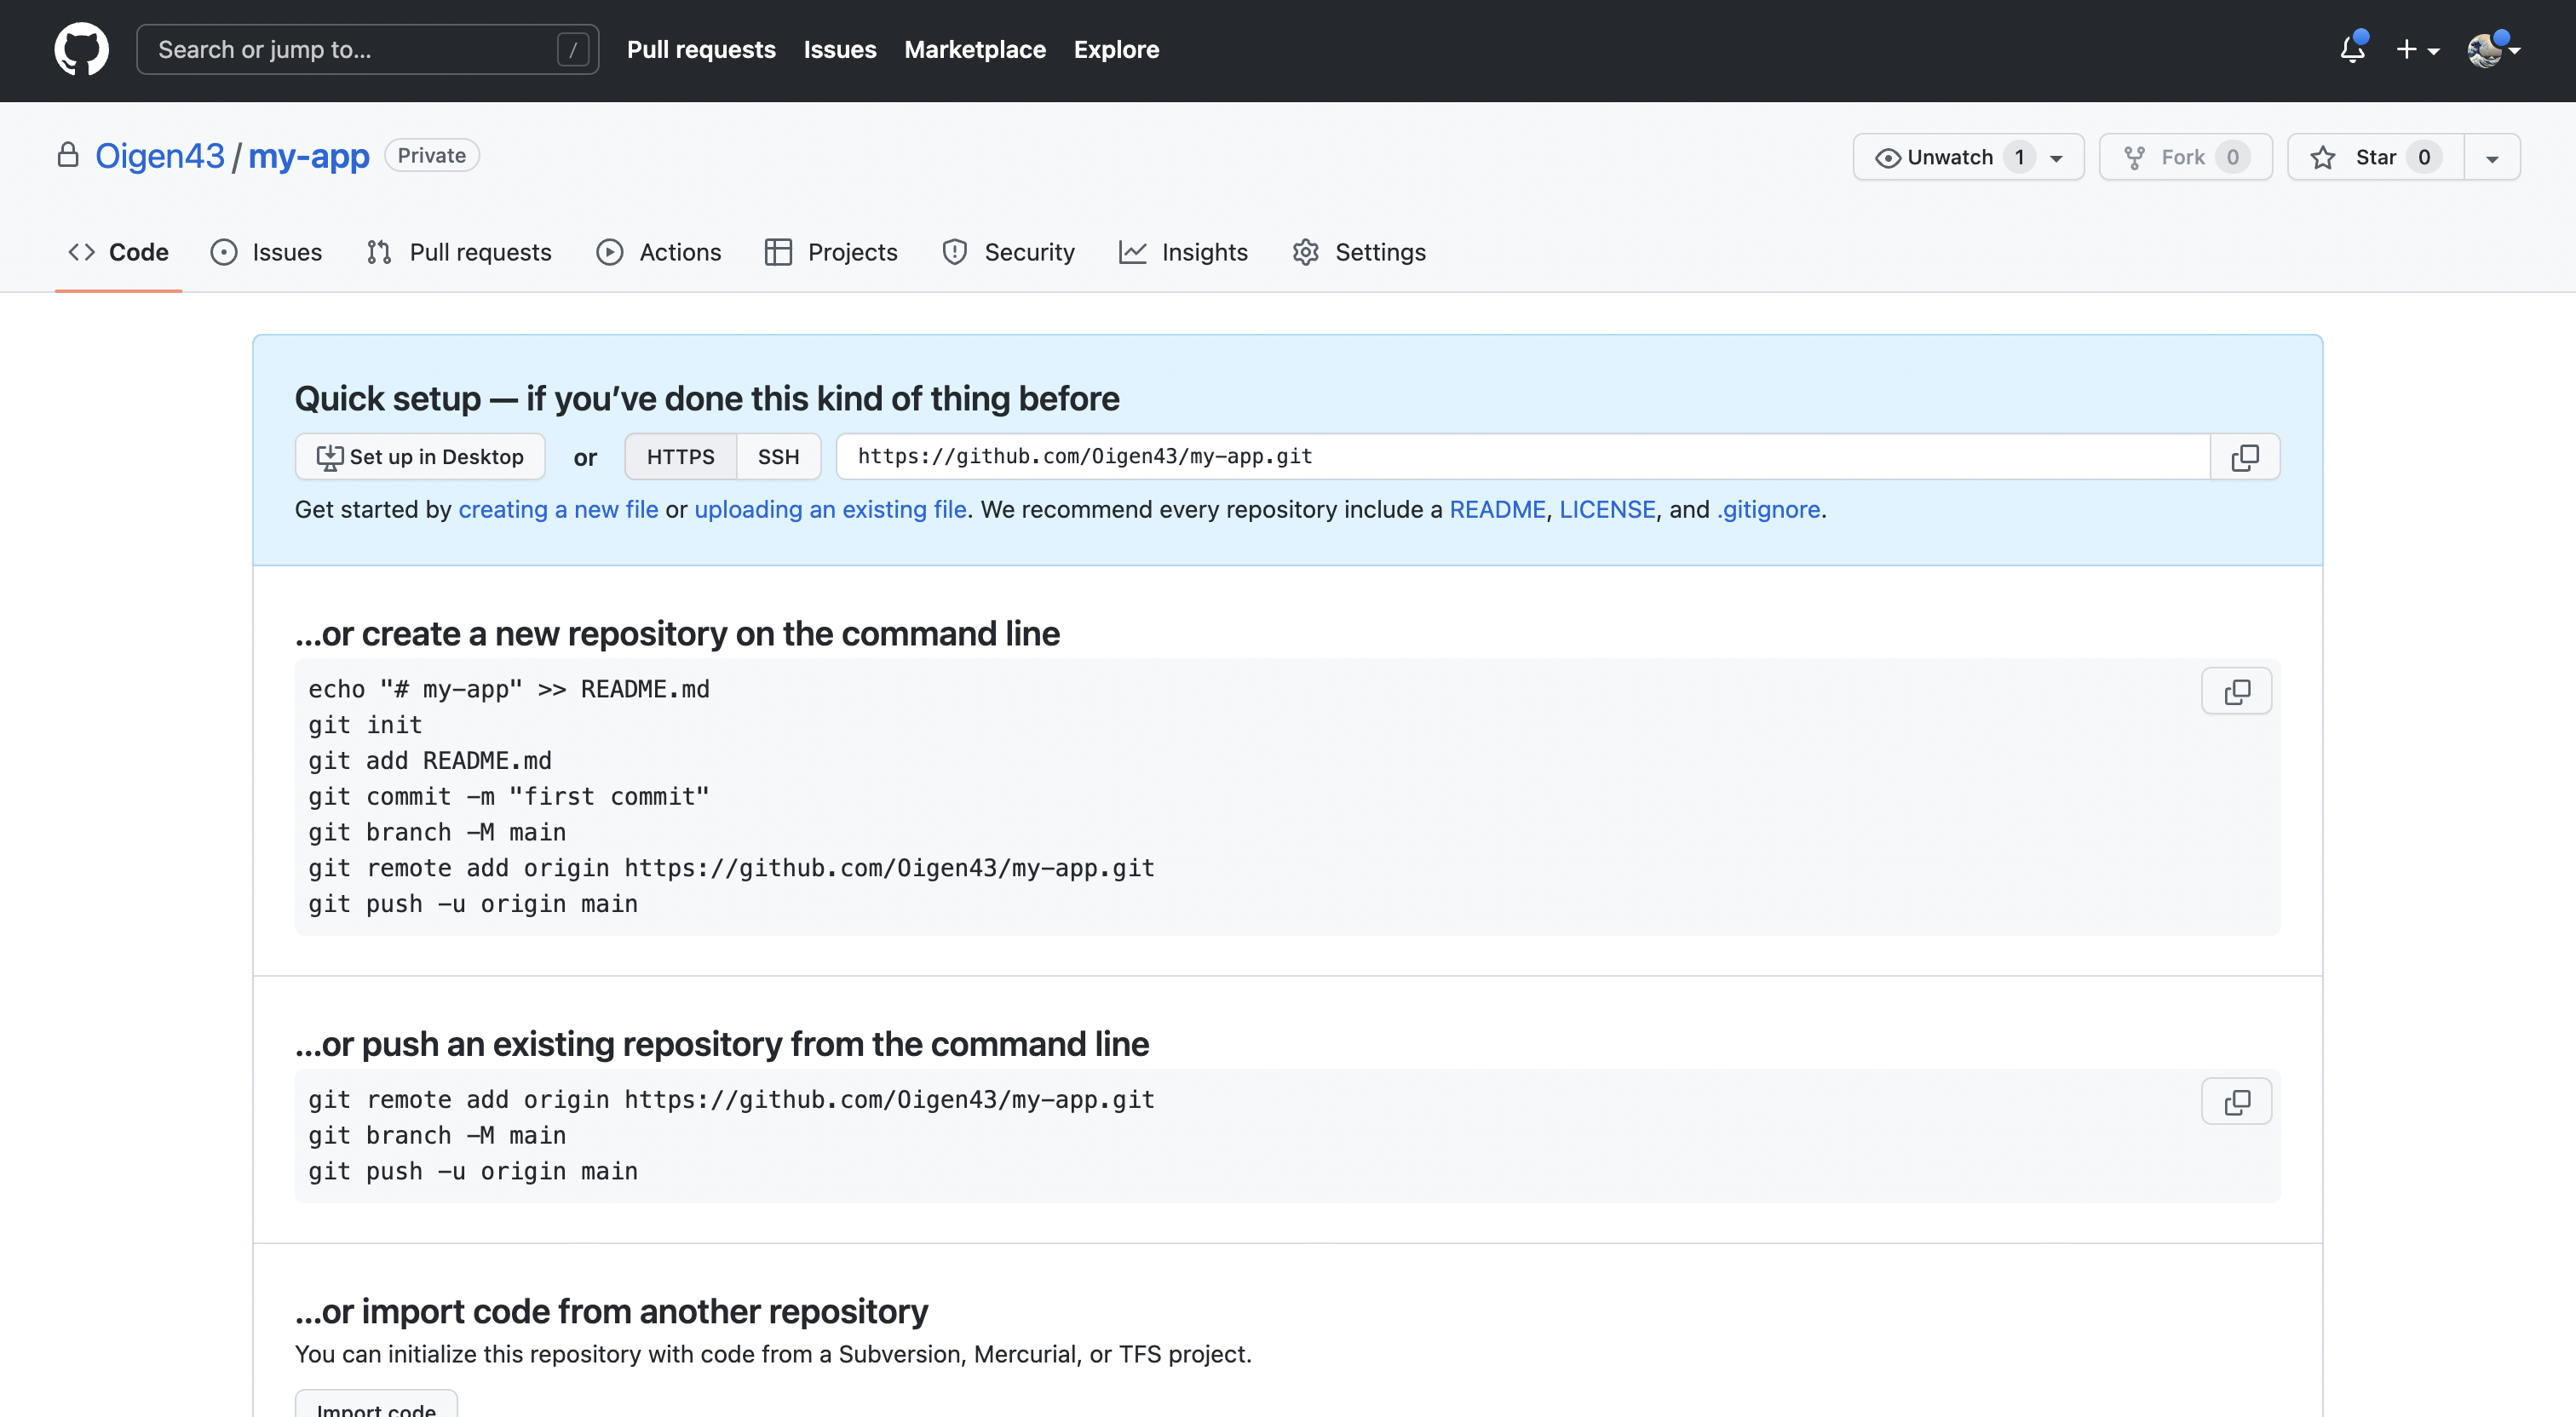 ```shell theme={null}
cd my-app
git remote add origin https://github.com/Oigen43/my-app.git
git branch -M main
git push -u origin main
```
## MongoDB Atlas
Navigate to [MongoDB Atlas](https://cloud.mongodb.com/), sign in to your account and create a new database.
### Database creation
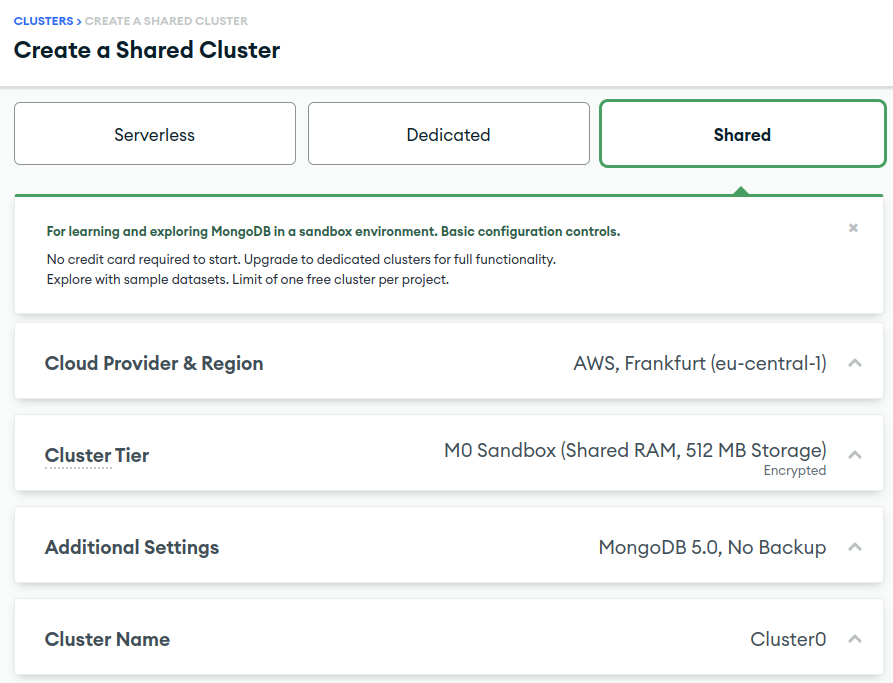
1. Select the appropriate type. Dedicated for a production environment, shared for staging/demo.
2. Select provider and region. We recommend selecting the same or closest region to the DO application.
3. Select cluster tier. Free M0 Sandbox should be enough for staging/demo environments. For production environment we recommended selecting the option that supports cloud backups, M2 or higher.
4. Enter cluster name
```shell theme={null}
cd my-app
git remote add origin https://github.com/Oigen43/my-app.git
git branch -M main
git push -u origin main
```
## MongoDB Atlas
Navigate to [MongoDB Atlas](https://cloud.mongodb.com/), sign in to your account and create a new database.
### Database creation
1. Select the appropriate type. Dedicated for a production environment, shared for staging/demo.
2. Select provider and region. We recommend selecting the same or closest region to the DO application.
3. Select cluster tier. Free M0 Sandbox should be enough for staging/demo environments. For production environment we recommended selecting the option that supports cloud backups, M2 or higher.
4. Enter cluster name
 ### Security and connection
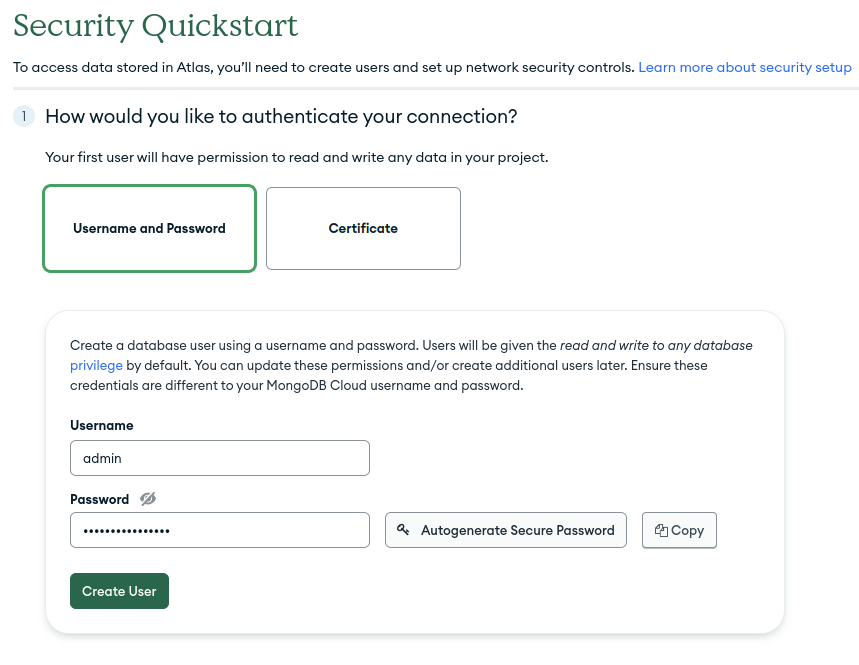
After cluster creation, you'll need to set up security. Select the authentication type (username and password) and create a user.
Please be aware that the initial character of the generated password should be a letter. If it isn't, you'll need to create a new password.
Failing to do this may lead to DigitalOcean parsing the `MONGO_URI` variable incorrectly.
### Security and connection
After cluster creation, you'll need to set up security. Select the authentication type (username and password) and create a user.
Please be aware that the initial character of the generated password should be a letter. If it isn't, you'll need to create a new password.
Failing to do this may lead to DigitalOcean parsing the `MONGO_URI` variable incorrectly.
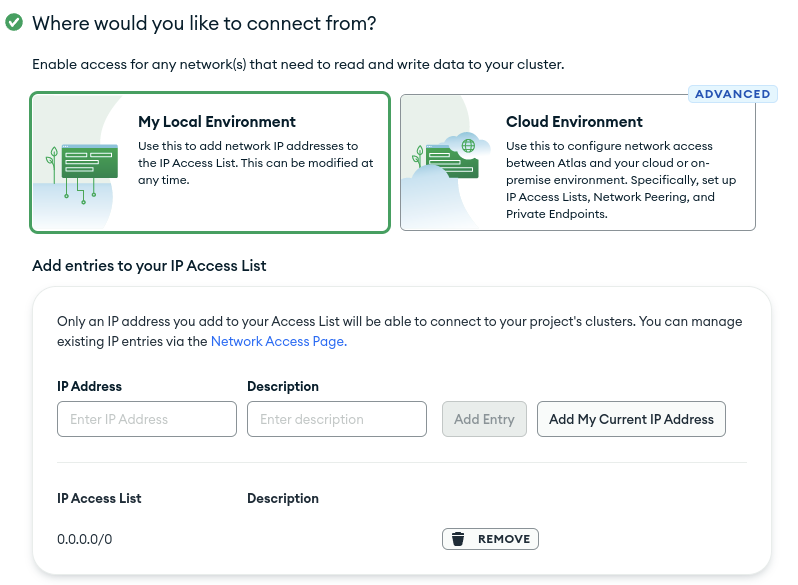
 Add IP addresses list, which should have access to your cluster. Add 0.0.0.0/0 IP address to allow anyone with credentials to connect.
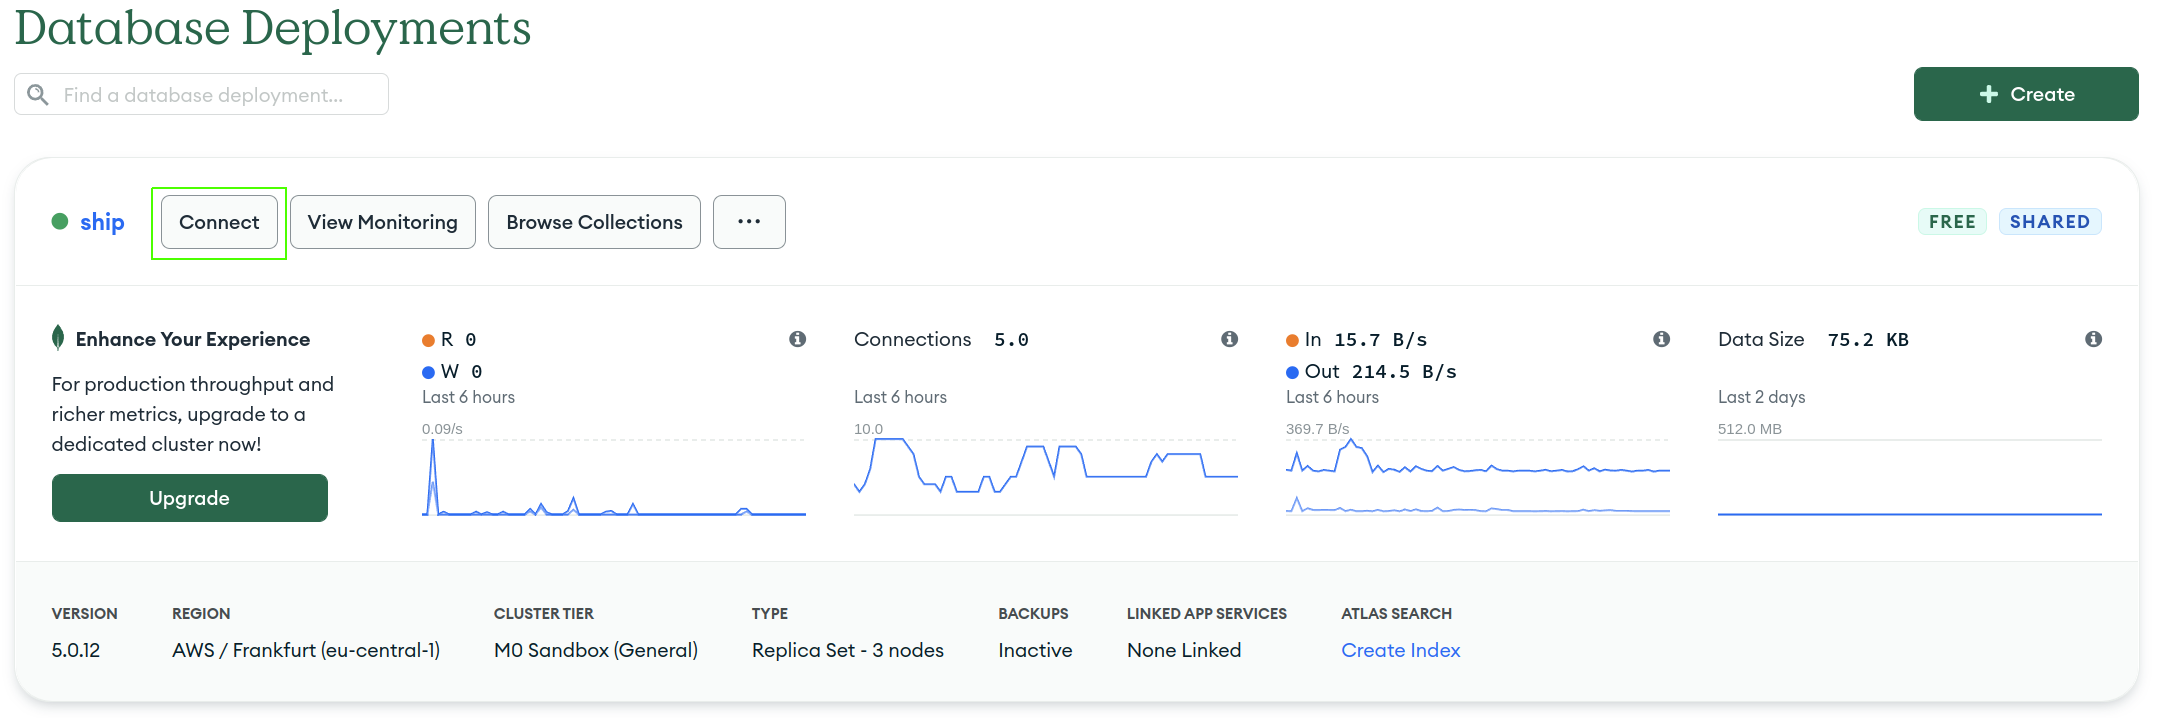
 After database creation, go to the dashboard page and get the URI connection string by pressing the `connect` button.
 Select `Connect your application` option. Choose driver and mongo version, and copy connection string. Don't forget to replace `` with your credentials.
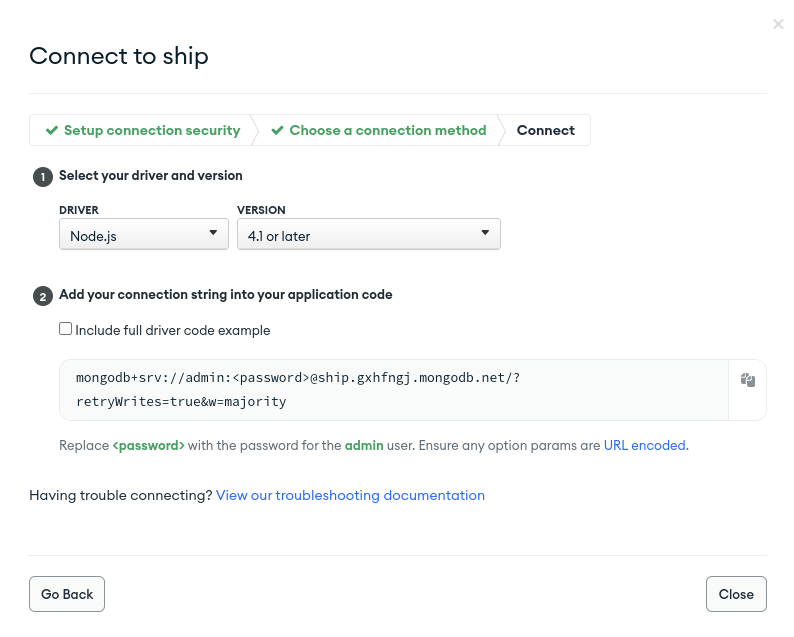 Save this value. It will be needed later when creating the app in Digital Ocean.
Before moving to production, it's crucial to set up [MongoDB backup methods](https://www.mongodb.com/docs/manual/core/backups).
This ensures that you can reliably restore your data in the event of unforeseen circumstances.
## Redis Cloud
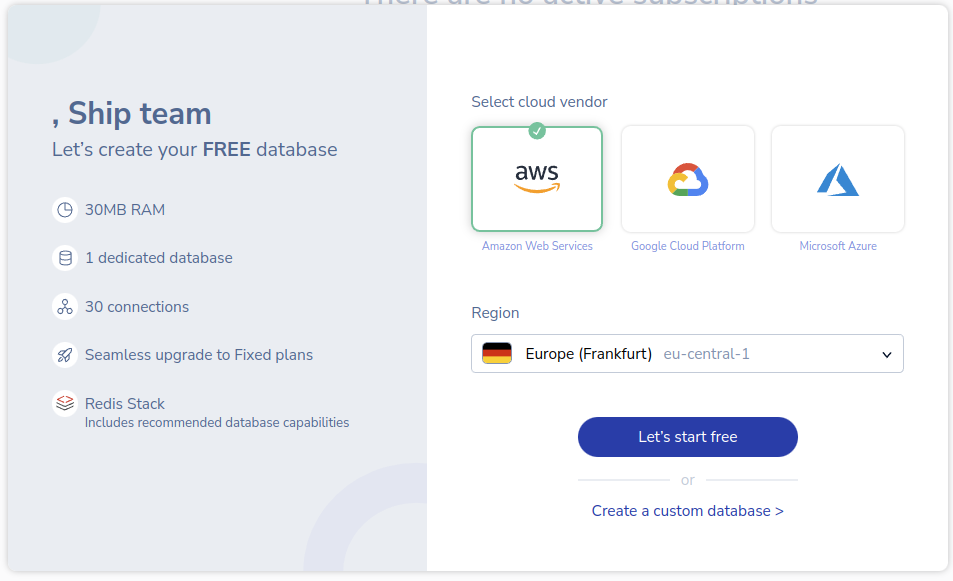
Navigate to [Redis Cloud](https://redis.com/try-free/) and create an account. Select cloud provider and region, then press `Let's start free` to finish database creation.
Save this value. It will be needed later when creating the app in Digital Ocean.
Before moving to production, it's crucial to set up [MongoDB backup methods](https://www.mongodb.com/docs/manual/core/backups).
This ensures that you can reliably restore your data in the event of unforeseen circumstances.
## Redis Cloud
Navigate to [Redis Cloud](https://redis.com/try-free/) and create an account. Select cloud provider and region, then press `Let's start free` to finish database creation.
 Open database settings and get the database public endpoint and password.
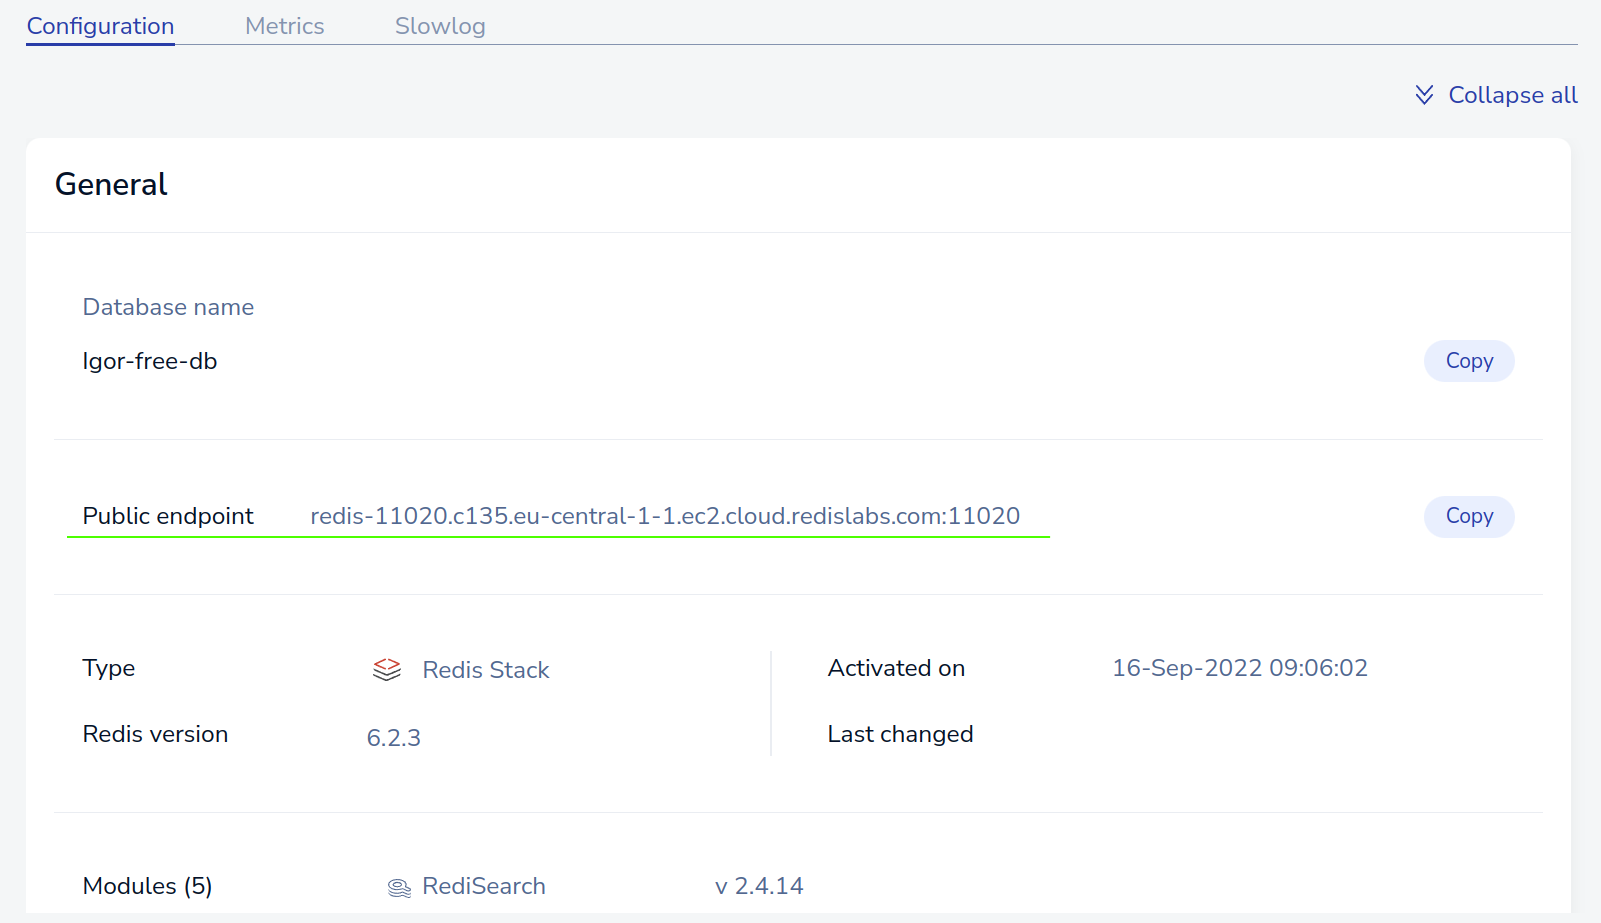
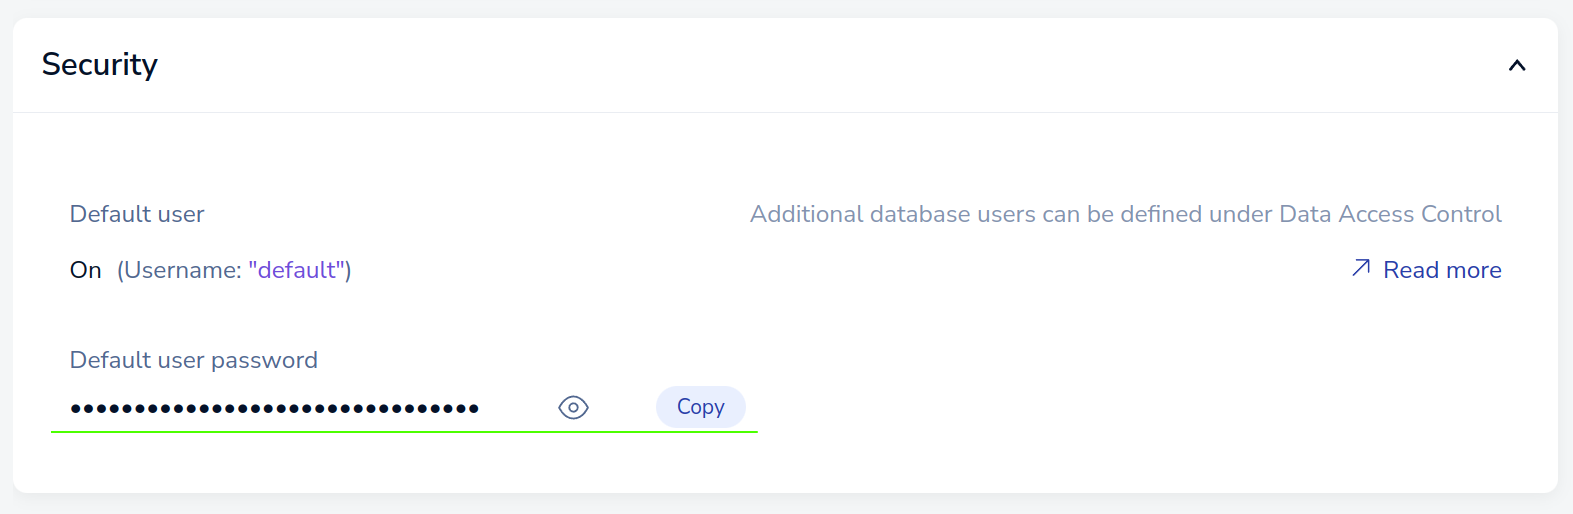 Form Redis connection string using public endpoint and password `redis://:`. Save this value. It will be needed later when creating the app in Digital Ocean.
## Digital Ocean
Navigate to the Digital Ocean Control Panel and select the **Apps** tab. The `Full-Stack` build type requires 2 applications. First for [Web](/web/overview) and second for [API](/api-reference/overview), [Migrator](https://github.com/docs/migrator.md), and [Scheduler](https://github.com/docs/scheduler.md) services.
### Initial step
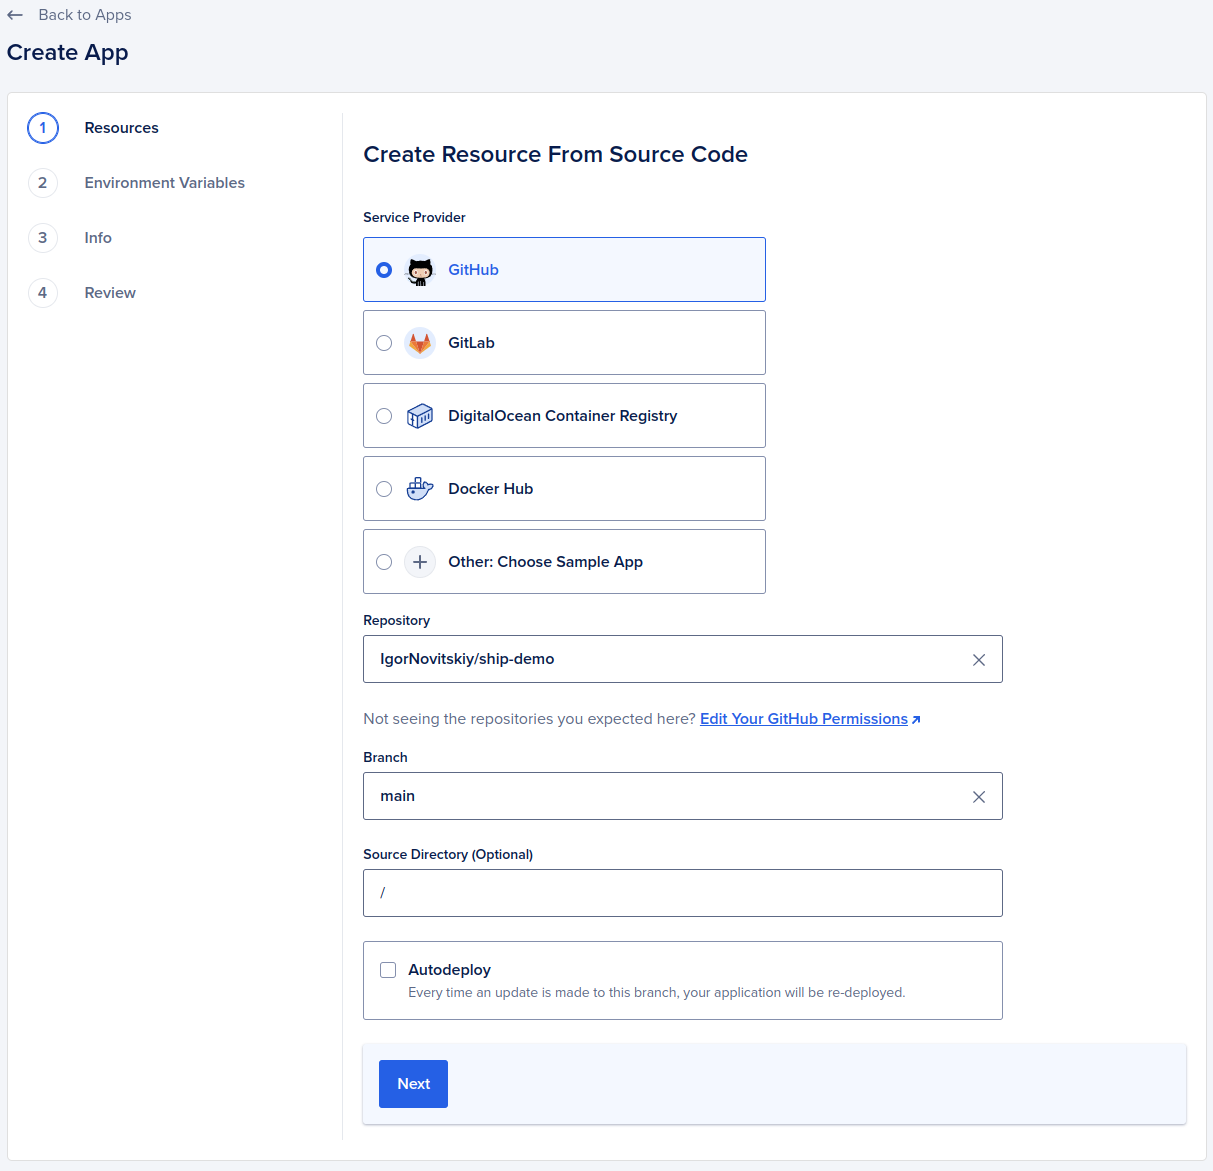
1. Select GitHub as a service provider. You might need to grant Digital Ocean access to your GitHub account or organization.
2. Select the repository with the application.
3. Select a branch for deployment.
4. Select the source directory if the code is in a subfolder.It should `apps/web` for web application and `apps/api` for api.
5. Turn off the Autodeploy option. The Ship uses GitHub Actions for CI due to the poor support of monorepos in the Digital Ocean Apps
Form Redis connection string using public endpoint and password `redis://:`. Save this value. It will be needed later when creating the app in Digital Ocean.
## Digital Ocean
Navigate to the Digital Ocean Control Panel and select the **Apps** tab. The `Full-Stack` build type requires 2 applications. First for [Web](/web/overview) and second for [API](/api-reference/overview), [Migrator](https://github.com/docs/migrator.md), and [Scheduler](https://github.com/docs/scheduler.md) services.
### Initial step
1. Select GitHub as a service provider. You might need to grant Digital Ocean access to your GitHub account or organization.
2. Select the repository with the application.
3. Select a branch for deployment.
4. Select the source directory if the code is in a subfolder.It should `apps/web` for web application and `apps/api` for api.
5. Turn off the Autodeploy option. The Ship uses GitHub Actions for CI due to the poor support of monorepos in the Digital Ocean Apps
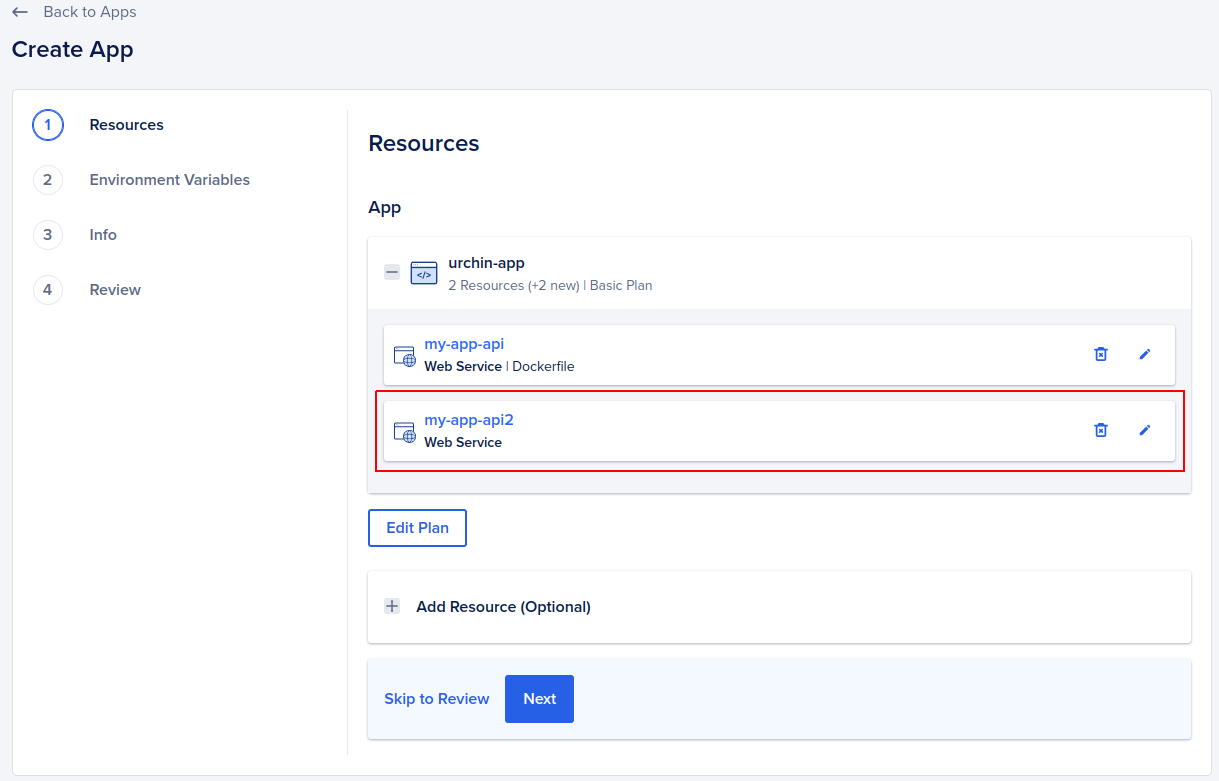
 ### Resources setup
1. Delete duplicated resources without dockerfile if you have one.
2. Select desired plan. For staging/demo environments, sufficiently selecting a basic plan for 5\$. For production, you might consider selecting a more expensive plan.
### Resources setup
1. Delete duplicated resources without dockerfile if you have one.
2. Select desired plan. For staging/demo environments, sufficiently selecting a basic plan for 5\$. For production, you might consider selecting a more expensive plan.
 ### Environment variables
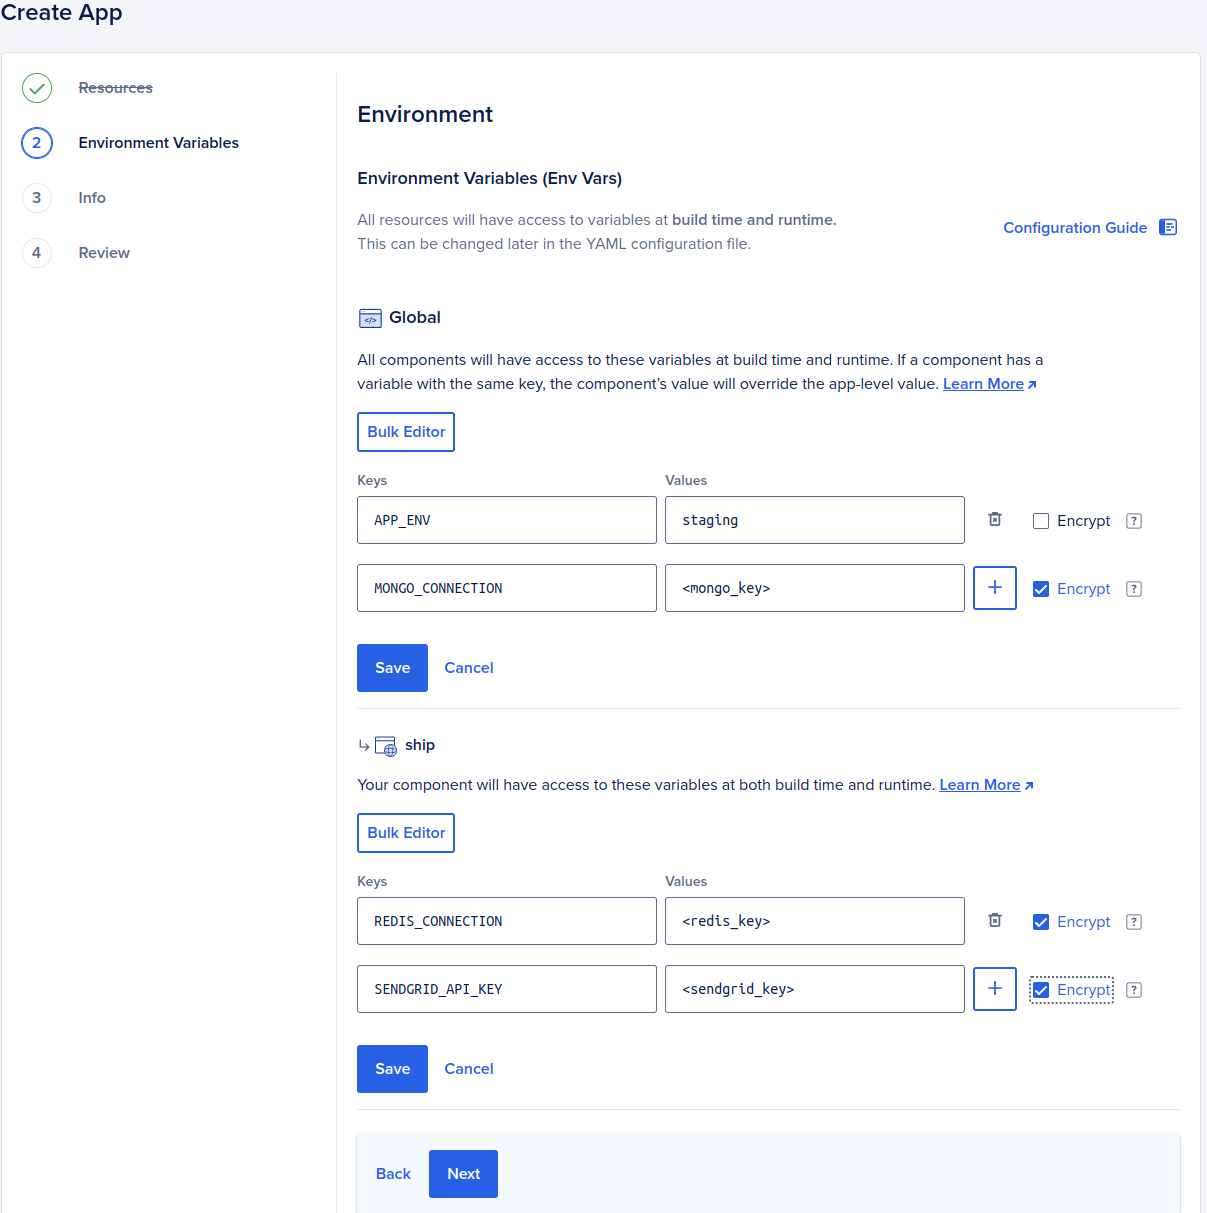
The `APP_ENV` environment variable is typically set based on the environment in which the application is running.
Its value corresponds to the specific environment, such as "development", "staging" or "production".
This variable helps the application identify its current environment and load the corresponding configuration.
For the web application, by setting the environment variable `APP_ENV`,
the application can determine the environment in which it is running and download the appropriate configuration file:
| APP\_ENV | File |
| ----------- | ---------------- |
| development | .env.development |
| staging | .env.staging |
| production | .env.production |
These files should contain specific configuration variables required for each environment.
In contrast, the API utilizes a single `.env` file that houses its environment-specific configuration.
This file typically contains variables like API keys, secrets, or other sensitive information.
To ensure security, it's crucial to add the `.env` file to the `.gitignore` file,
preventing it from being tracked and committed to the repository.
So just specify the environment variables that will contain the values of your secrets.
For example, if you have a secret named `API_KEY`,
create an environment variable named `API_KEY` and set the value of the corresponding secret for it
Variables, added in the `Global` section will be available to all resources within the application, while ones added in the `ship` section will be available only for that resource. Adding `MONGO_CONNECTION` in the global section allows you to use it later if you decide to set up migrator/scheduler resources
### Environment variables
The `APP_ENV` environment variable is typically set based on the environment in which the application is running.
Its value corresponds to the specific environment, such as "development", "staging" or "production".
This variable helps the application identify its current environment and load the corresponding configuration.
For the web application, by setting the environment variable `APP_ENV`,
the application can determine the environment in which it is running and download the appropriate configuration file:
| APP\_ENV | File |
| ----------- | ---------------- |
| development | .env.development |
| staging | .env.staging |
| production | .env.production |
These files should contain specific configuration variables required for each environment.
In contrast, the API utilizes a single `.env` file that houses its environment-specific configuration.
This file typically contains variables like API keys, secrets, or other sensitive information.
To ensure security, it's crucial to add the `.env` file to the `.gitignore` file,
preventing it from being tracked and committed to the repository.
So just specify the environment variables that will contain the values of your secrets.
For example, if you have a secret named `API_KEY`,
create an environment variable named `API_KEY` and set the value of the corresponding secret for it
Variables, added in the `Global` section will be available to all resources within the application, while ones added in the `ship` section will be available only for that resource. Adding `MONGO_CONNECTION` in the global section allows you to use it later if you decide to set up migrator/scheduler resources
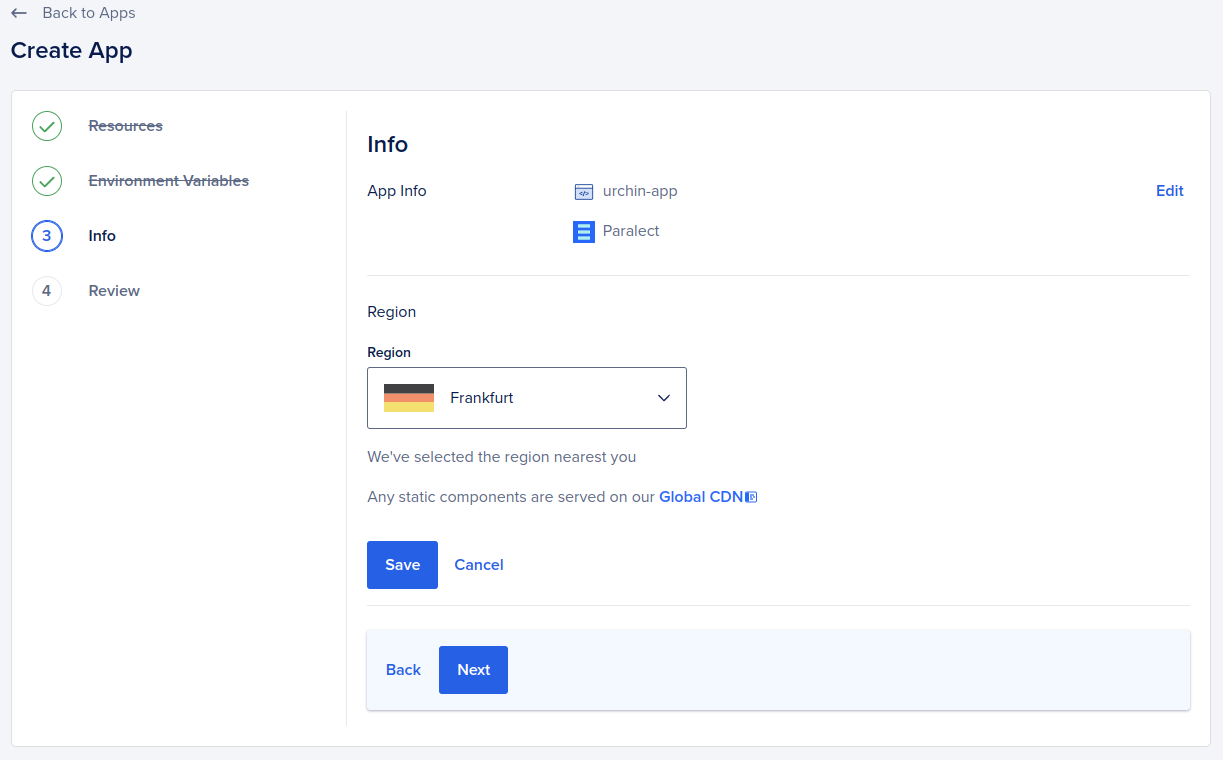
 ### Application name and hosted region
* \[**Optional**] Select desired application name and/or region for your application
### Application name and hosted region
* \[**Optional**] Select desired application name and/or region for your application
 ### Review
Verify everything is correct and create a new resource.
After the application creation, you'll land on the application dashboard page. On dashboard, you can see application status, check runtime logs, track deployment status, and manage application settings.
### App Spec
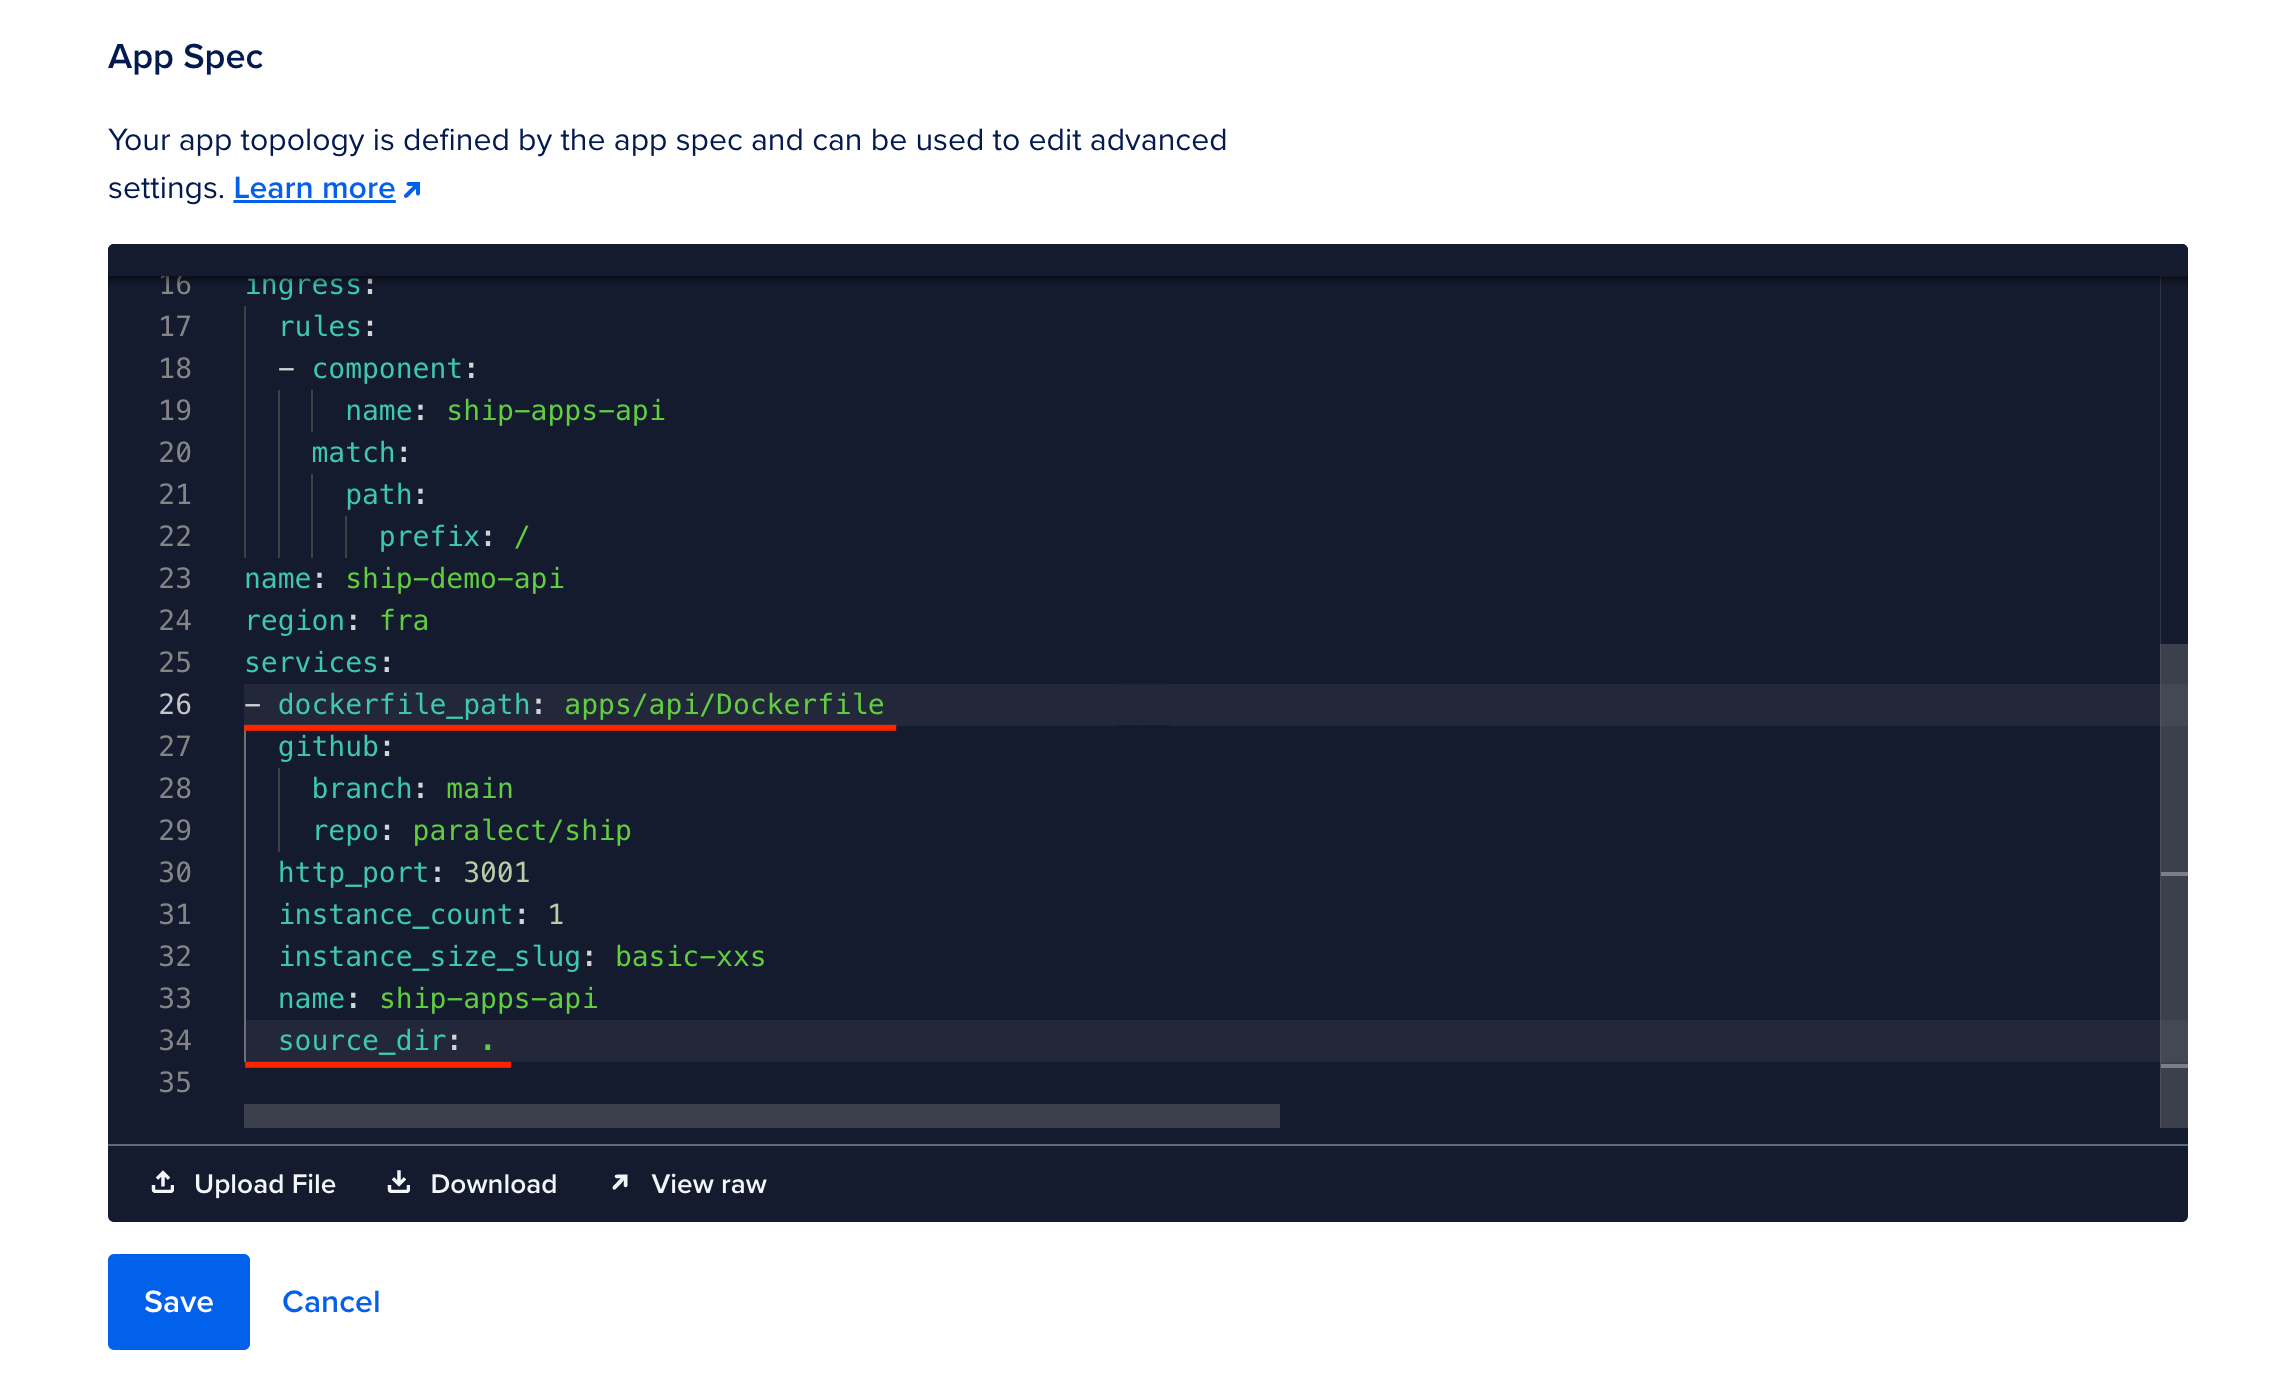
Digital Ocean sets the path to Dockerfiles to the root by default. You will need to change it manually.
Navigate to Settings, expand the App spec tab and change `dockerfile_path` in the editor.
To deploy your application in a monorepo, it's essential to modify the `source_dir` parameter to the root directory.
This adjustment is necessary to ensure the correct configuration and operation of the applications within the monorepo.
### Review
Verify everything is correct and create a new resource.
After the application creation, you'll land on the application dashboard page. On dashboard, you can see application status, check runtime logs, track deployment status, and manage application settings.
### App Spec
Digital Ocean sets the path to Dockerfiles to the root by default. You will need to change it manually.
Navigate to Settings, expand the App spec tab and change `dockerfile_path` in the editor.
To deploy your application in a monorepo, it's essential to modify the `source_dir` parameter to the root directory.
This adjustment is necessary to ensure the correct configuration and operation of the applications within the monorepo.
 ## Cloudflare
Before this step you need to register a domain name, usually we already have it if not, look: [Register a new domain](https://developers.cloudflare.com/registrar/get-started/register-domain)
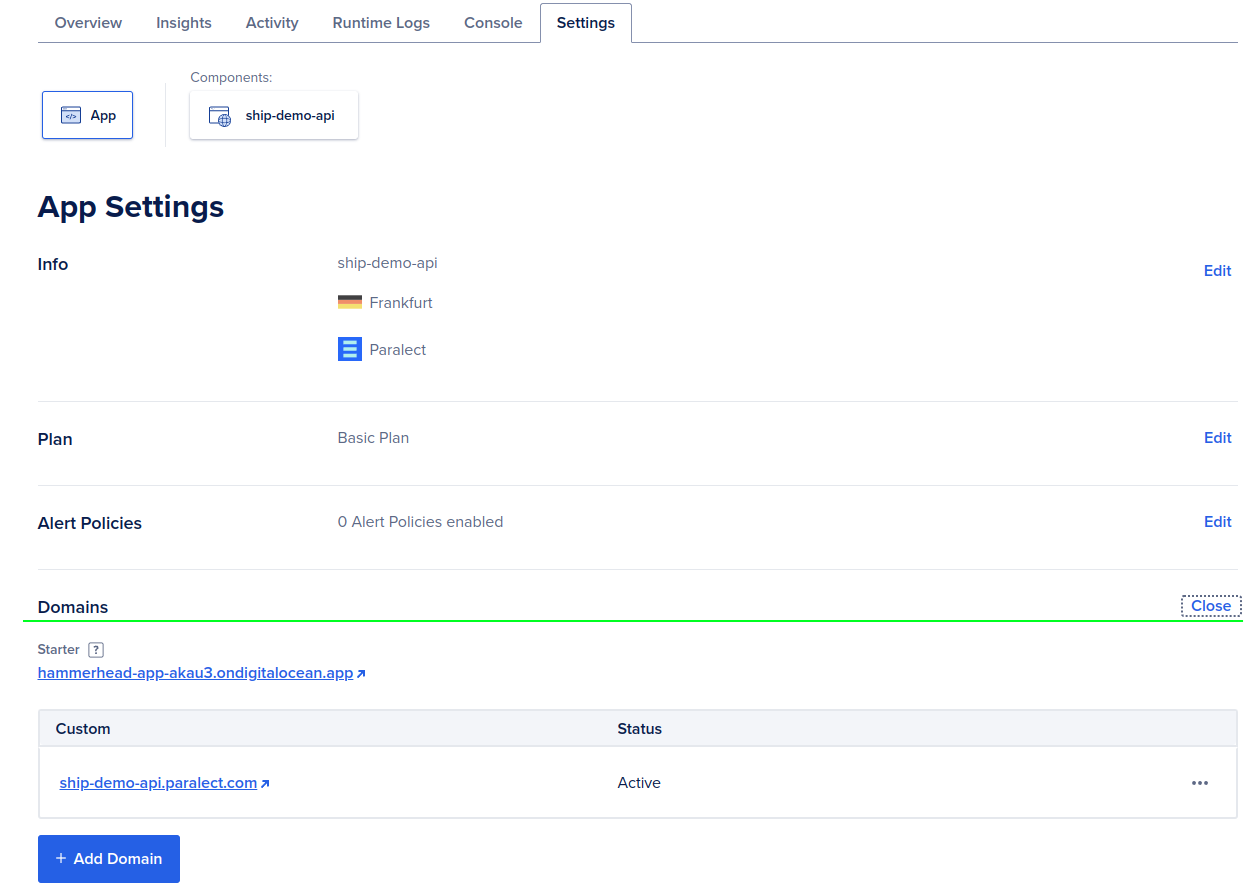
Navigate to your Digital ocean application and open `Settings` tab. Select `Domains` row to open domain settings and click `Add domain` button
## Cloudflare
Before this step you need to register a domain name, usually we already have it if not, look: [Register a new domain](https://developers.cloudflare.com/registrar/get-started/register-domain)
Navigate to your Digital ocean application and open `Settings` tab. Select `Domains` row to open domain settings and click `Add domain` button
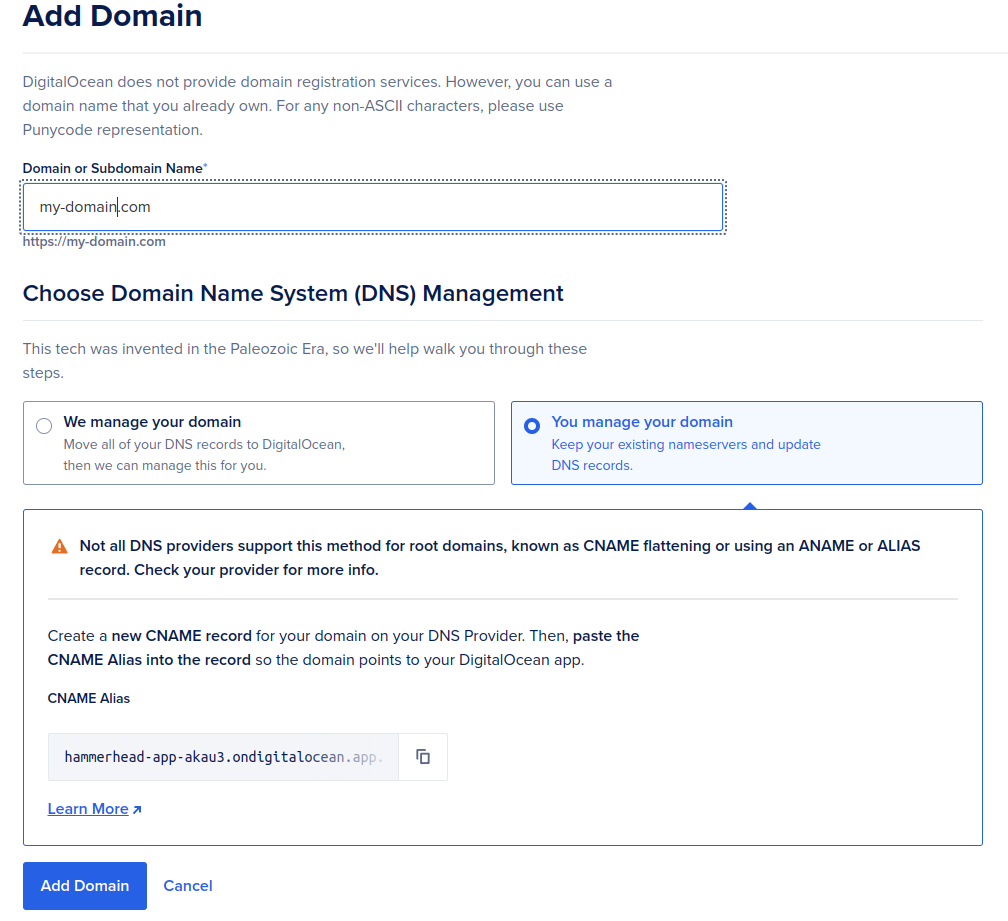
 Type your desired domain and select option `You manage your domain`
In the bottom section you'll be asked to copy CNAME alias of your digital ocean application name to record in your dns provider.
Copy that alias and leave the form (do no close it or submit).
Type your desired domain and select option `You manage your domain`
In the bottom section you'll be asked to copy CNAME alias of your digital ocean application name to record in your dns provider.
Copy that alias and leave the form (do no close it or submit).
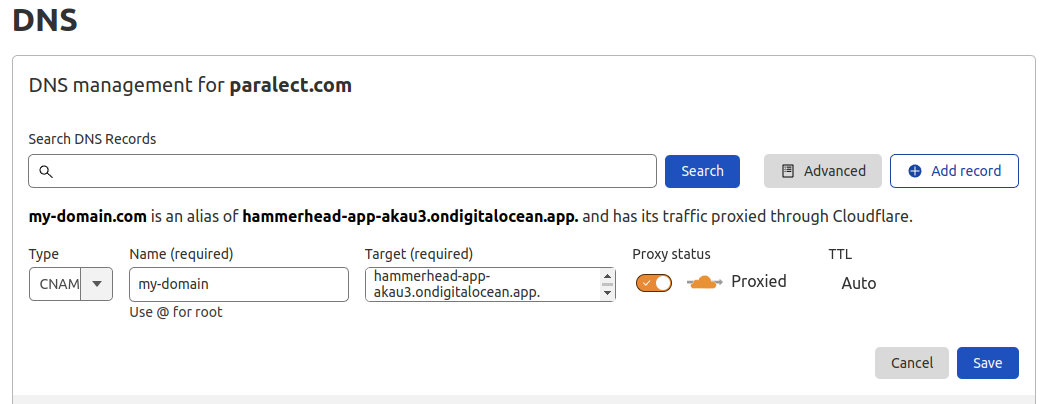
 Navigate to [CloudFlare](https://dash.cloudflare.com/) and sign into account.
1. Go to `DNS` tab and create a new record.
2. Click `Add record`. Select type `CNAME`, enter domain name (must be the same you entered in digital ocean settings) and paste alias into `target` field.
Make sure `Proxy status` toggle enabled.
3. Save changes
Navigate to [CloudFlare](https://dash.cloudflare.com/) and sign into account.
1. Go to `DNS` tab and create a new record.
2. Click `Add record`. Select type `CNAME`, enter domain name (must be the same you entered in digital ocean settings) and paste alias into `target` field.
Make sure `Proxy status` toggle enabled.
3. Save changes
 Now go back to digital ocean and submit form. It usually takes about 5 minutes for digital ocean to confirm and start using your new domain.
Once domain is confirmed, application can be accessed by new address.
## GitHub Actions
You can find two github actions in the `.github/workflows` folder, responsible for triggering deployment when you push changes in your repository. If you chose frontend or backend on the initialization step, you'll have one github workflow for the selected application type.
These actions require a Digital Ocean access token and application ID. Respectively these are `DO_ACCESS_TOKEN` and `DO_API_STAGING_APP_ID`/`DO_WEB_STAGING_APP_ID`/`DO_API_PRODUCTION_APP_ID`/`DO_WEB_PRODUCTION_APP_ID`.
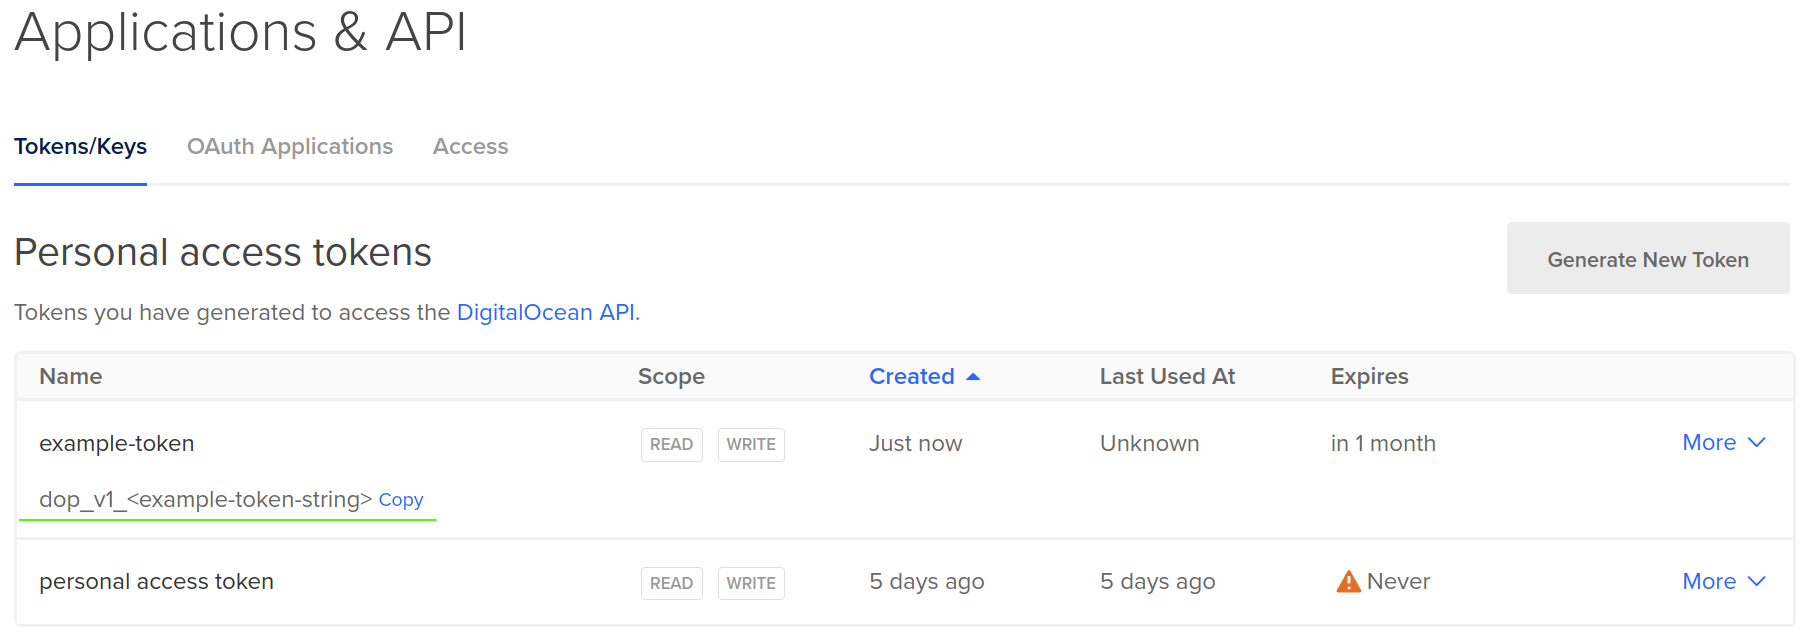
Navigate to digital ocean and open the **API** tab on the left sidebar.
Click **Generate new token**, select a name and set the expiration period.
Also, pick both **read** and **write** permissions for the scope.
Now go back to digital ocean and submit form. It usually takes about 5 minutes for digital ocean to confirm and start using your new domain.
Once domain is confirmed, application can be accessed by new address.
## GitHub Actions
You can find two github actions in the `.github/workflows` folder, responsible for triggering deployment when you push changes in your repository. If you chose frontend or backend on the initialization step, you'll have one github workflow for the selected application type.
These actions require a Digital Ocean access token and application ID. Respectively these are `DO_ACCESS_TOKEN` and `DO_API_STAGING_APP_ID`/`DO_WEB_STAGING_APP_ID`/`DO_API_PRODUCTION_APP_ID`/`DO_WEB_PRODUCTION_APP_ID`.
Navigate to digital ocean and open the **API** tab on the left sidebar.
Click **Generate new token**, select a name and set the expiration period.
Also, pick both **read** and **write** permissions for the scope.
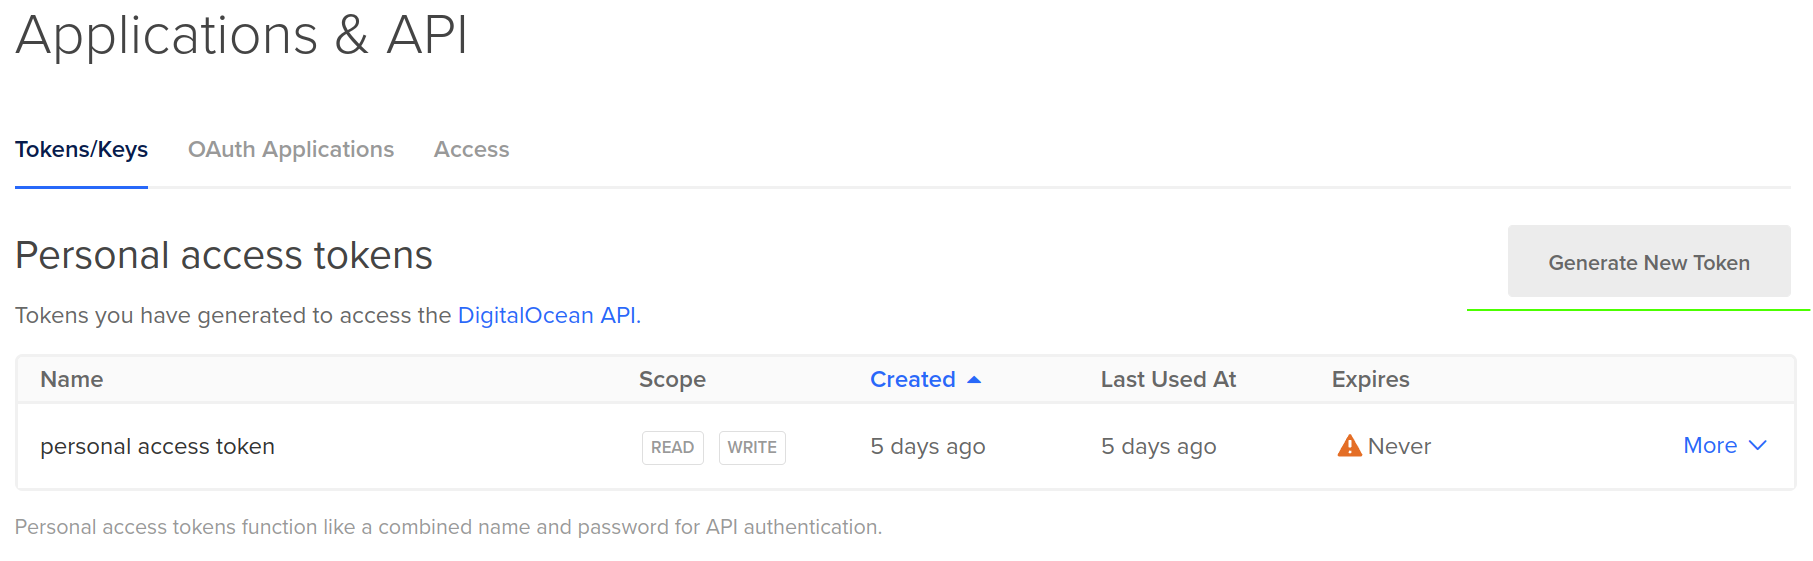 You'll see generated token in the list. Do not forget to copy the value and store it in a safe place. You won't be able to copy value after leaving the page.
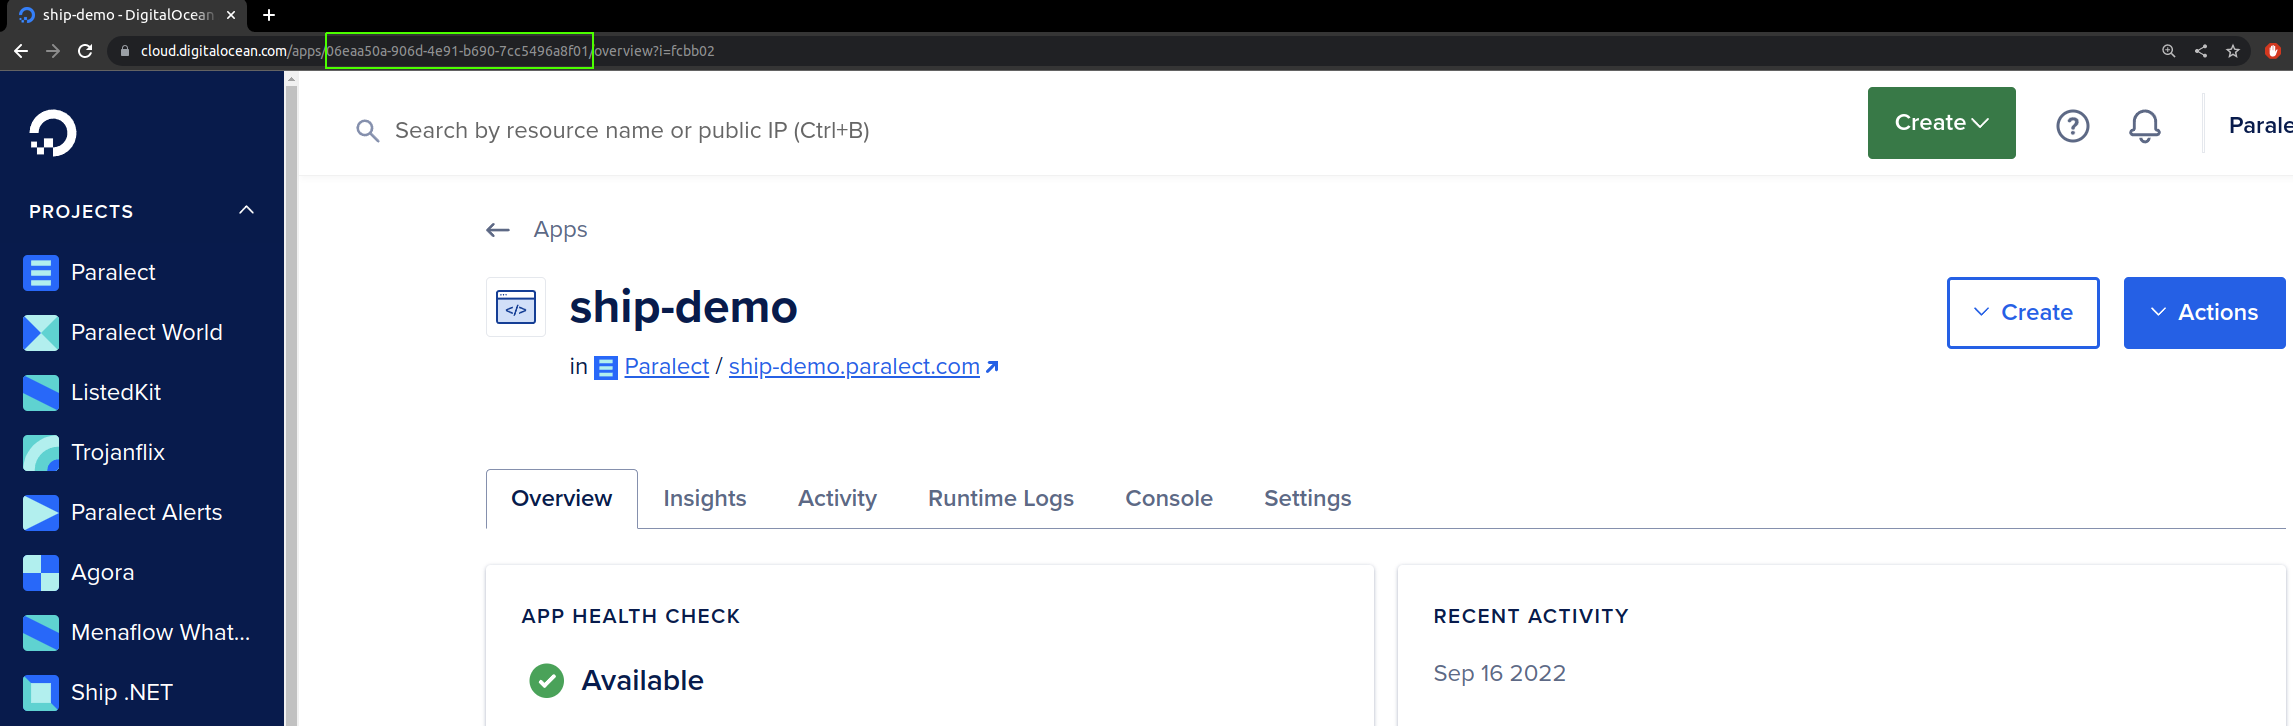
 Next, navigate to the **Apps** tab in the left sidebar and open your Digital Ocean application. You can find the id of your application id in the browser address bar.
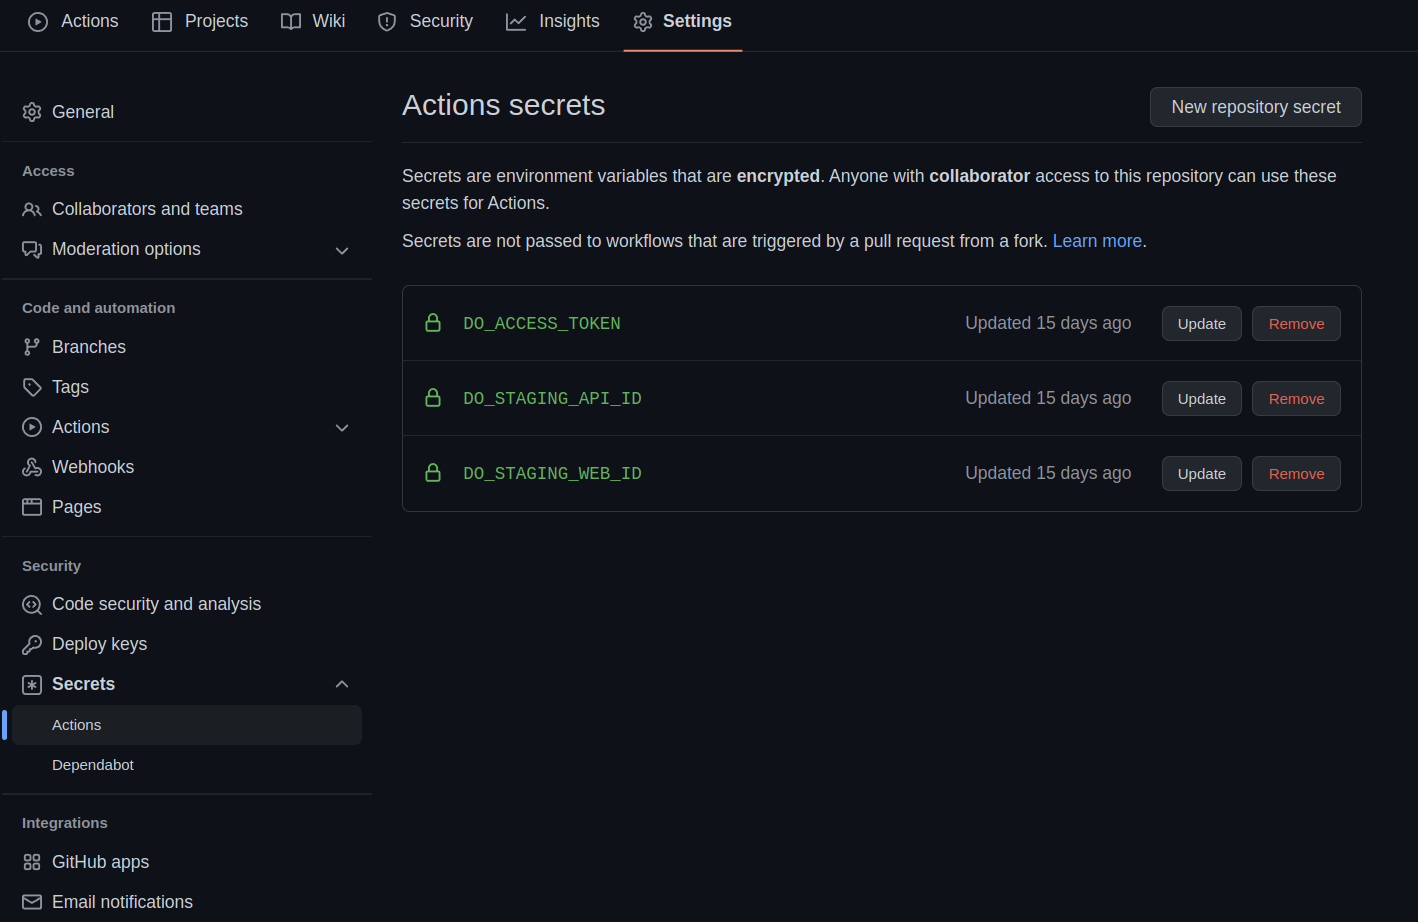
 Now you can add these keys to your github repository's secrets.
Navigate to the GitHub repository page, and open the **Settings** tab and these values. You have to be repository **admin** or **owner** to open this tab.
Now you can add these keys to your github repository's secrets.
Navigate to the GitHub repository page, and open the **Settings** tab and these values. You have to be repository **admin** or **owner** to open this tab.
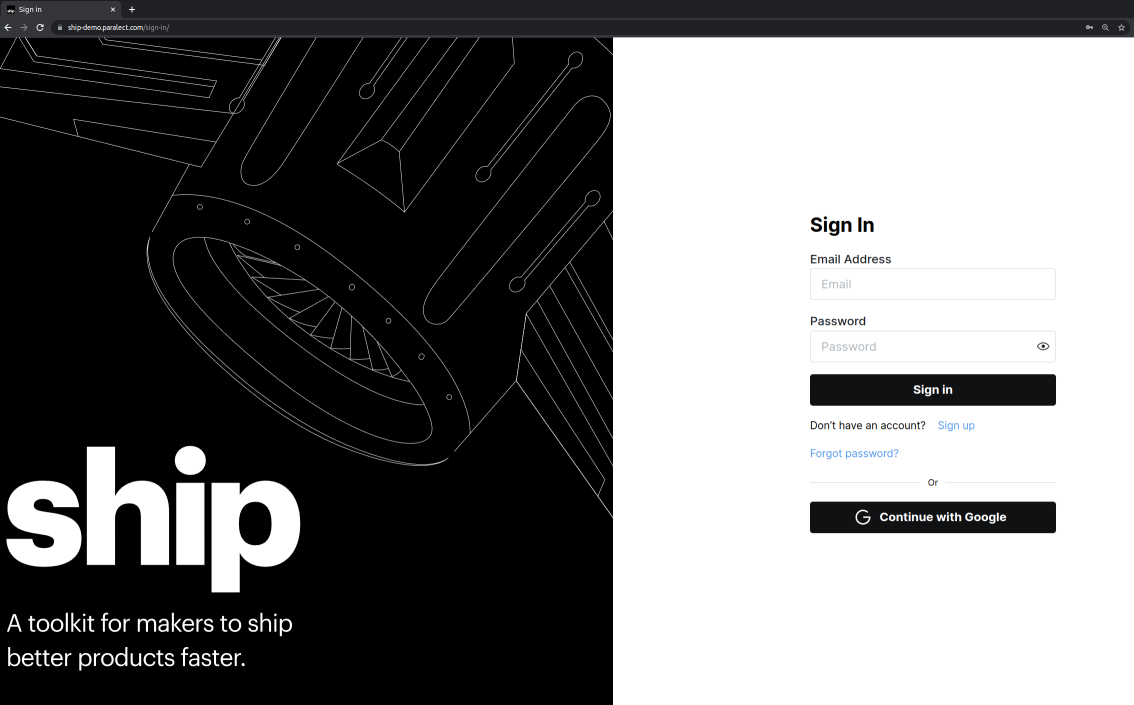
 Done! Application deployed and can be accessed by provided domain.
 ## Set up migrator and scheduler (Optional)
Digital Ocean Apps allows configuring additional resources within one application, which can serve as background workers and jobs, and a scheduler to run before/after the deployment process.
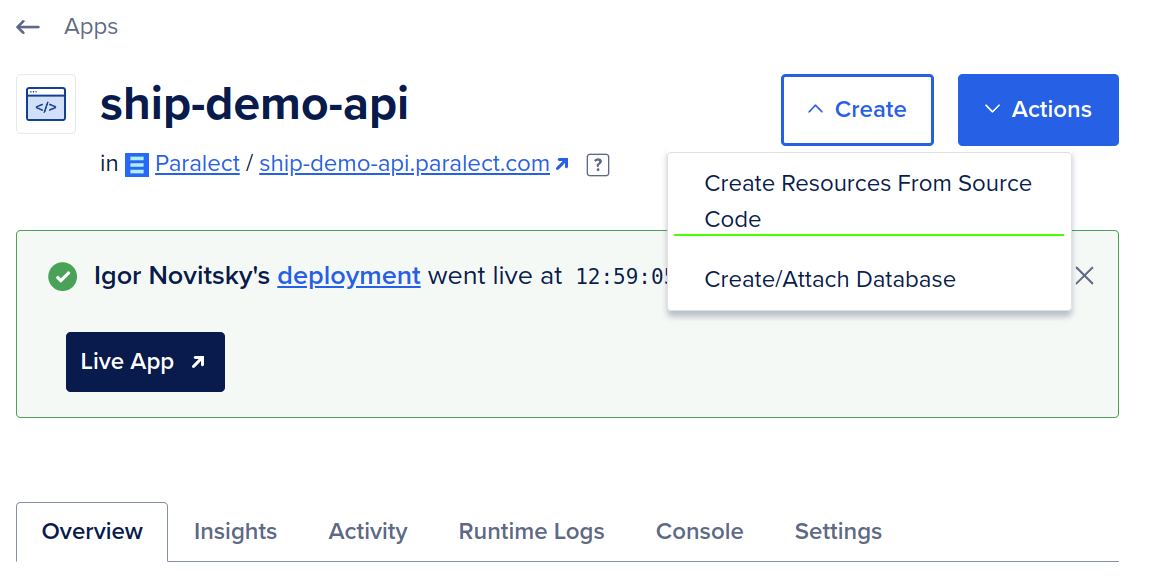
Navigate to your Digital Ocean application. **Make sure to select the application with API server**, open a `Create` dropdown menu in the top-right corner, and select the `Create Resources From Source Code` option.
## Set up migrator and scheduler (Optional)
Digital Ocean Apps allows configuring additional resources within one application, which can serve as background workers and jobs, and a scheduler to run before/after the deployment process.
Navigate to your Digital Ocean application. **Make sure to select the application with API server**, open a `Create` dropdown menu in the top-right corner, and select the `Create Resources From Source Code` option.
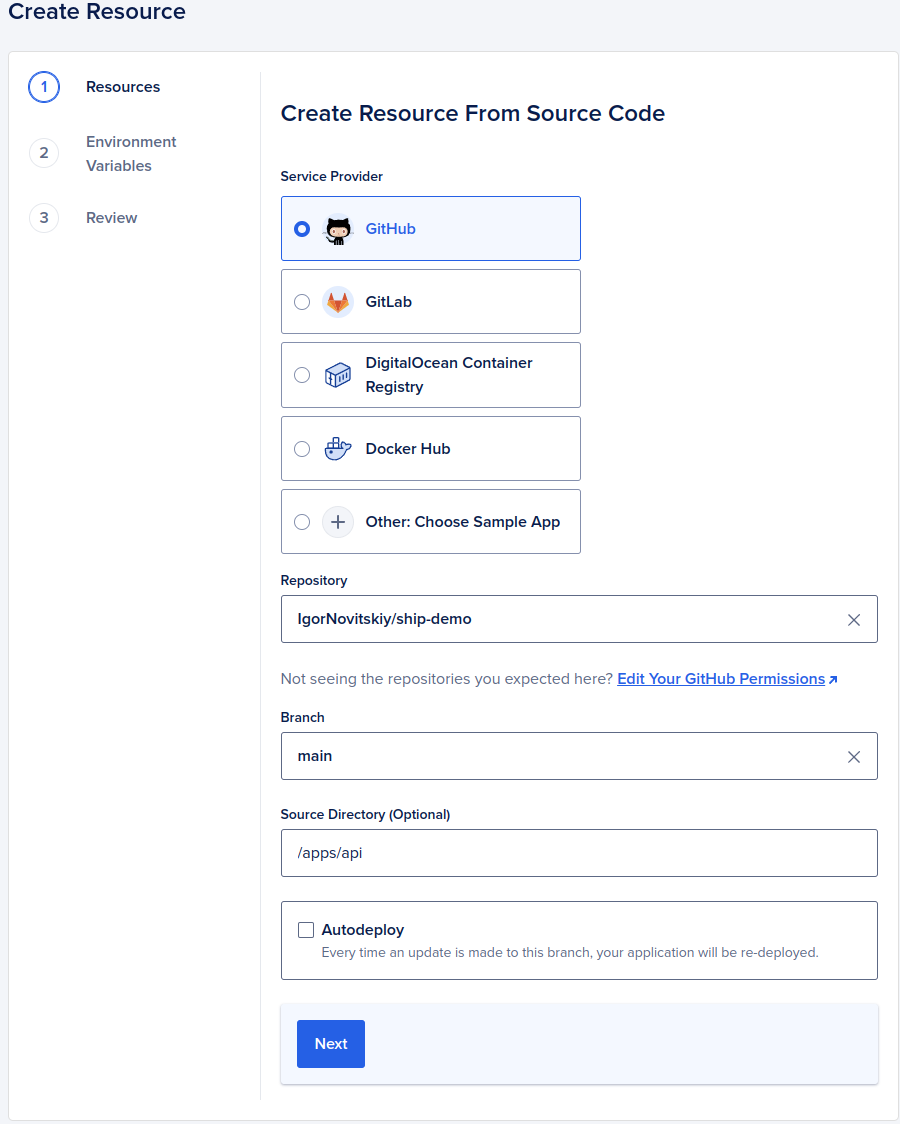
 1. Select a project repository, add a path to the source directory, disable auto-deploy, and press `Next`.
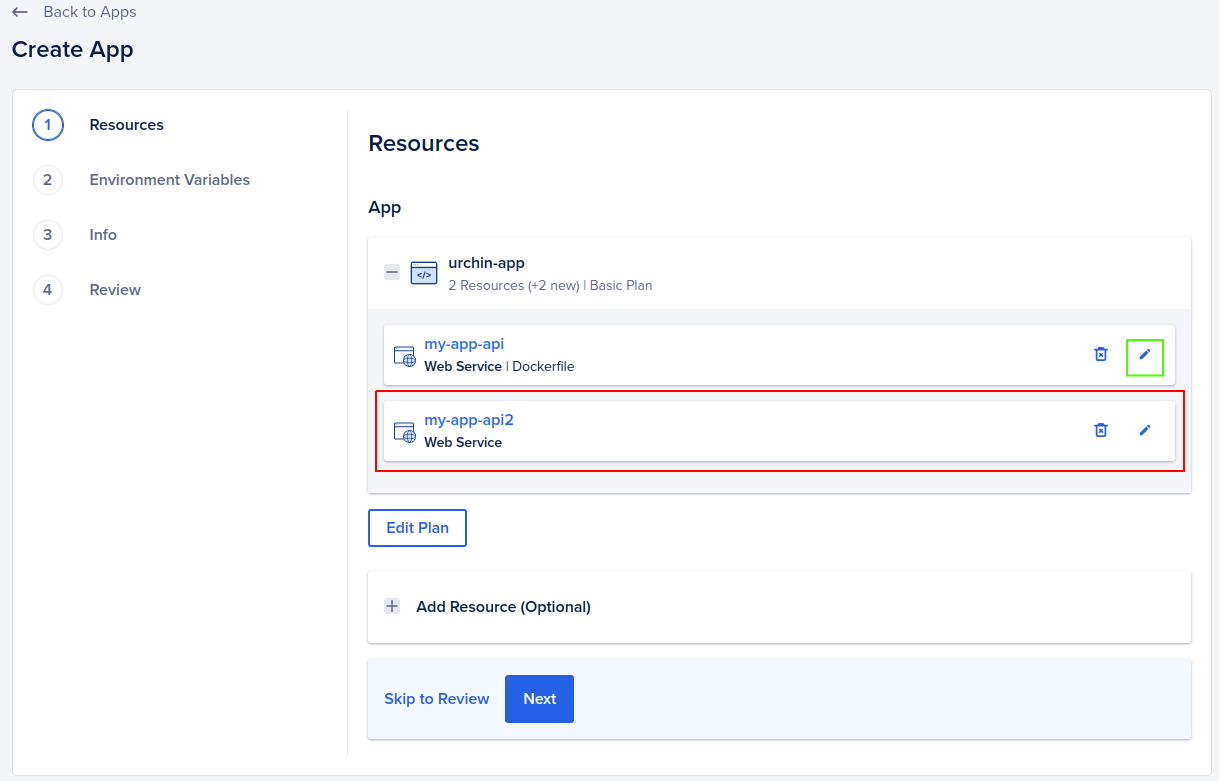
 2. Delete a resource without Dockerfile and edit second by clicking on the pencil icon.
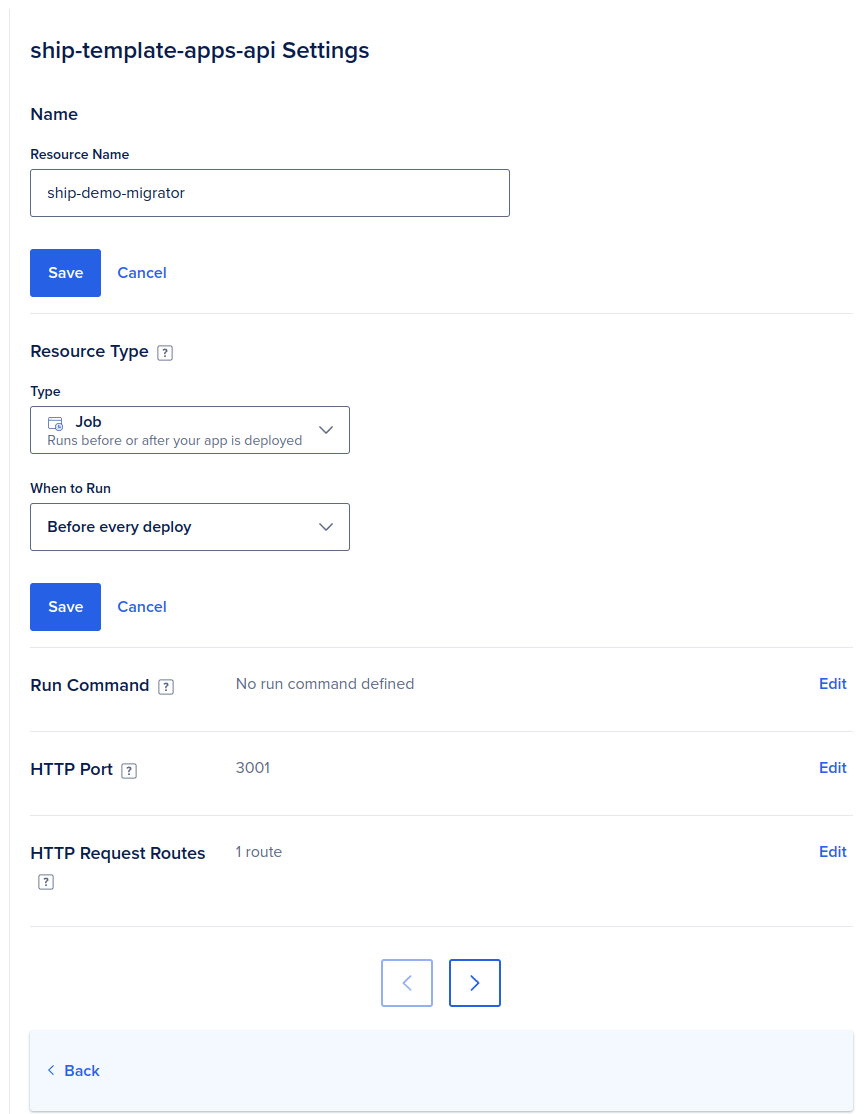
 3. In the edit resource form, select `Resource Type` - `Job`, `Before every deploy`, and change the name of the resource (not required, but might be useful later). Press save and go back to the resources screen.
 4. Select the `Add Additional Resource from Source` option below the list of added resources, repeat steps 1-2, and navigate to the edit form for a new resource.
5. Select `Resource Type` - `Worker`, save changes and go back.
4. Select the `Add Additional Resource from Source` option below the list of added resources, repeat steps 1-2, and navigate to the edit form for a new resource.
5. Select `Resource Type` - `Worker`, save changes and go back.
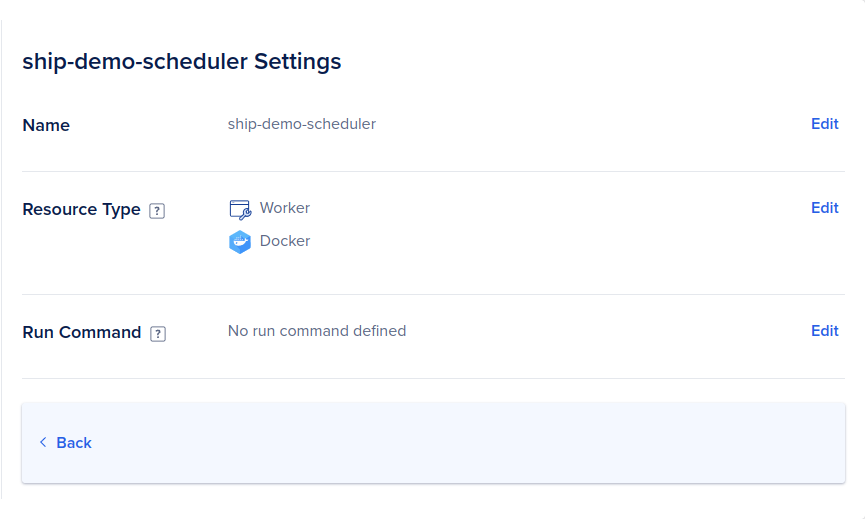 6. Proceed with the next steps, add environment variables if needed, verify a new monthly cost of the application and create resources.
You can find created resources in the `overview` tab.
6. Proceed with the next steps, add environment variables if needed, verify a new monthly cost of the application and create resources.
You can find created resources in the `overview` tab.
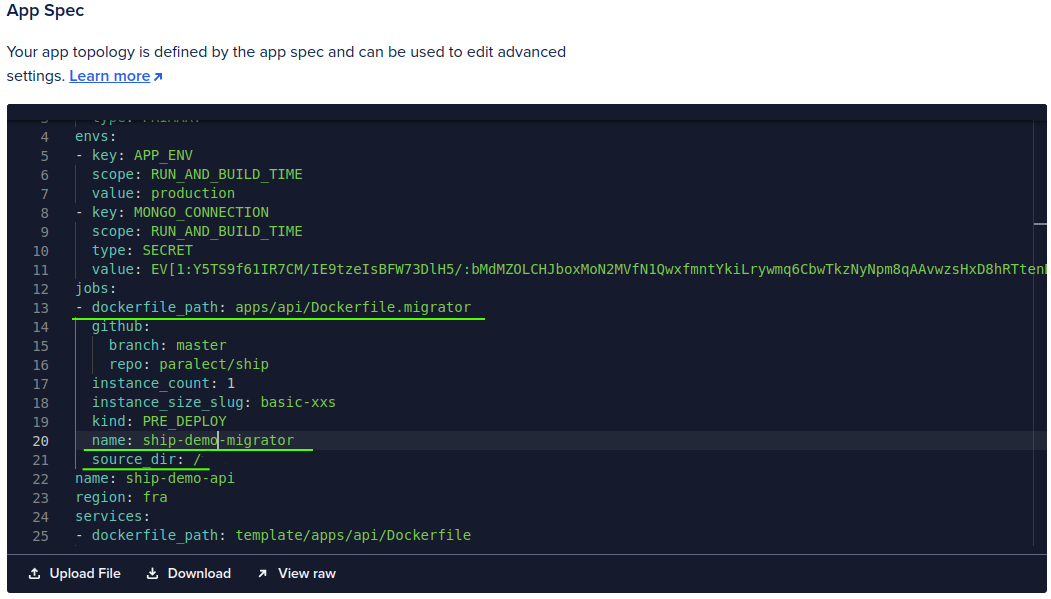
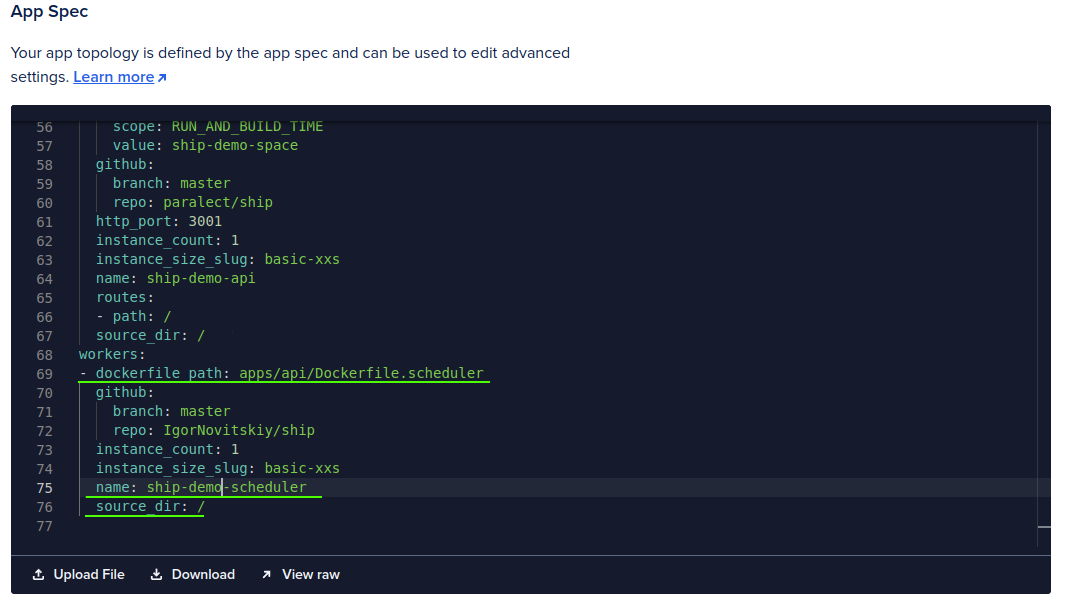
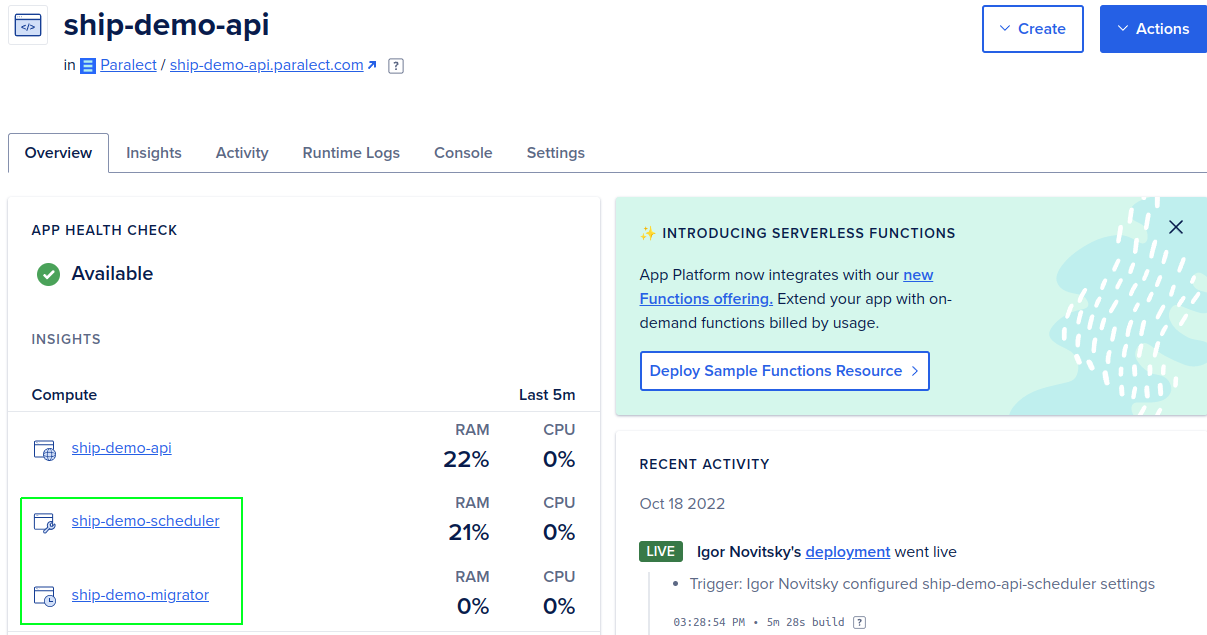 7. Navigate to Application Spec `(settings tab)`. Change the `dockerfile_path` variable to files with migrator and scheduler.
Migrator is placed in the `jobs` section. You can also find it by name of the resource. The scheduler is placed in the `workers` section.
To deploy your application in a monorepo, it’s essential to modify the `source_dir` parameter to the root directory.
This adjustment is necessary to ensure the correct configuration and operation of the applications within the monorepo.
7. Navigate to Application Spec `(settings tab)`. Change the `dockerfile_path` variable to files with migrator and scheduler.
Migrator is placed in the `jobs` section. You can also find it by name of the resource. The scheduler is placed in the `workers` section.
To deploy your application in a monorepo, it’s essential to modify the `source_dir` parameter to the root directory.
This adjustment is necessary to ensure the correct configuration and operation of the applications within the monorepo.
 ## Logging (optional)
### Build-in
Digital Ocean has built-in logs in raw format. It will gather all data that your apps will produce.
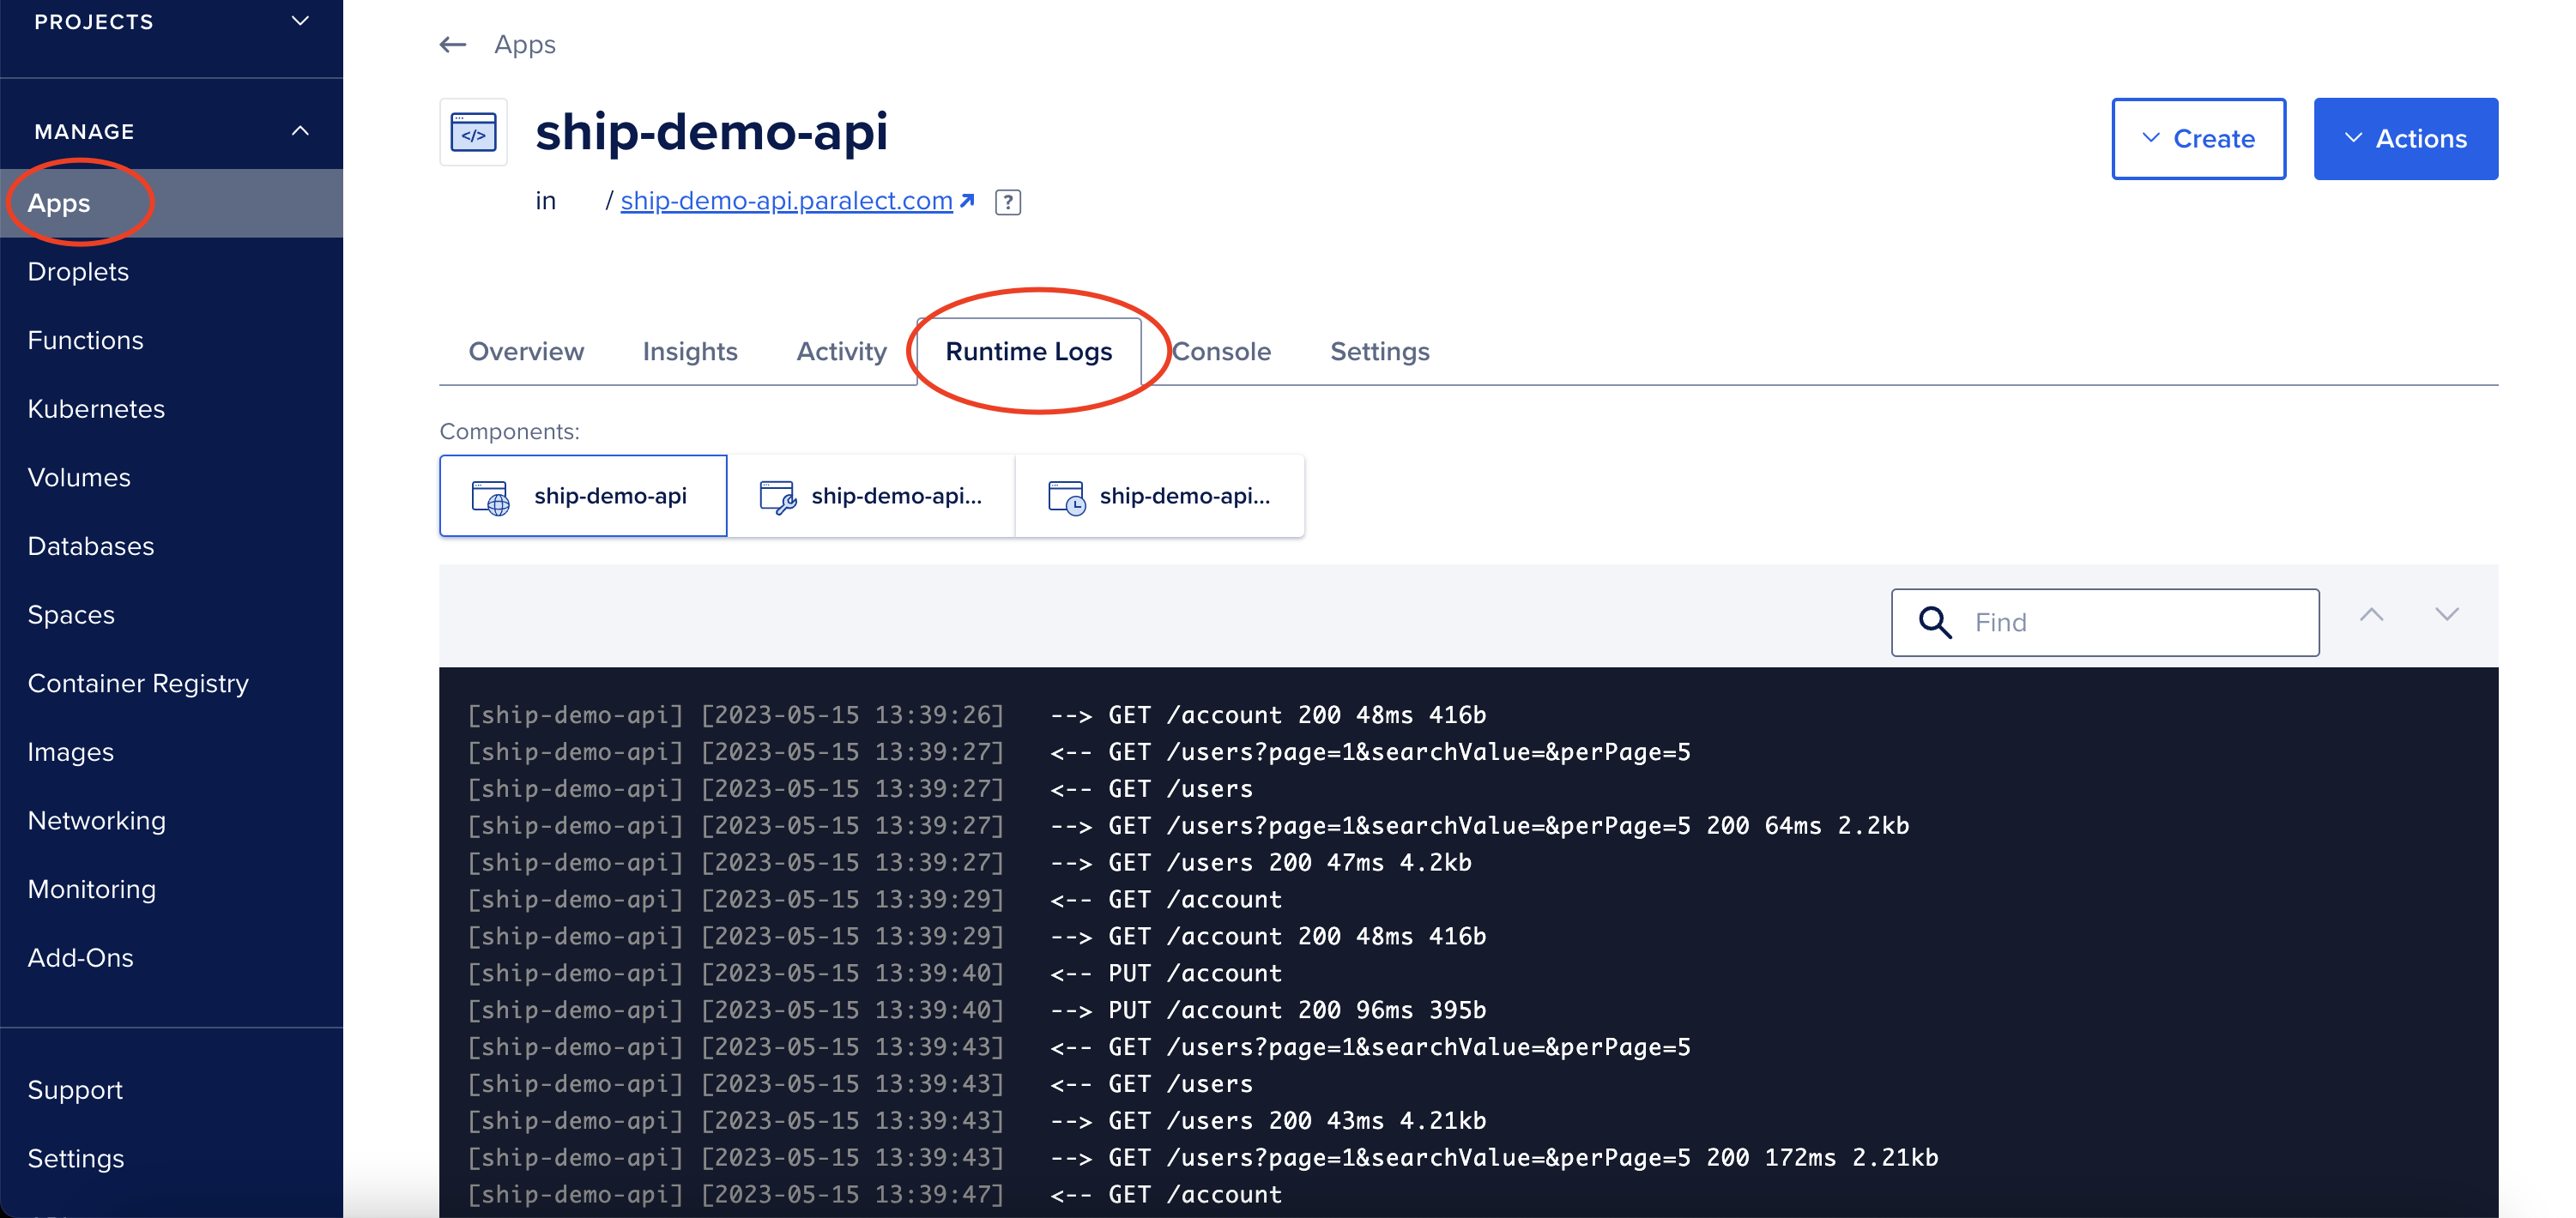
In order to view them, follow these steps:
1. Log in to your Digital Ocean account.
2. Click on the Apps tab in the left-hand navigation menu.
3. Click on the name of the app you want to view the logs for.
4. Click on the Runtime Logs tab in the app dashboard.
5. You will see a list of logs for different components of your app. Click on the component you want to view the logs for.
6. You can filter the logs by time, severity, and component. Use the drop-down menus provided to select your filter criteria.
7. You can also search for specific keywords in the logs by using the search bar at the top of the page.
## Logging (optional)
### Build-in
Digital Ocean has built-in logs in raw format. It will gather all data that your apps will produce.
In order to view them, follow these steps:
1. Log in to your Digital Ocean account.
2. Click on the Apps tab in the left-hand navigation menu.
3. Click on the name of the app you want to view the logs for.
4. Click on the Runtime Logs tab in the app dashboard.
5. You will see a list of logs for different components of your app. Click on the component you want to view the logs for.
6. You can filter the logs by time, severity, and component. Use the drop-down menus provided to select your filter criteria.
7. You can also search for specific keywords in the logs by using the search bar at the top of the page.
 ### Integrations
Currently, Digital Ocean Apps supports only 3 integrations: [PaperTrail](https://marketplace.digitalocean.com/add-ons/papertrail), [Logtail](https://marketplace.digitalocean.com/add-ons/logtail) and [Datadog](https://www.datadoghq.com/). You can find detailed instructions on how to set up these logs at this [link](https://docs.digitalocean.com/products/app-platform/how-to/forward-logs/).
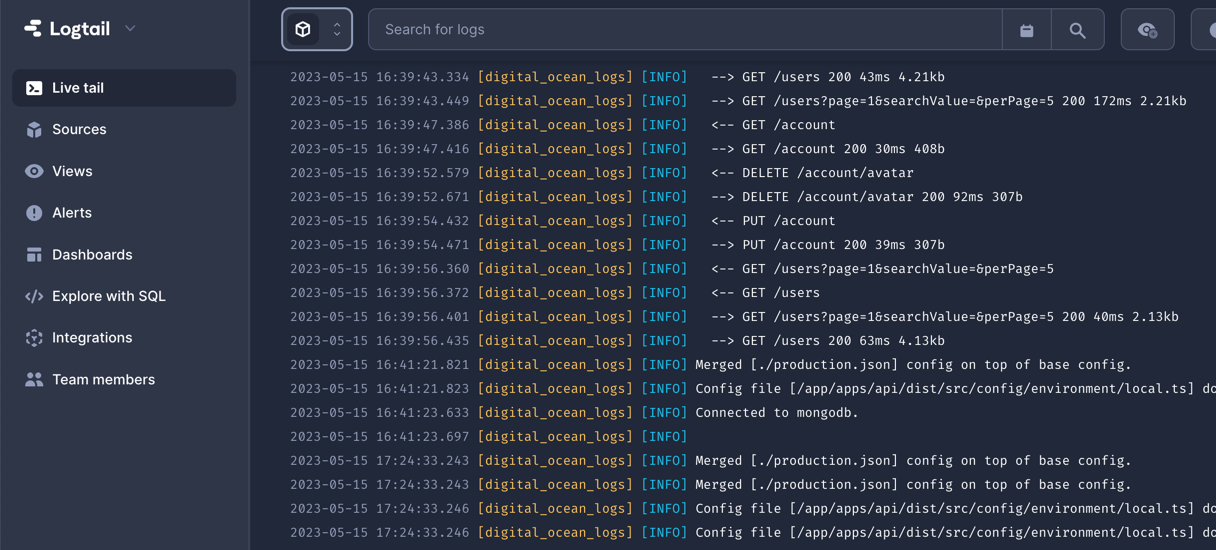
### Example Integration Logtail
To configure Logtail follow these steps:
1. Create account on Logtail
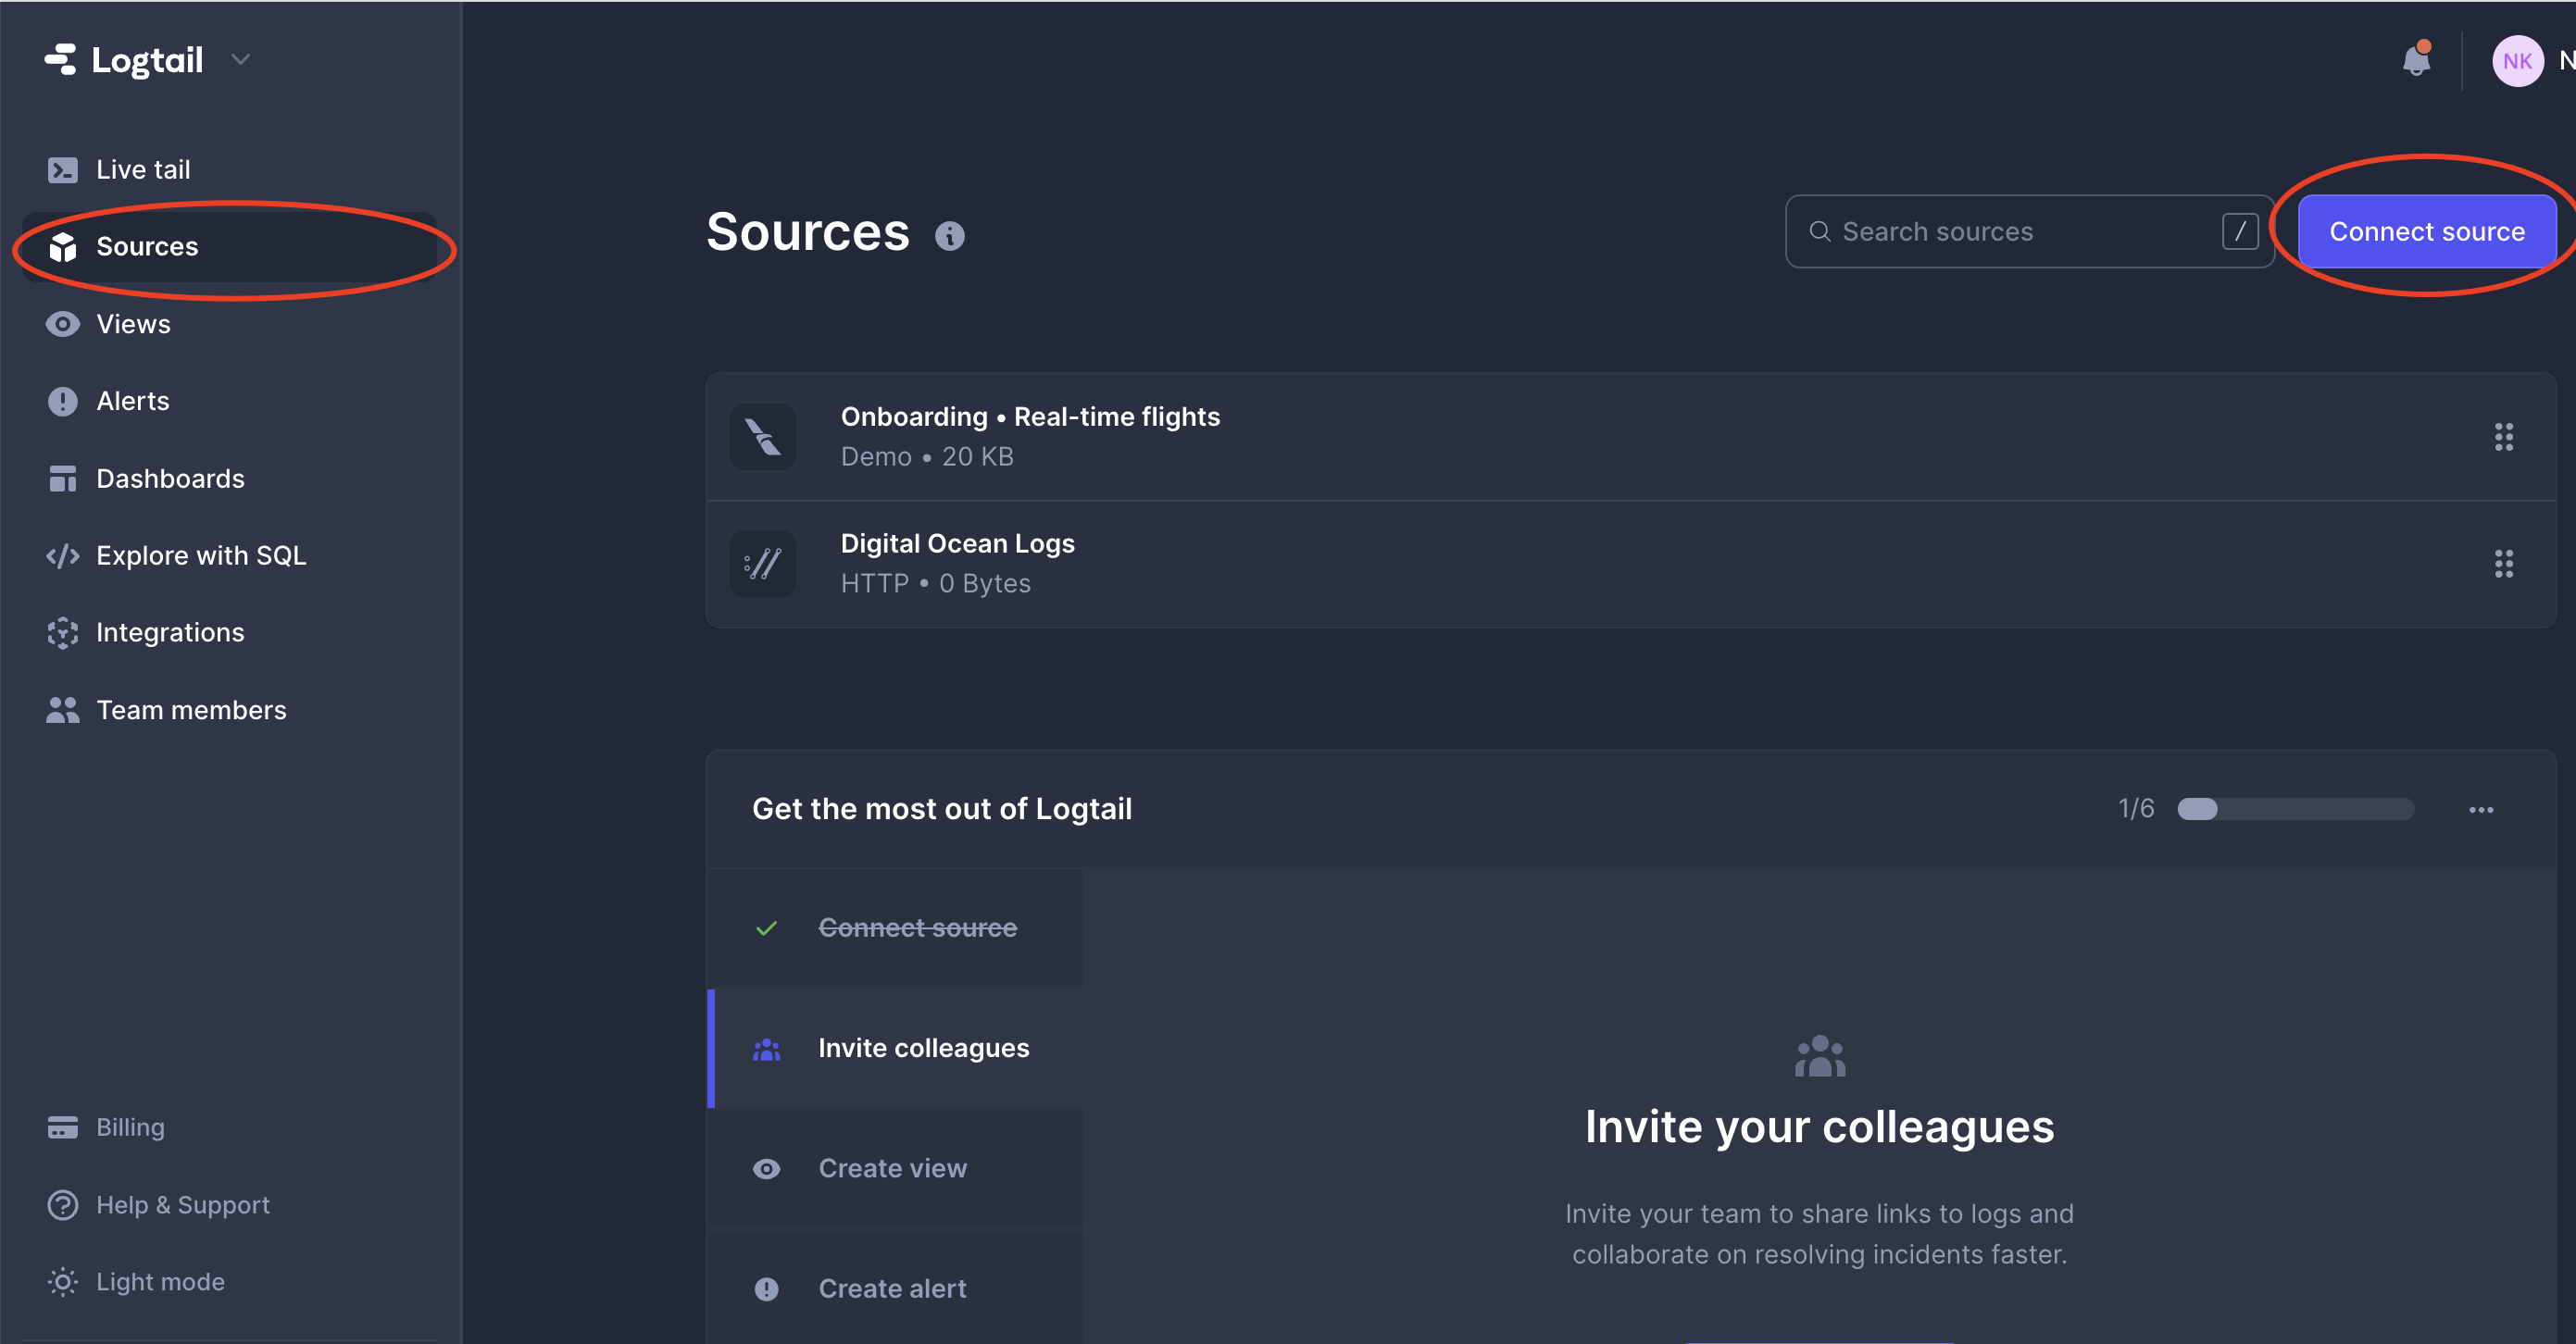
2. Open Sources on the left sidebar.
3. Create new source by clicking "Connect source" button
### Integrations
Currently, Digital Ocean Apps supports only 3 integrations: [PaperTrail](https://marketplace.digitalocean.com/add-ons/papertrail), [Logtail](https://marketplace.digitalocean.com/add-ons/logtail) and [Datadog](https://www.datadoghq.com/). You can find detailed instructions on how to set up these logs at this [link](https://docs.digitalocean.com/products/app-platform/how-to/forward-logs/).
### Example Integration Logtail
To configure Logtail follow these steps:
1. Create account on Logtail
2. Open Sources on the left sidebar.
3. Create new source by clicking "Connect source" button
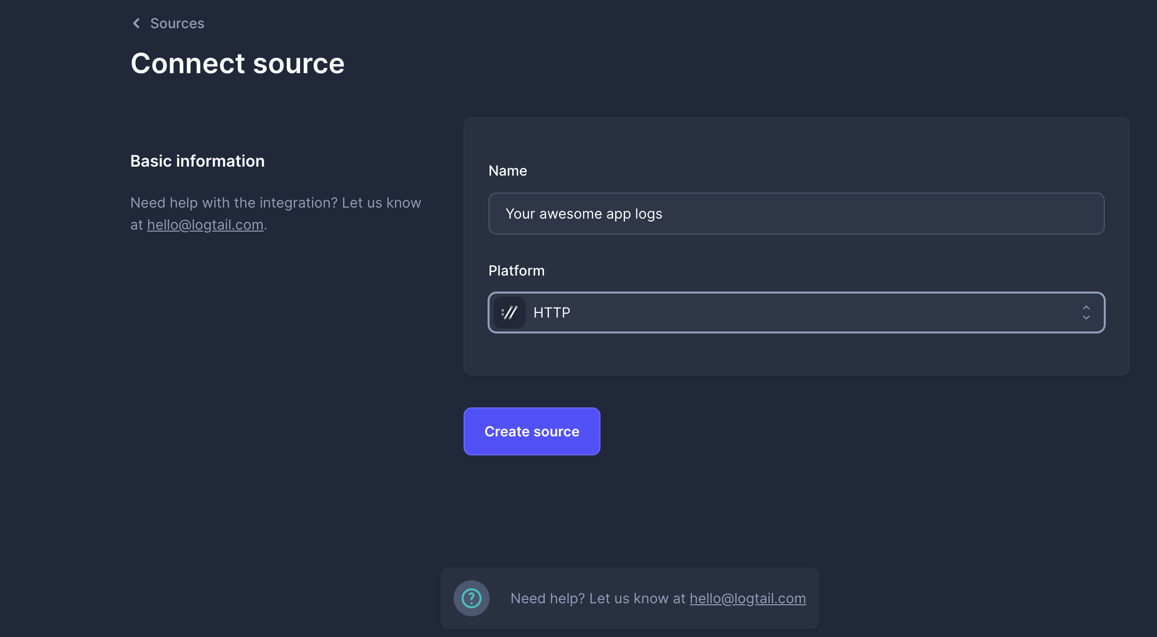
 4. Select HTTP source and specify name for this connection
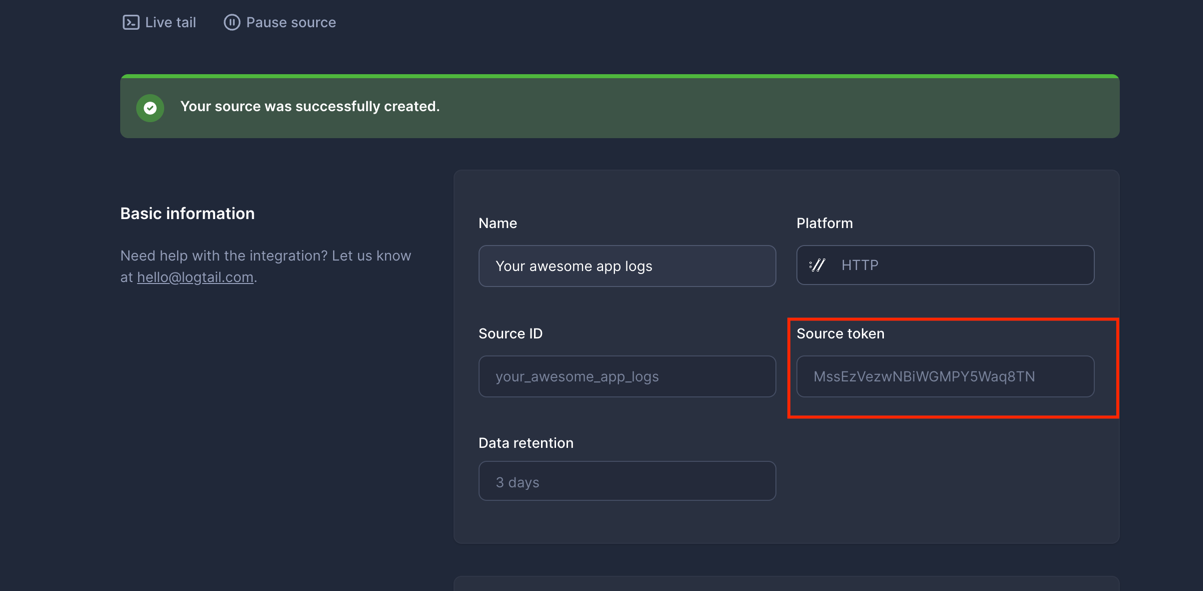
 5. Copy source token
 6. Open Digital Ocean Apps
7. Select Settings tab for your application
6. Open Digital Ocean Apps
7. Select Settings tab for your application
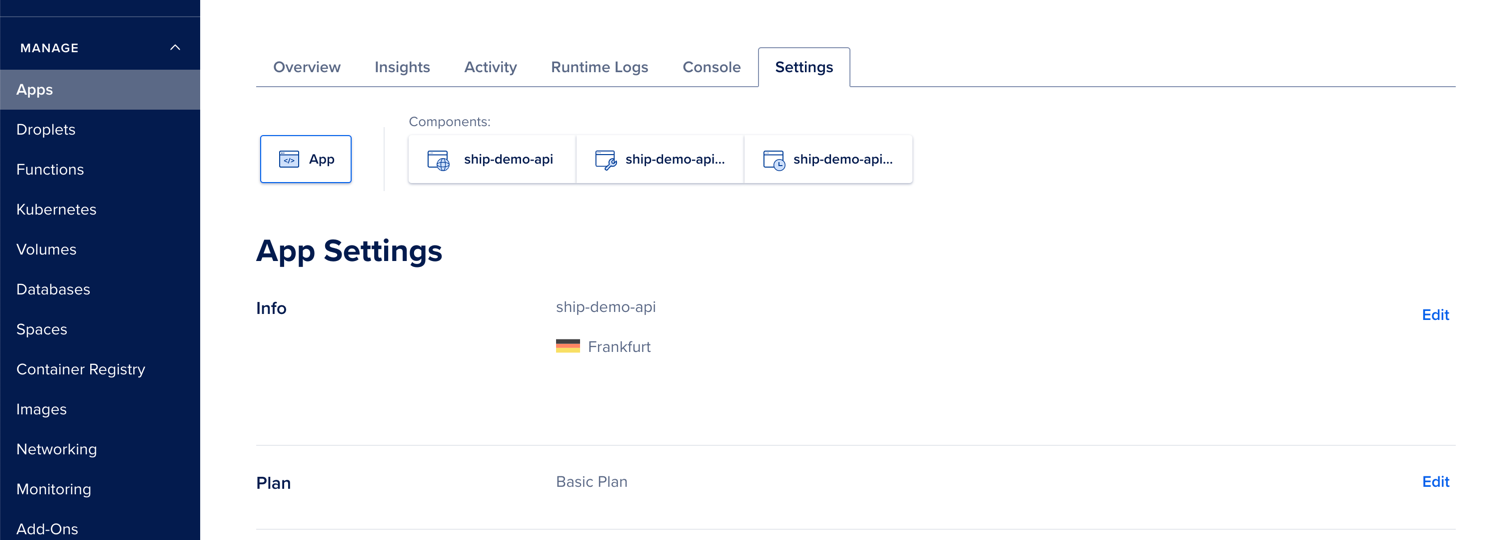 8. Select Log Forwarding and then press "Add Destination"
 9. Fill information with token that we retrieved from Logtail
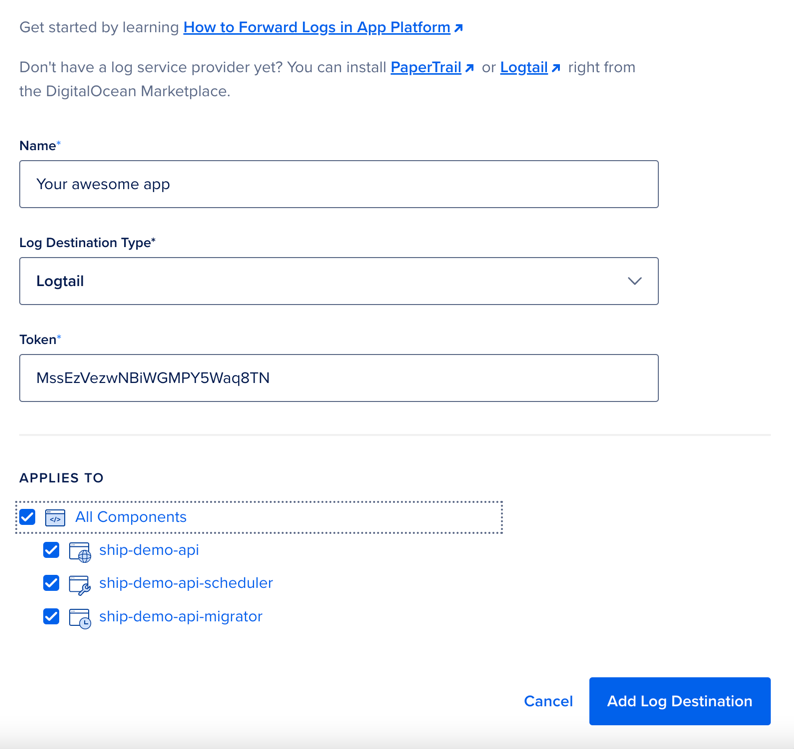 10. That's it! In couple minutes your app will send the latest logs to Logtail