> ## Documentation Index
> Fetch the complete documentation index at: https://ship-jskiller1404-add-ommiting-private-fields-feature.mintlify.site/llms.txt
> Use this file to discover all available pages before exploring further.
# Stripe account
## Api keys
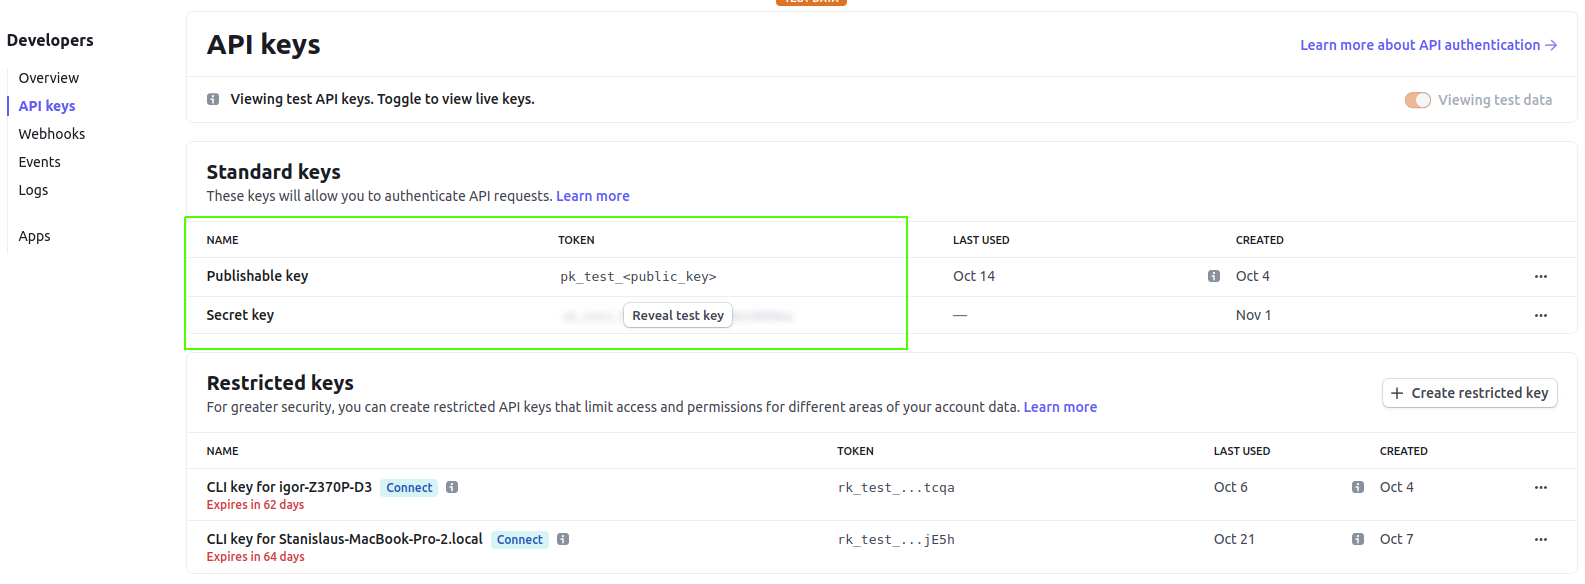
Navigate to the `Developers` tab [link](https://dashboard.stripe.com/test/developers) and select `API keys` in the left sidebar.
Here you can find two keys - public and secret.
Public key is required by the client-side stripe library (for example - a payment form to purchase a product or add a card for later use).
(Ship uses client-side stripe library to display add card form)
Secret key is used to interract with stripe using application's server.
Copy them and store in web's (public key) configs and server's configs (secret key)
 ## Webhooks
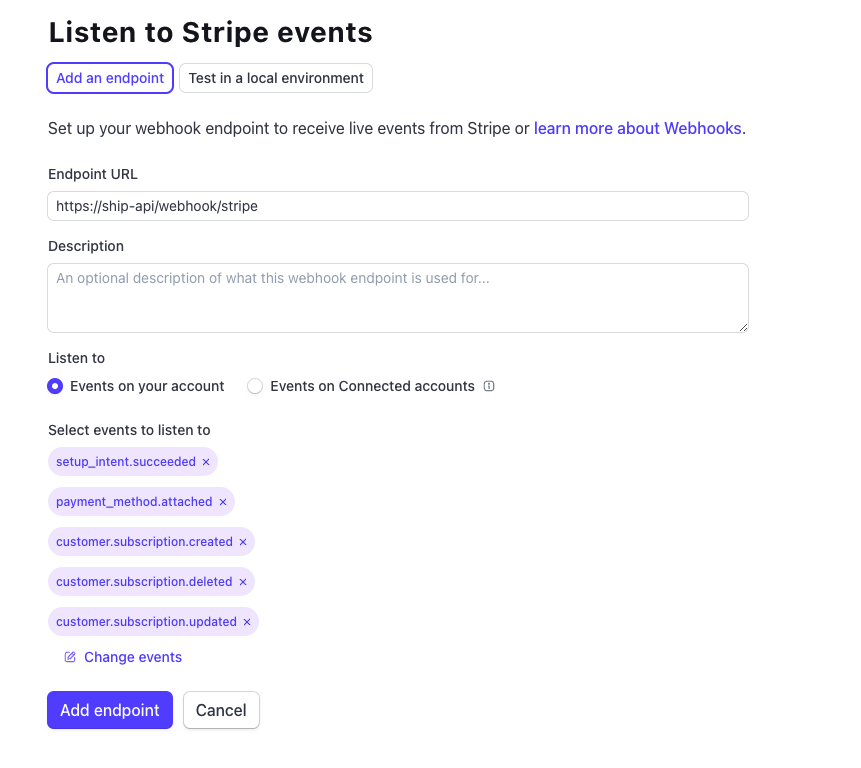
Webhooks allow stripe to communicate with your server by sending plain POST requests on every event, that happens on stripe. During adding a new webhook you can select which events should be sent to the server.
Start creating a new webhook by clicking on the `+ Add endpoint` button.
Type URL of the endpoint, responsible for listening for the stripe events (Default ship URL is `HTTPS:///webhook/stripe`).
Add events that you want to listen to. Ship listens for the following events -
* `setup_intent.succeeded`
Triggers when a customer adds a new card using stripe form on the web application.
* `customer.subscription.create`
Triggers when a customer's subscription created
* `payment_method.attached`
Triggers when a customer adds a new card during the payment process on stripe checkout page
* `customer.subscription.updated`
Triggers when a customer's subscription changes
* `customer.subscription.deleted`
Triggers when a customer's subscription is deleted.
## Webhooks
Webhooks allow stripe to communicate with your server by sending plain POST requests on every event, that happens on stripe. During adding a new webhook you can select which events should be sent to the server.
Start creating a new webhook by clicking on the `+ Add endpoint` button.
Type URL of the endpoint, responsible for listening for the stripe events (Default ship URL is `HTTPS:///webhook/stripe`).
Add events that you want to listen to. Ship listens for the following events -
* `setup_intent.succeeded`
Triggers when a customer adds a new card using stripe form on the web application.
* `customer.subscription.create`
Triggers when a customer's subscription created
* `payment_method.attached`
Triggers when a customer adds a new card during the payment process on stripe checkout page
* `customer.subscription.updated`
Triggers when a customer's subscription changes
* `customer.subscription.deleted`
Triggers when a customer's subscription is deleted.
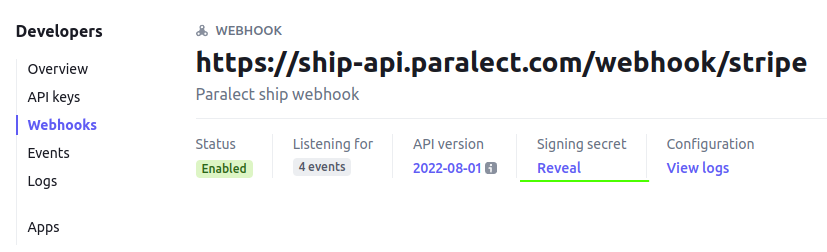
 Navigate to the created webhook and reveal webhook secret. Copy this value to API config's
 For local development, you can use Stripe CLI to forward events on your localhost - [link](https://stripe.com/docs/stripe-cli)
## Subscription products
Navigate to the product tab [link](https://dashboard.stripe.com/test/products) and press the Button `+ Add product` in the top right corner.
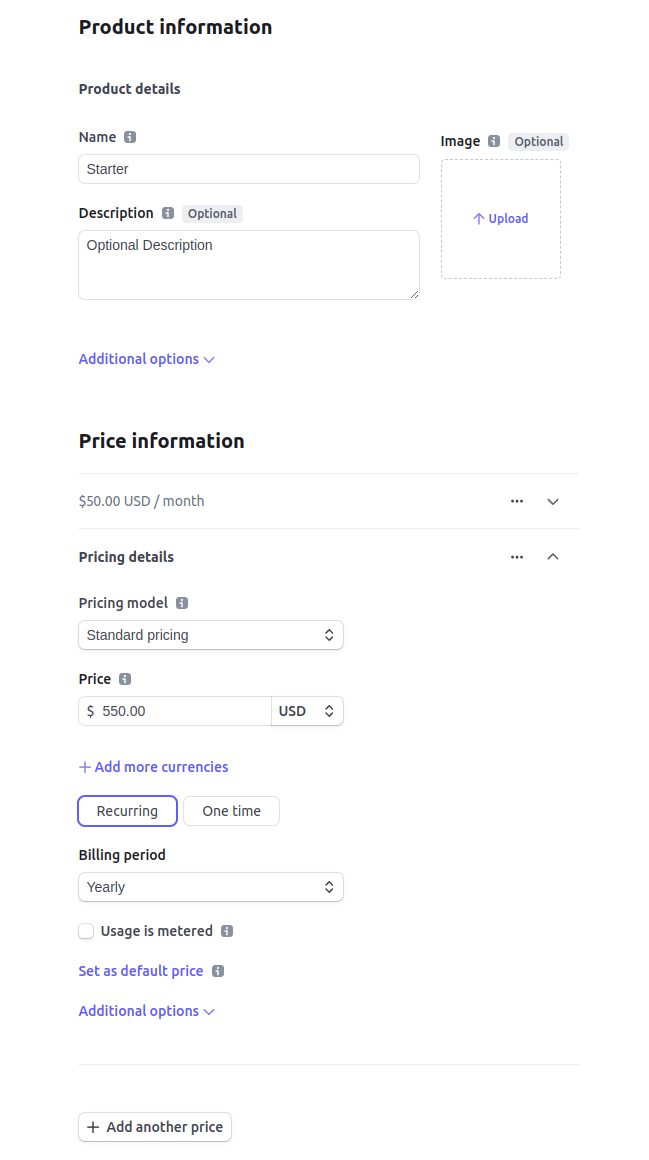
Add product name and, optionally, description and image.
Next, add price information. To create a basic subscription with recurring payments, select pricing model `Standard pricing`, add price and currency, select `Recurring` option below the price, and select Billing period.
Stripe allows to setup several prices for product. Ship uses subscripti ons with two payment periods - monthly and yearly, therefore stripe product should has two prices. Click the button `+ Add another price` at the bottom and fill in the second form. Make sure prices have `Monthly` and `Yearly` billing periods
For local development, you can use Stripe CLI to forward events on your localhost - [link](https://stripe.com/docs/stripe-cli)
## Subscription products
Navigate to the product tab [link](https://dashboard.stripe.com/test/products) and press the Button `+ Add product` in the top right corner.
Add product name and, optionally, description and image.
Next, add price information. To create a basic subscription with recurring payments, select pricing model `Standard pricing`, add price and currency, select `Recurring` option below the price, and select Billing period.
Stripe allows to setup several prices for product. Ship uses subscripti ons with two payment periods - monthly and yearly, therefore stripe product should has two prices. Click the button `+ Add another price` at the bottom and fill in the second form. Make sure prices have `Monthly` and `Yearly` billing periods
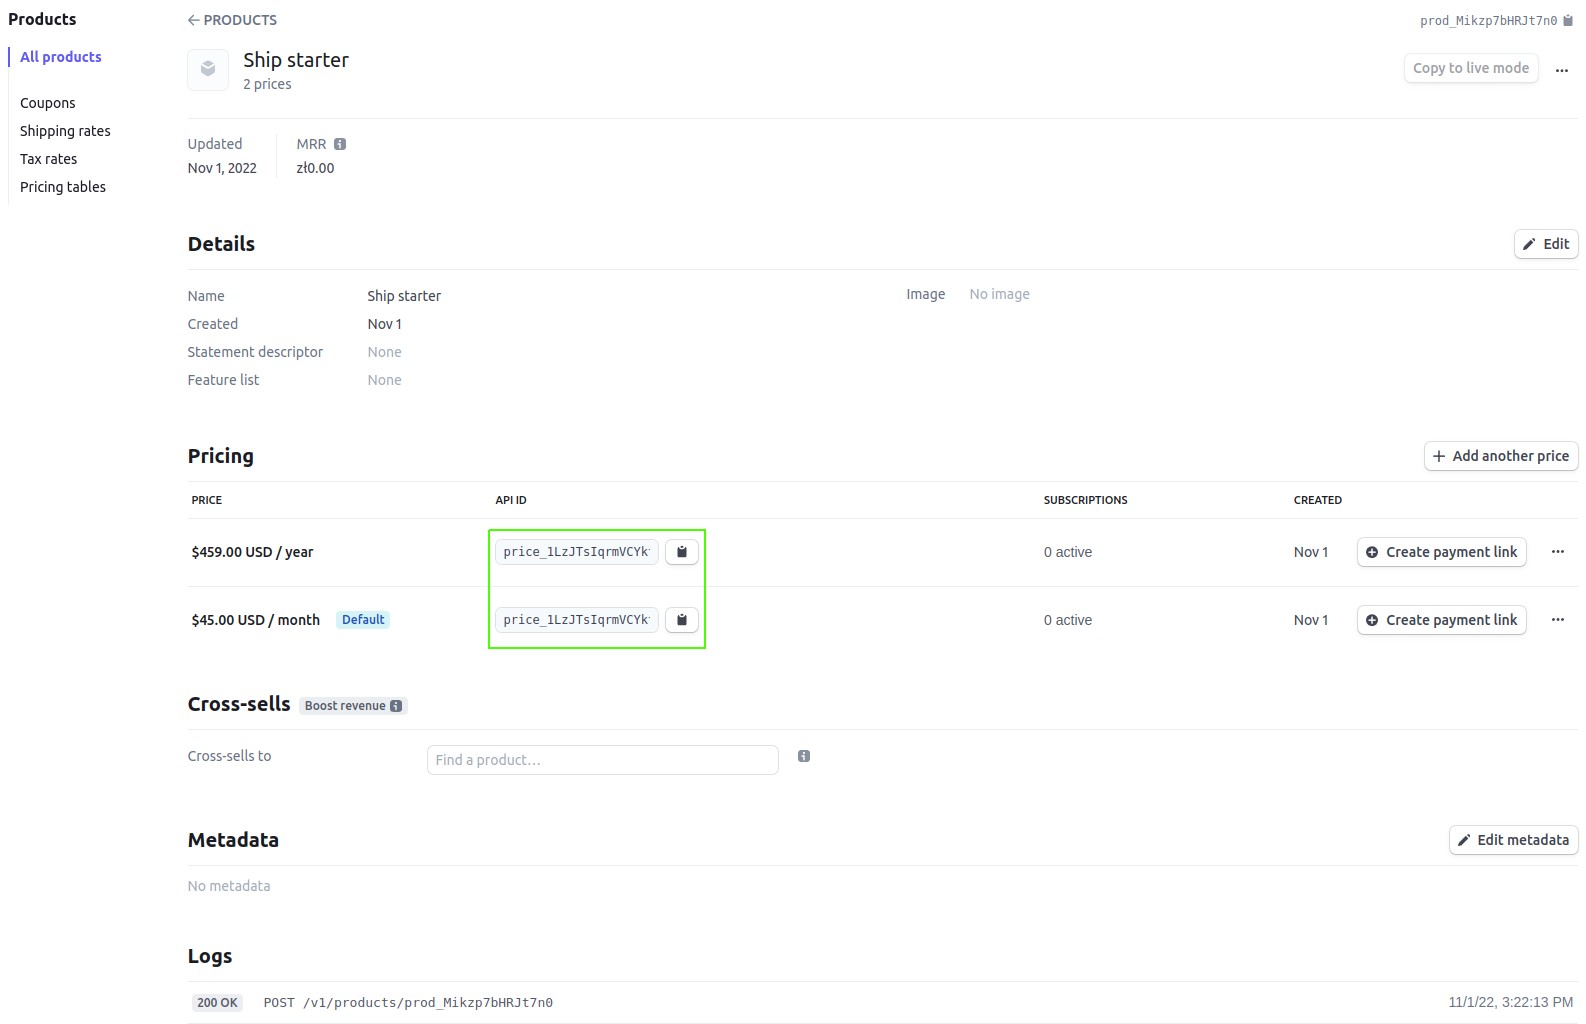
 Open created product detailed view. Here you can find information about prices, logs and events, related to this product.
Purchase operation requires price ids of the product. Copy them and store them in the application's config
Open created product detailed view. Here you can find information about prices, logs and events, related to this product.
Purchase operation requires price ids of the product. Copy them and store them in the application's config