- kubectl - CLI tool for accessing Kubernetes cluster;
- kubectx - CLI tool for easier switching between Kubernetes contexts;
- helm - CLI tool for managing Kubernetes deployments;
- aws-cli - CLI tool for managing AWS resources;
- eksctl - CLI tool for managing EKS clusters;
- k8sec - CLI tool for managing Kubernetes Secrets easily;
How to install k8sec on Linux?
How to install k8sec on Linux?
Setup project
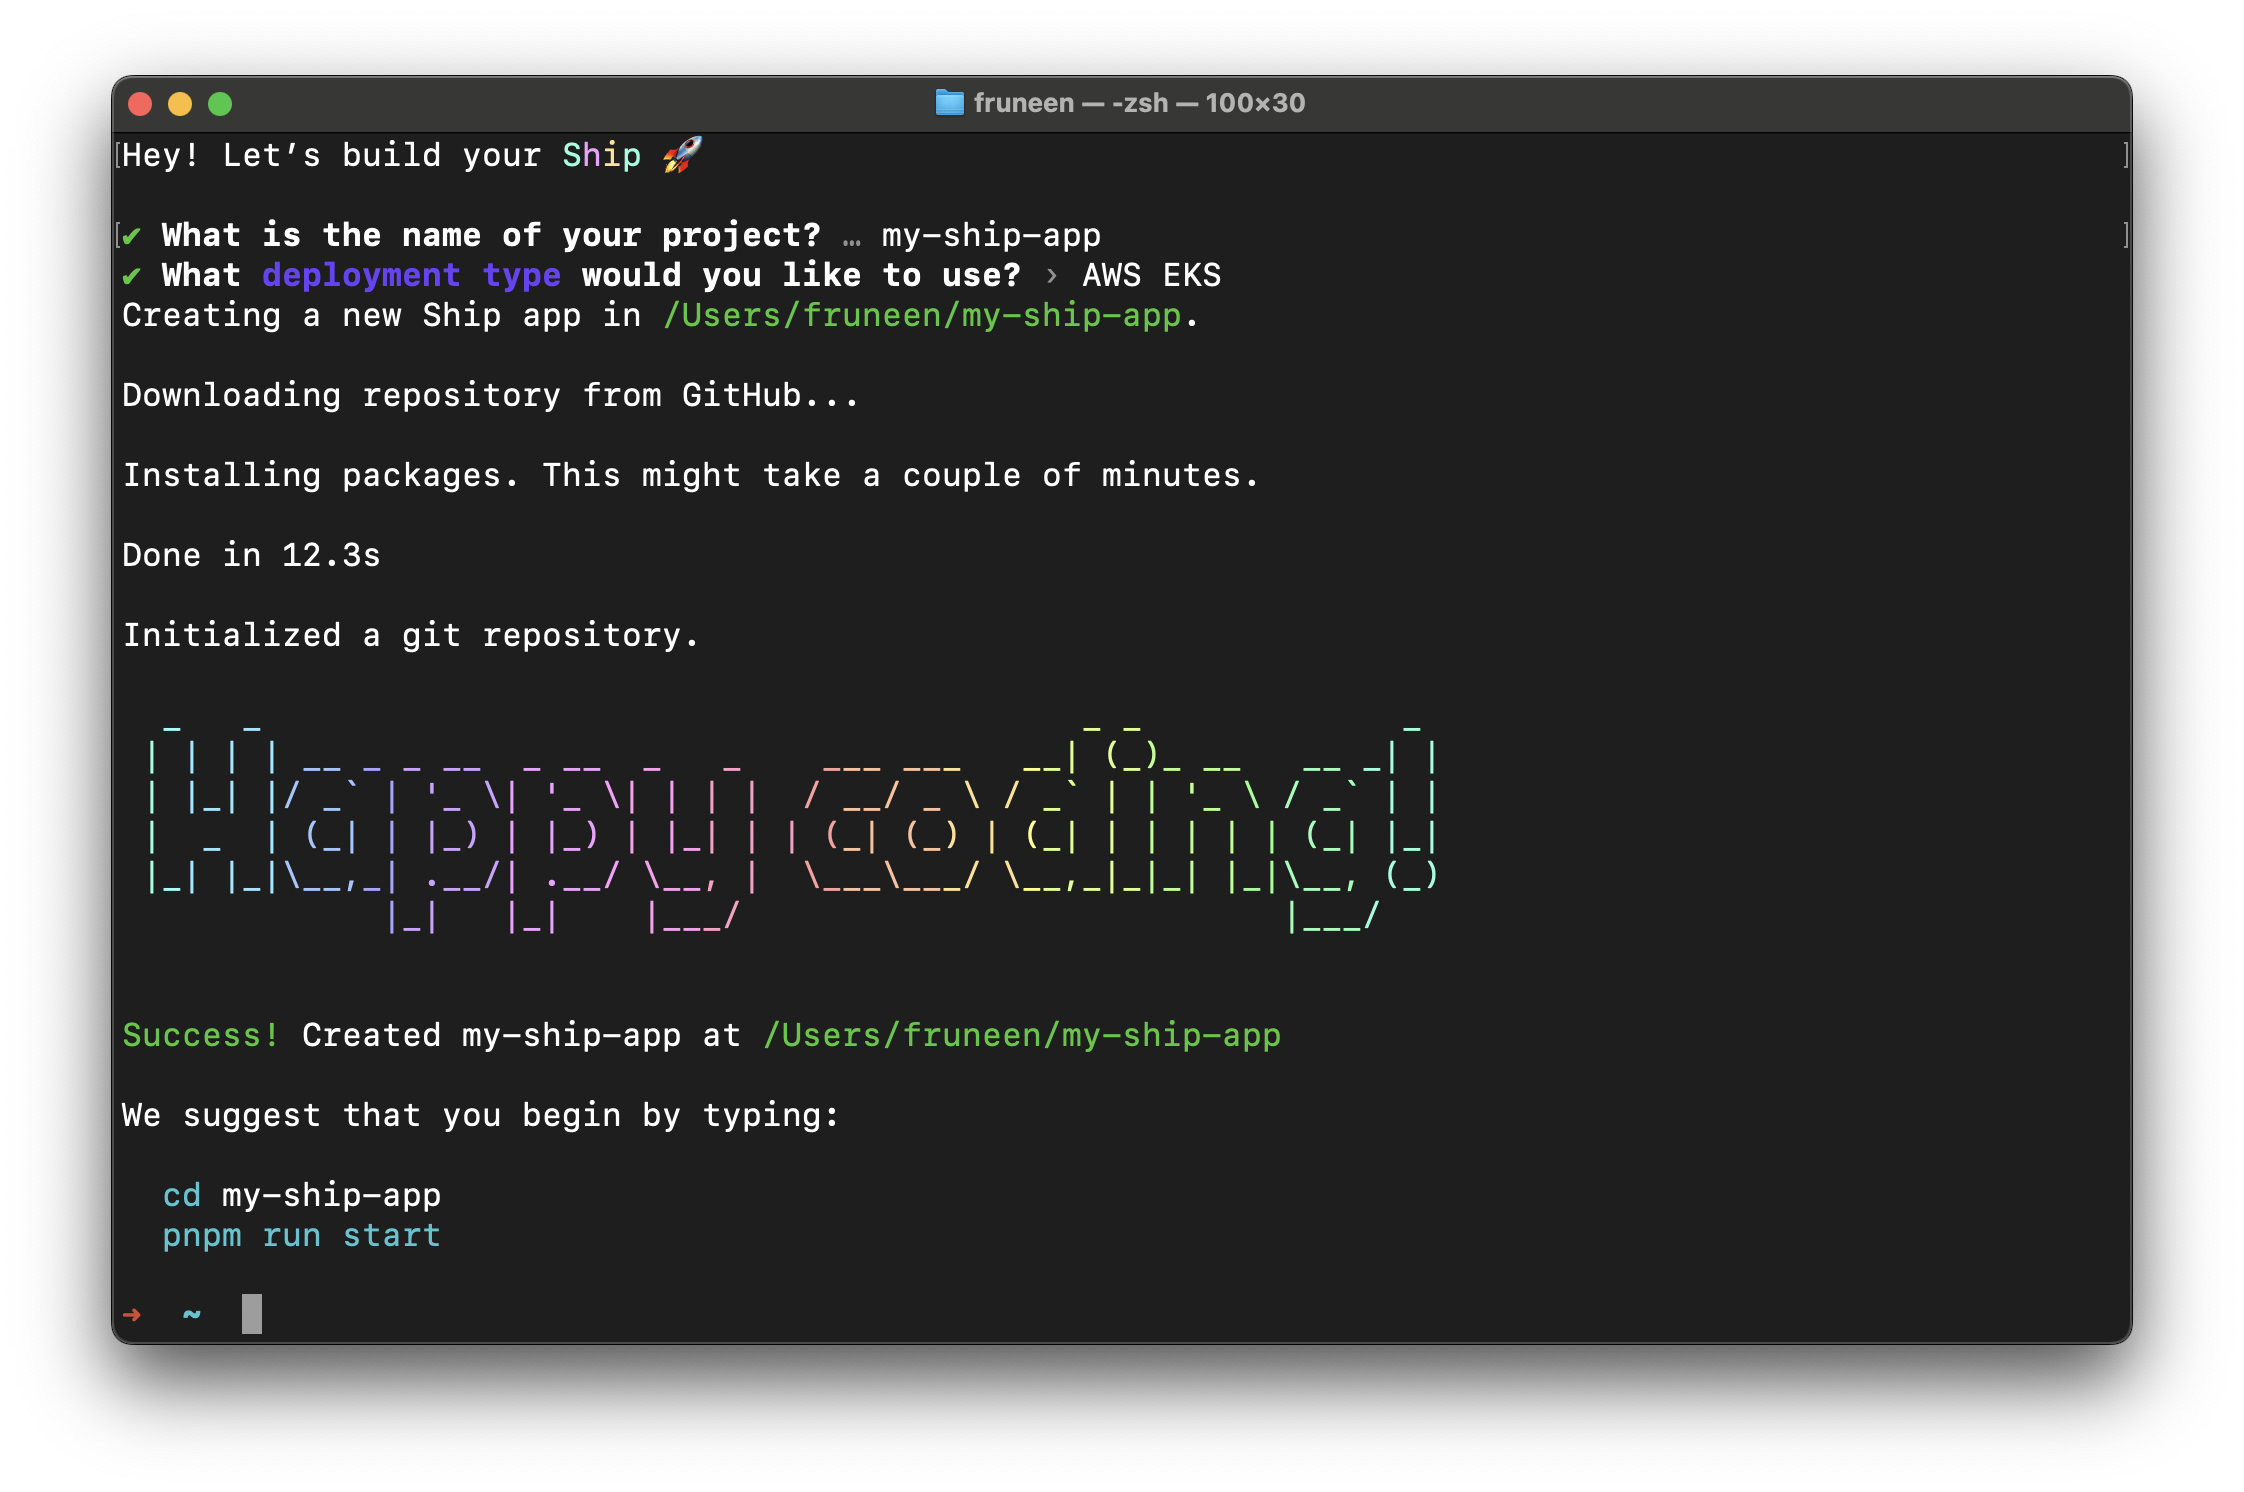
First, initialize your project. Typenpx create-ship-app@latest in the terminal then choose AWS EKS deployment type.
AWS Regions
AWS Regions are physical locations of AWS cluster data centers. Each group of logical data centers calls Availability Zone (AZ). AZs allow the operation of production applications and databases that are more highly available, fault-tolerant and scalable. Now you need to select an AWS region for future use of the services. You can read more about region selection for your workloads here: What to Consider when Selecting a Region for your Workloads. For this deployment guide, we will use the us-east-1 region.Container registry
You need to create private repositories for storing Docker images. The deployment script will upload images to Container Registry during the build step, and Kubernetes will automatically pull these images from Container Registry to run a new version of the service during the deployment step. Now we should create a repository for each service. For Ship, we need to create repositories for the next services: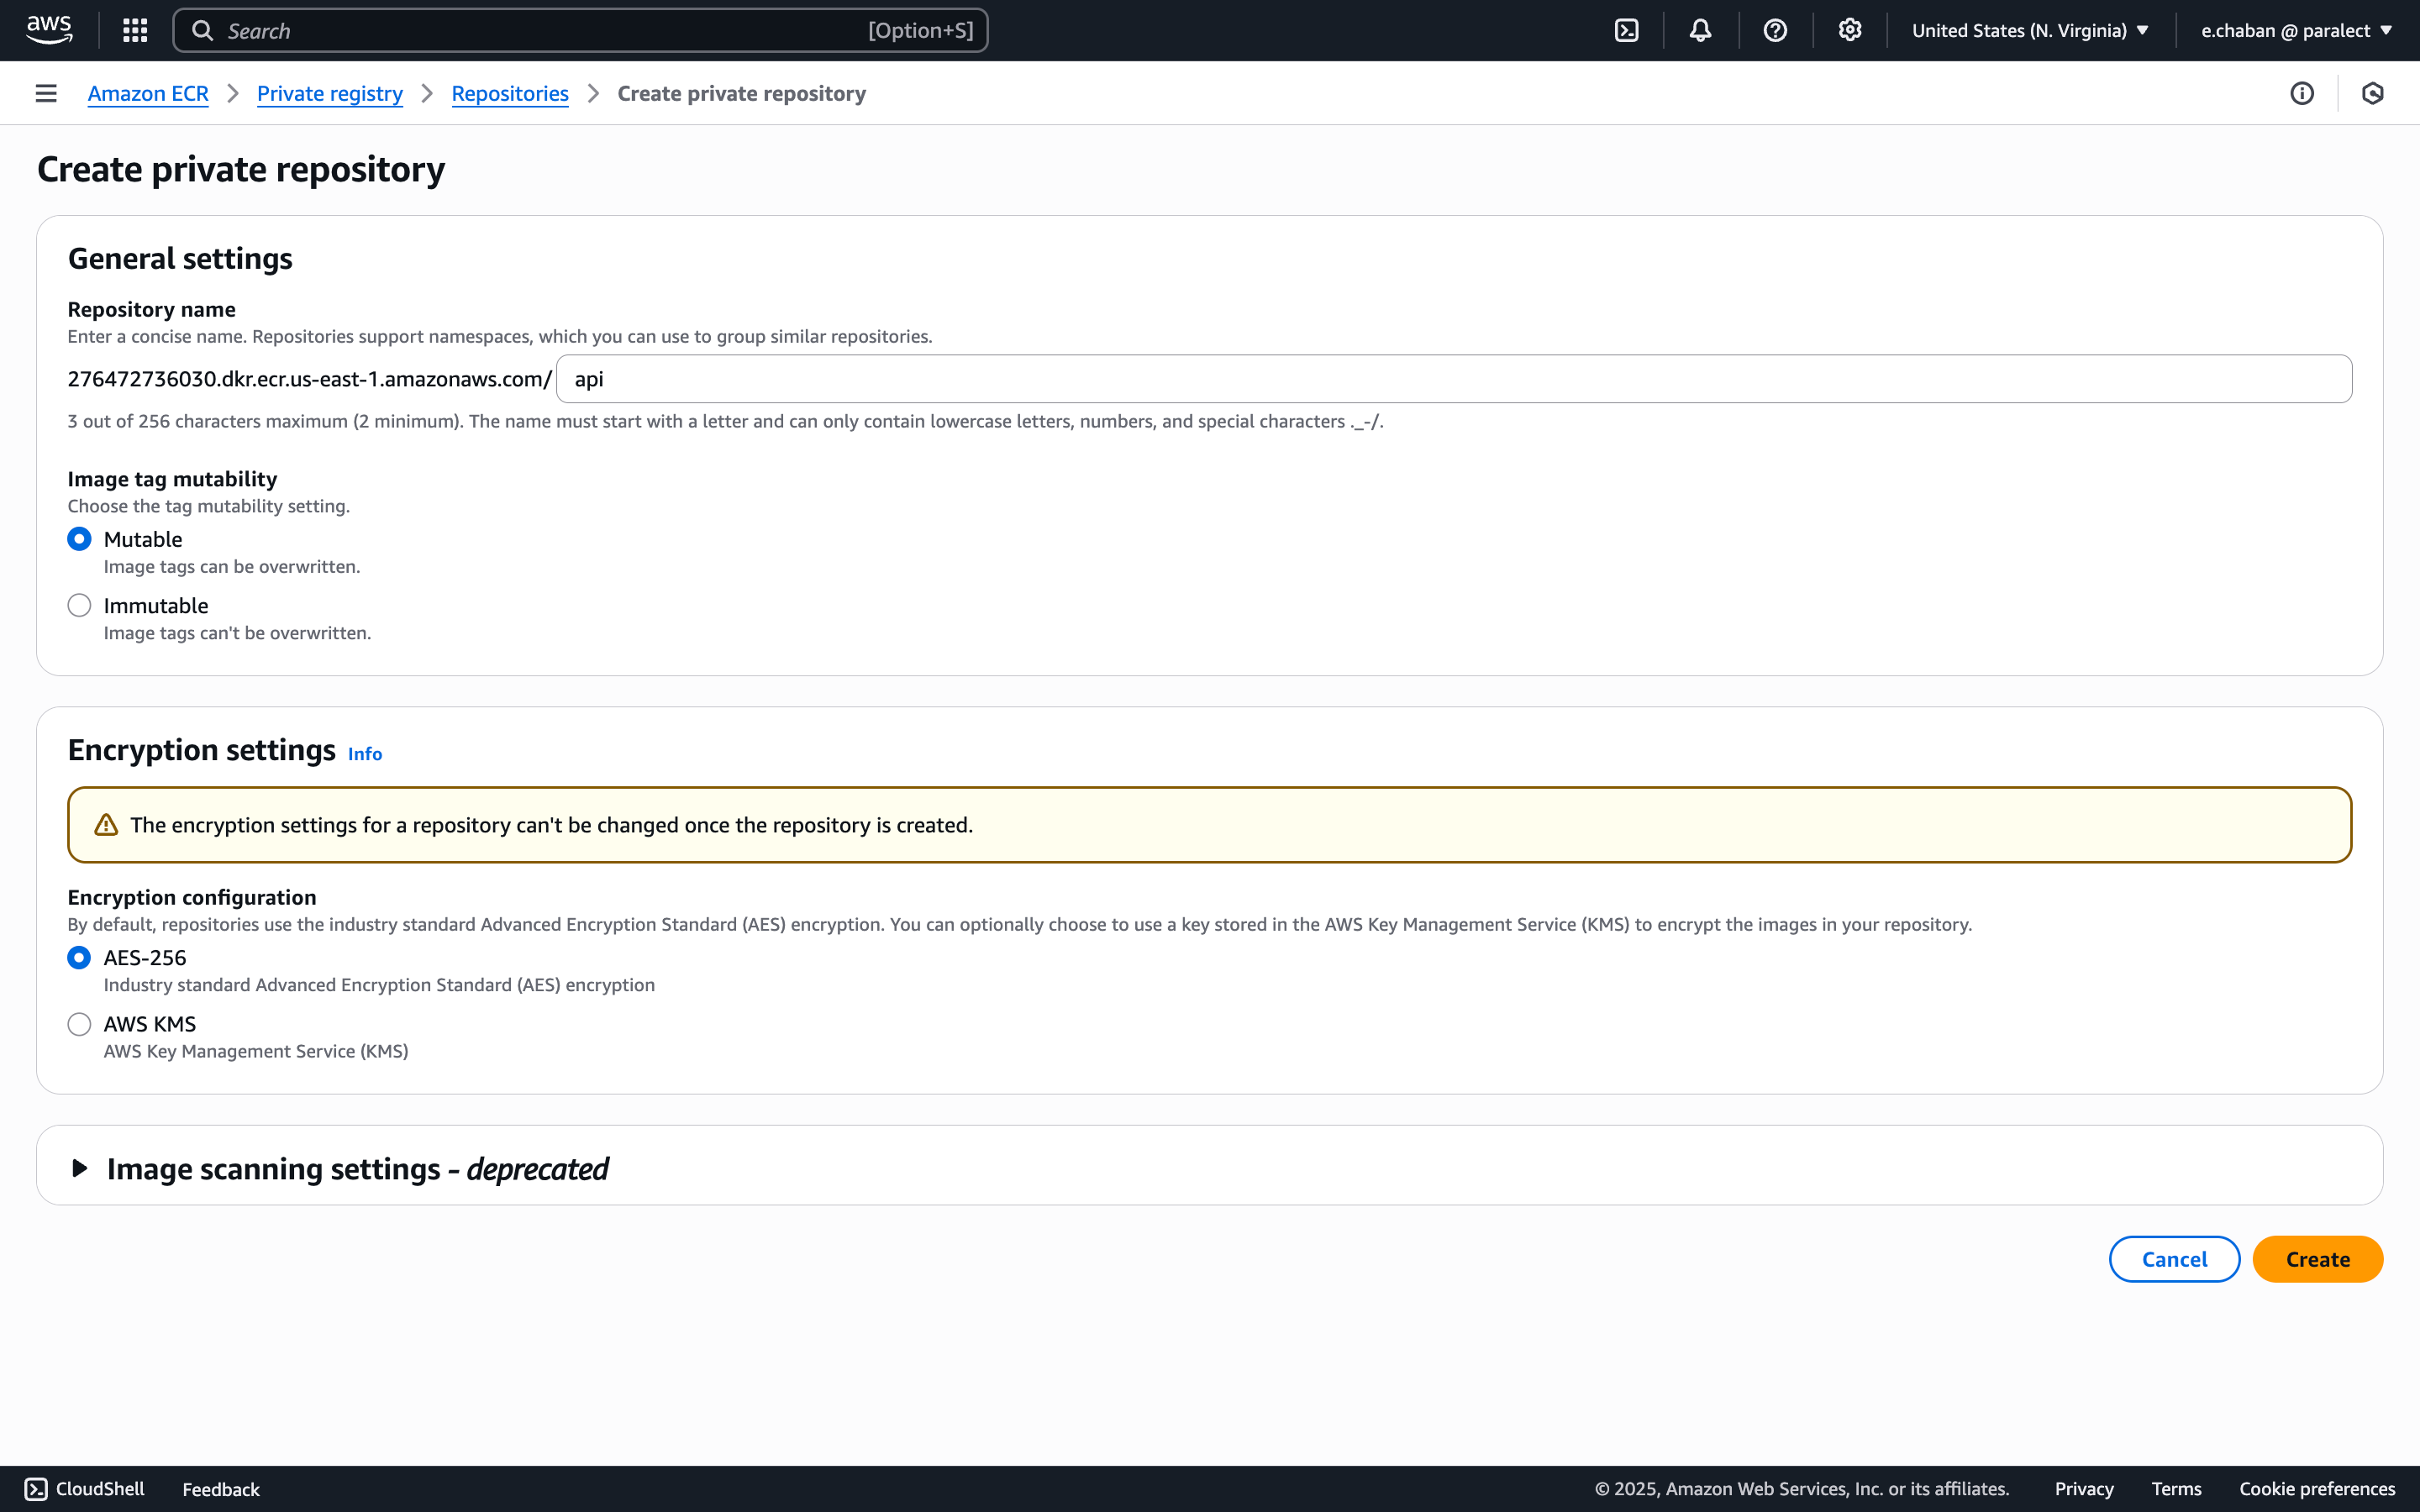
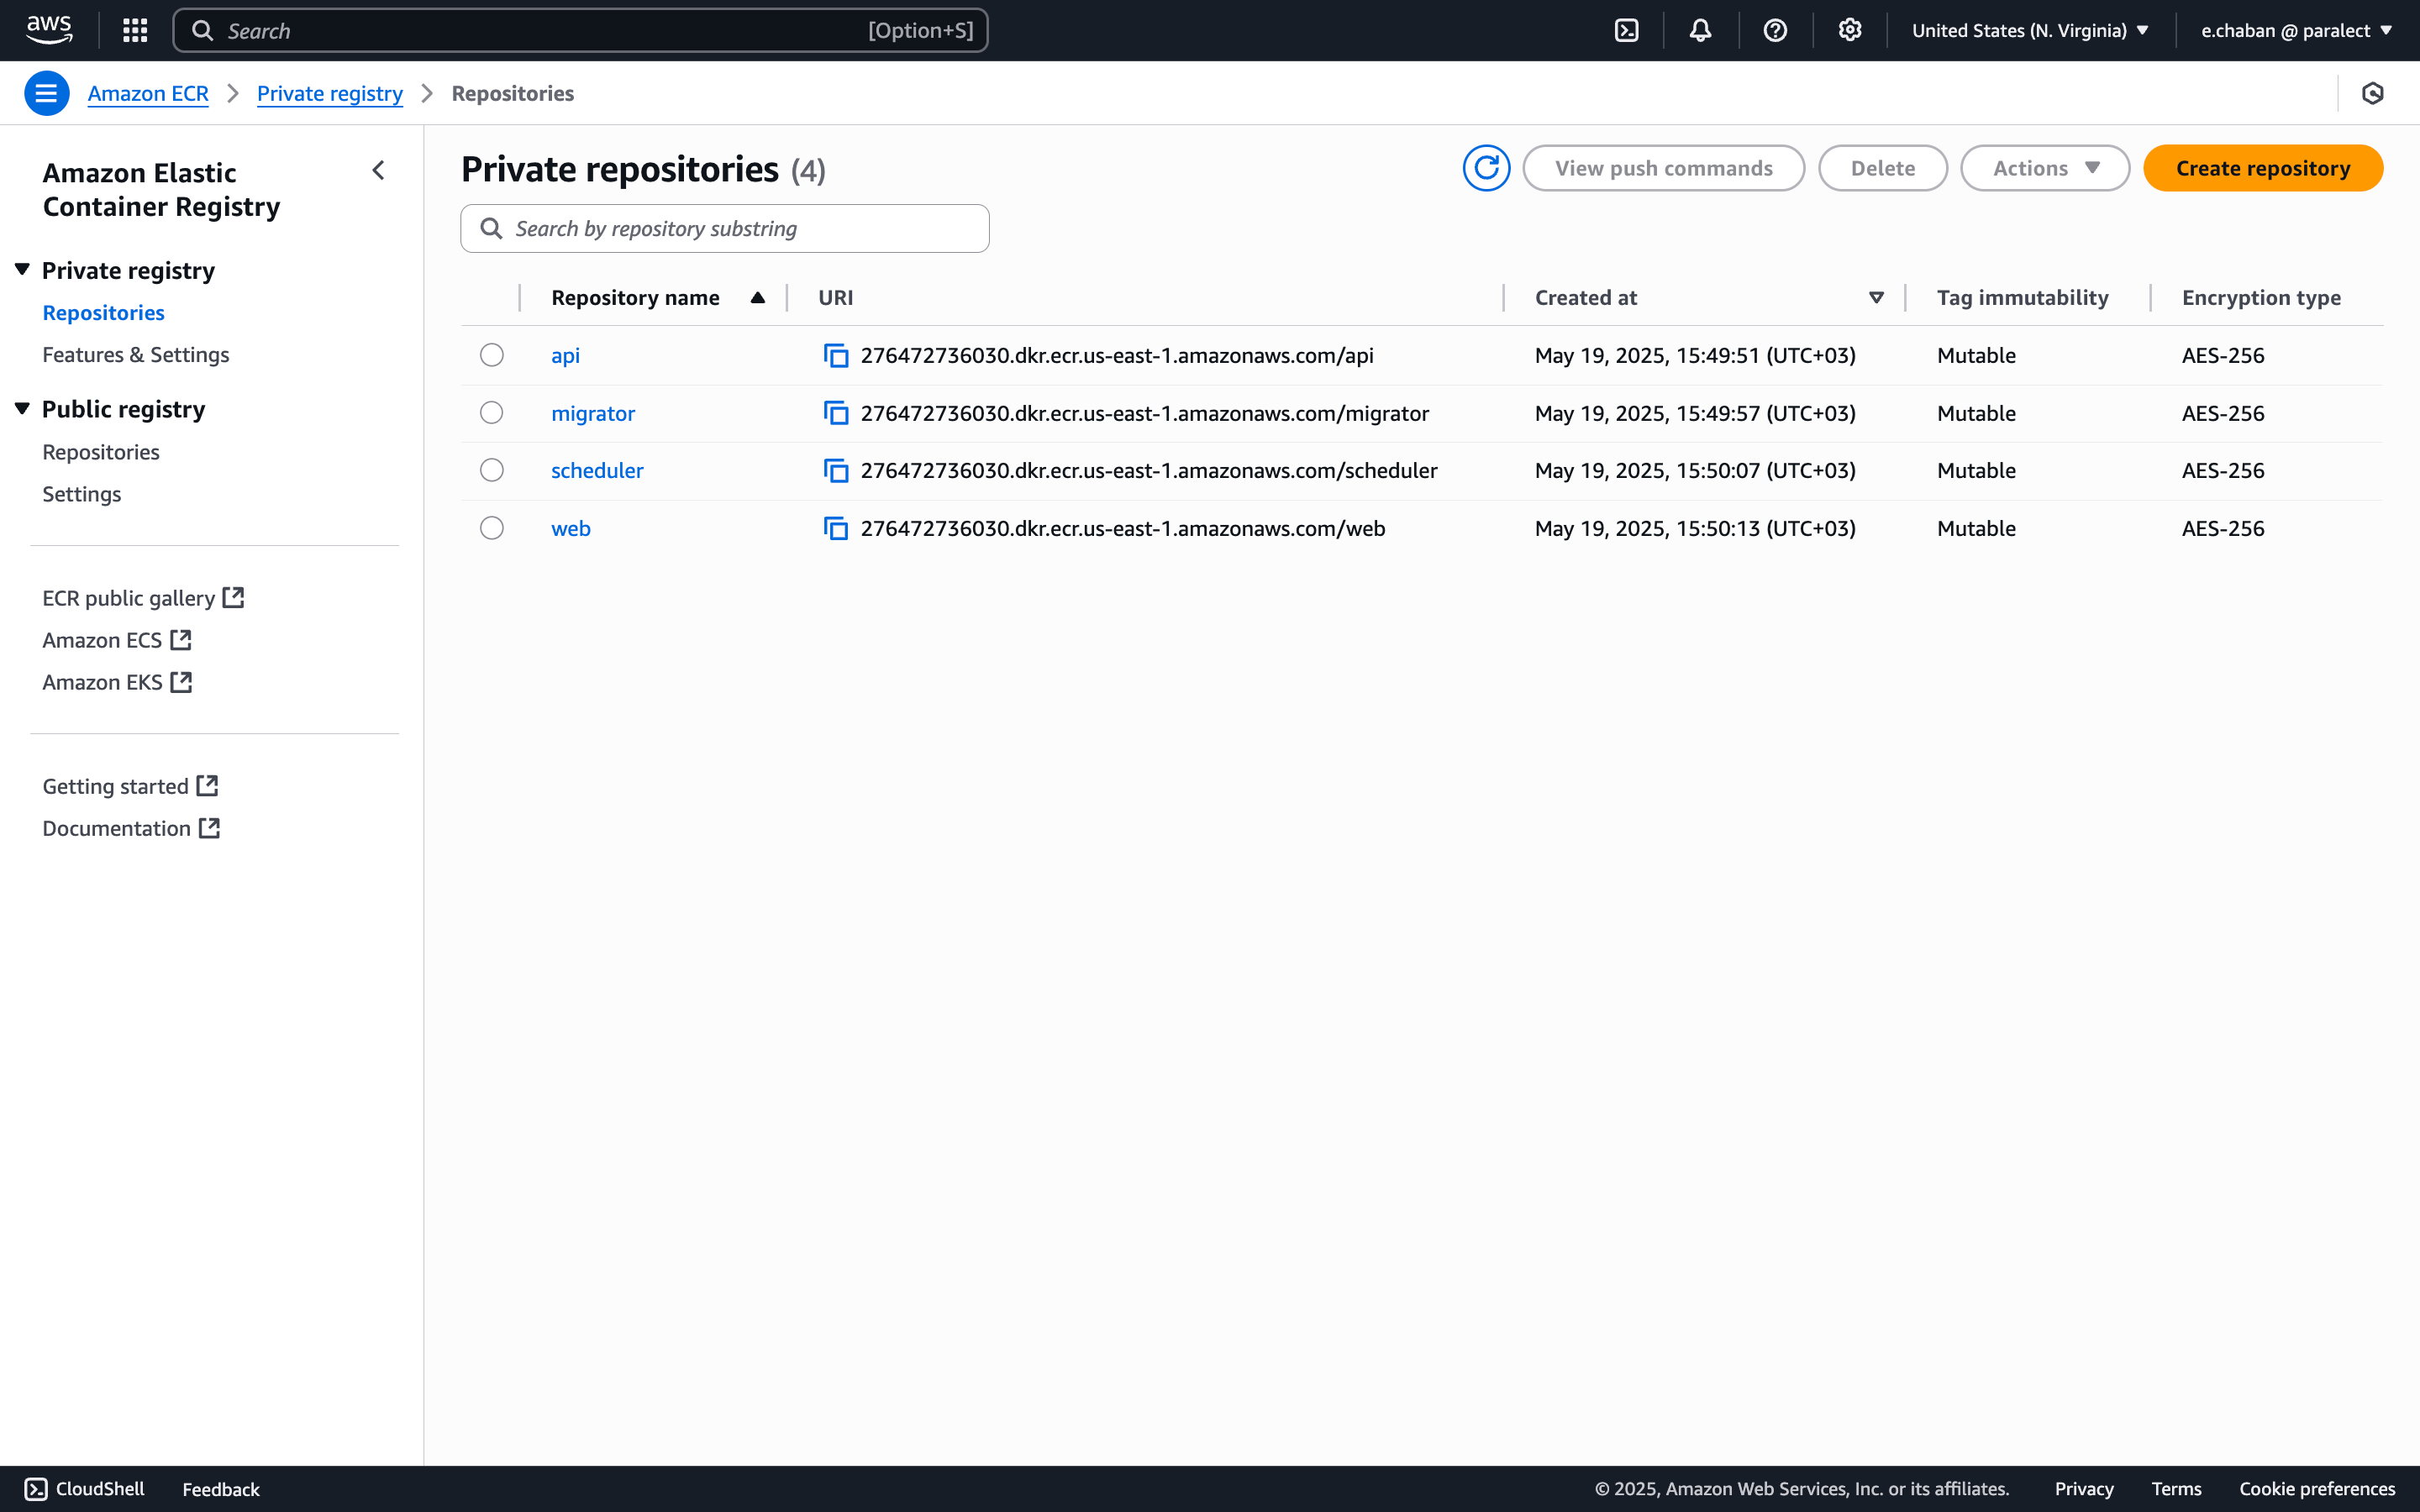
- API - 276472736030.dkr.ecr.us-east-1.amazonaws.com/api;
- Migrator - 276472736030.dkr.ecr.us-east-1.amazonaws.com/migrator;
- Scheduler - 276472736030.dkr.ecr.us-east-1.amazonaws.com/scheduler;
- Web - 276472736030.dkr.ecr.us-east-1.amazonaws.com/web;
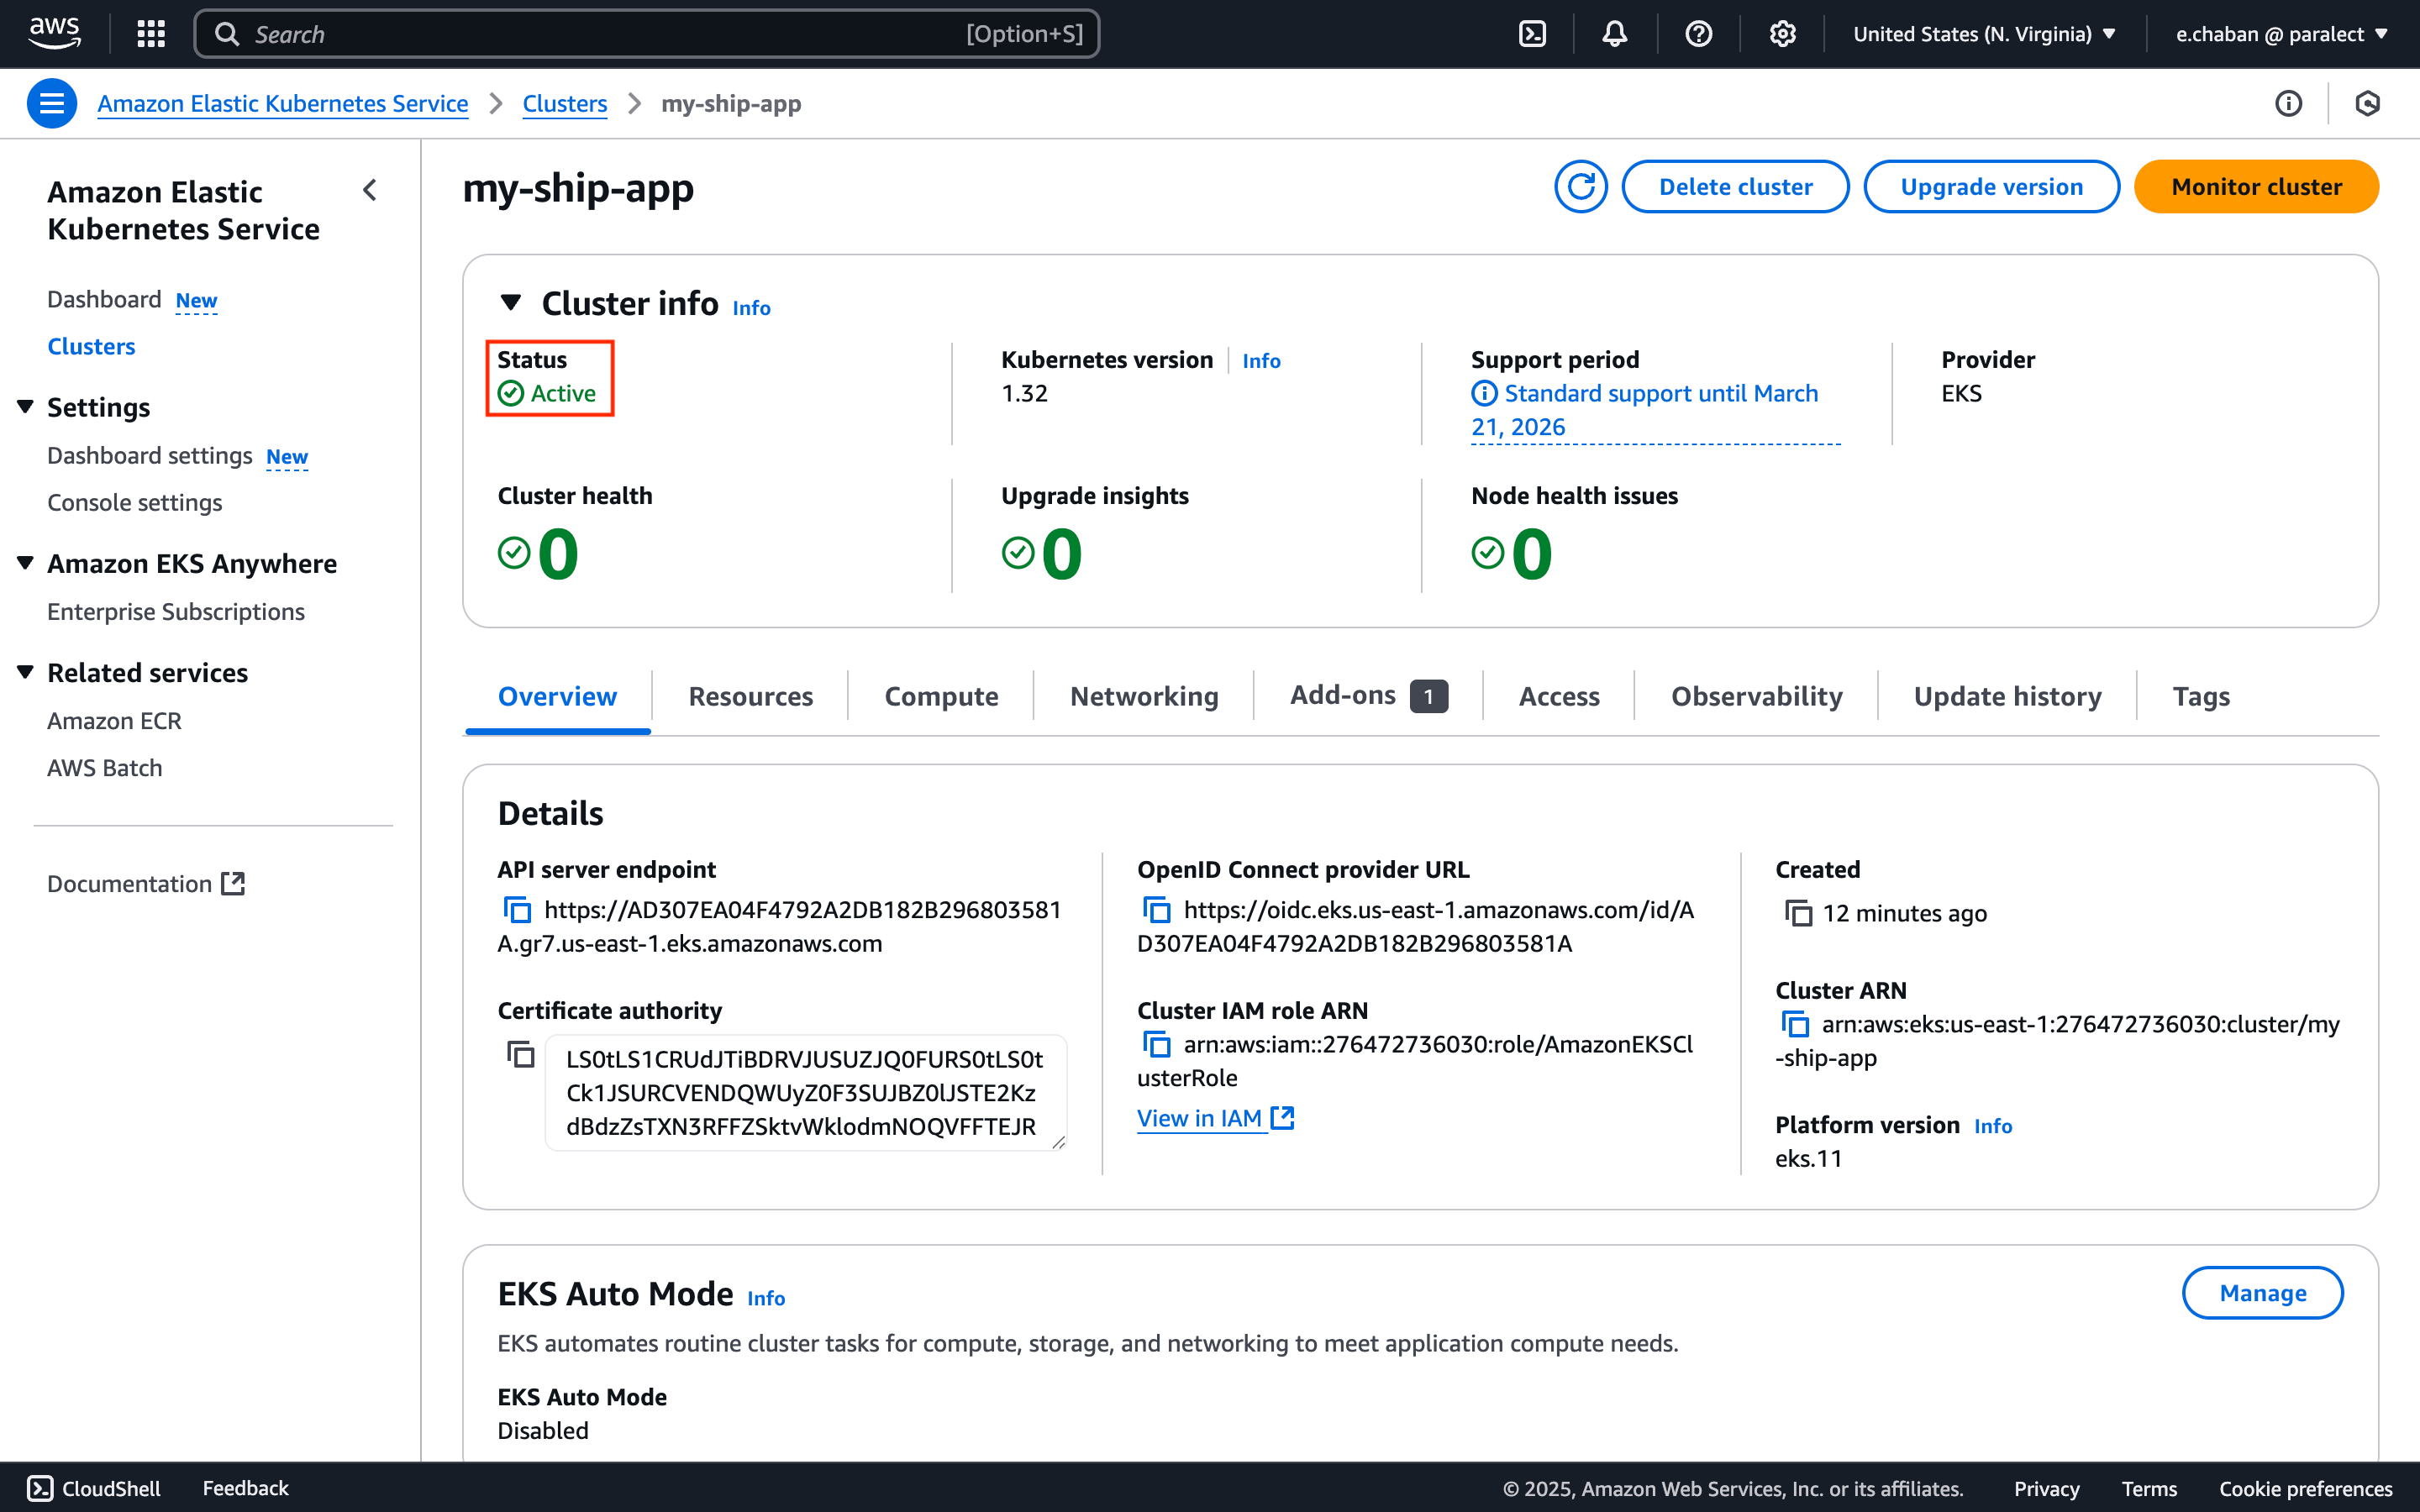
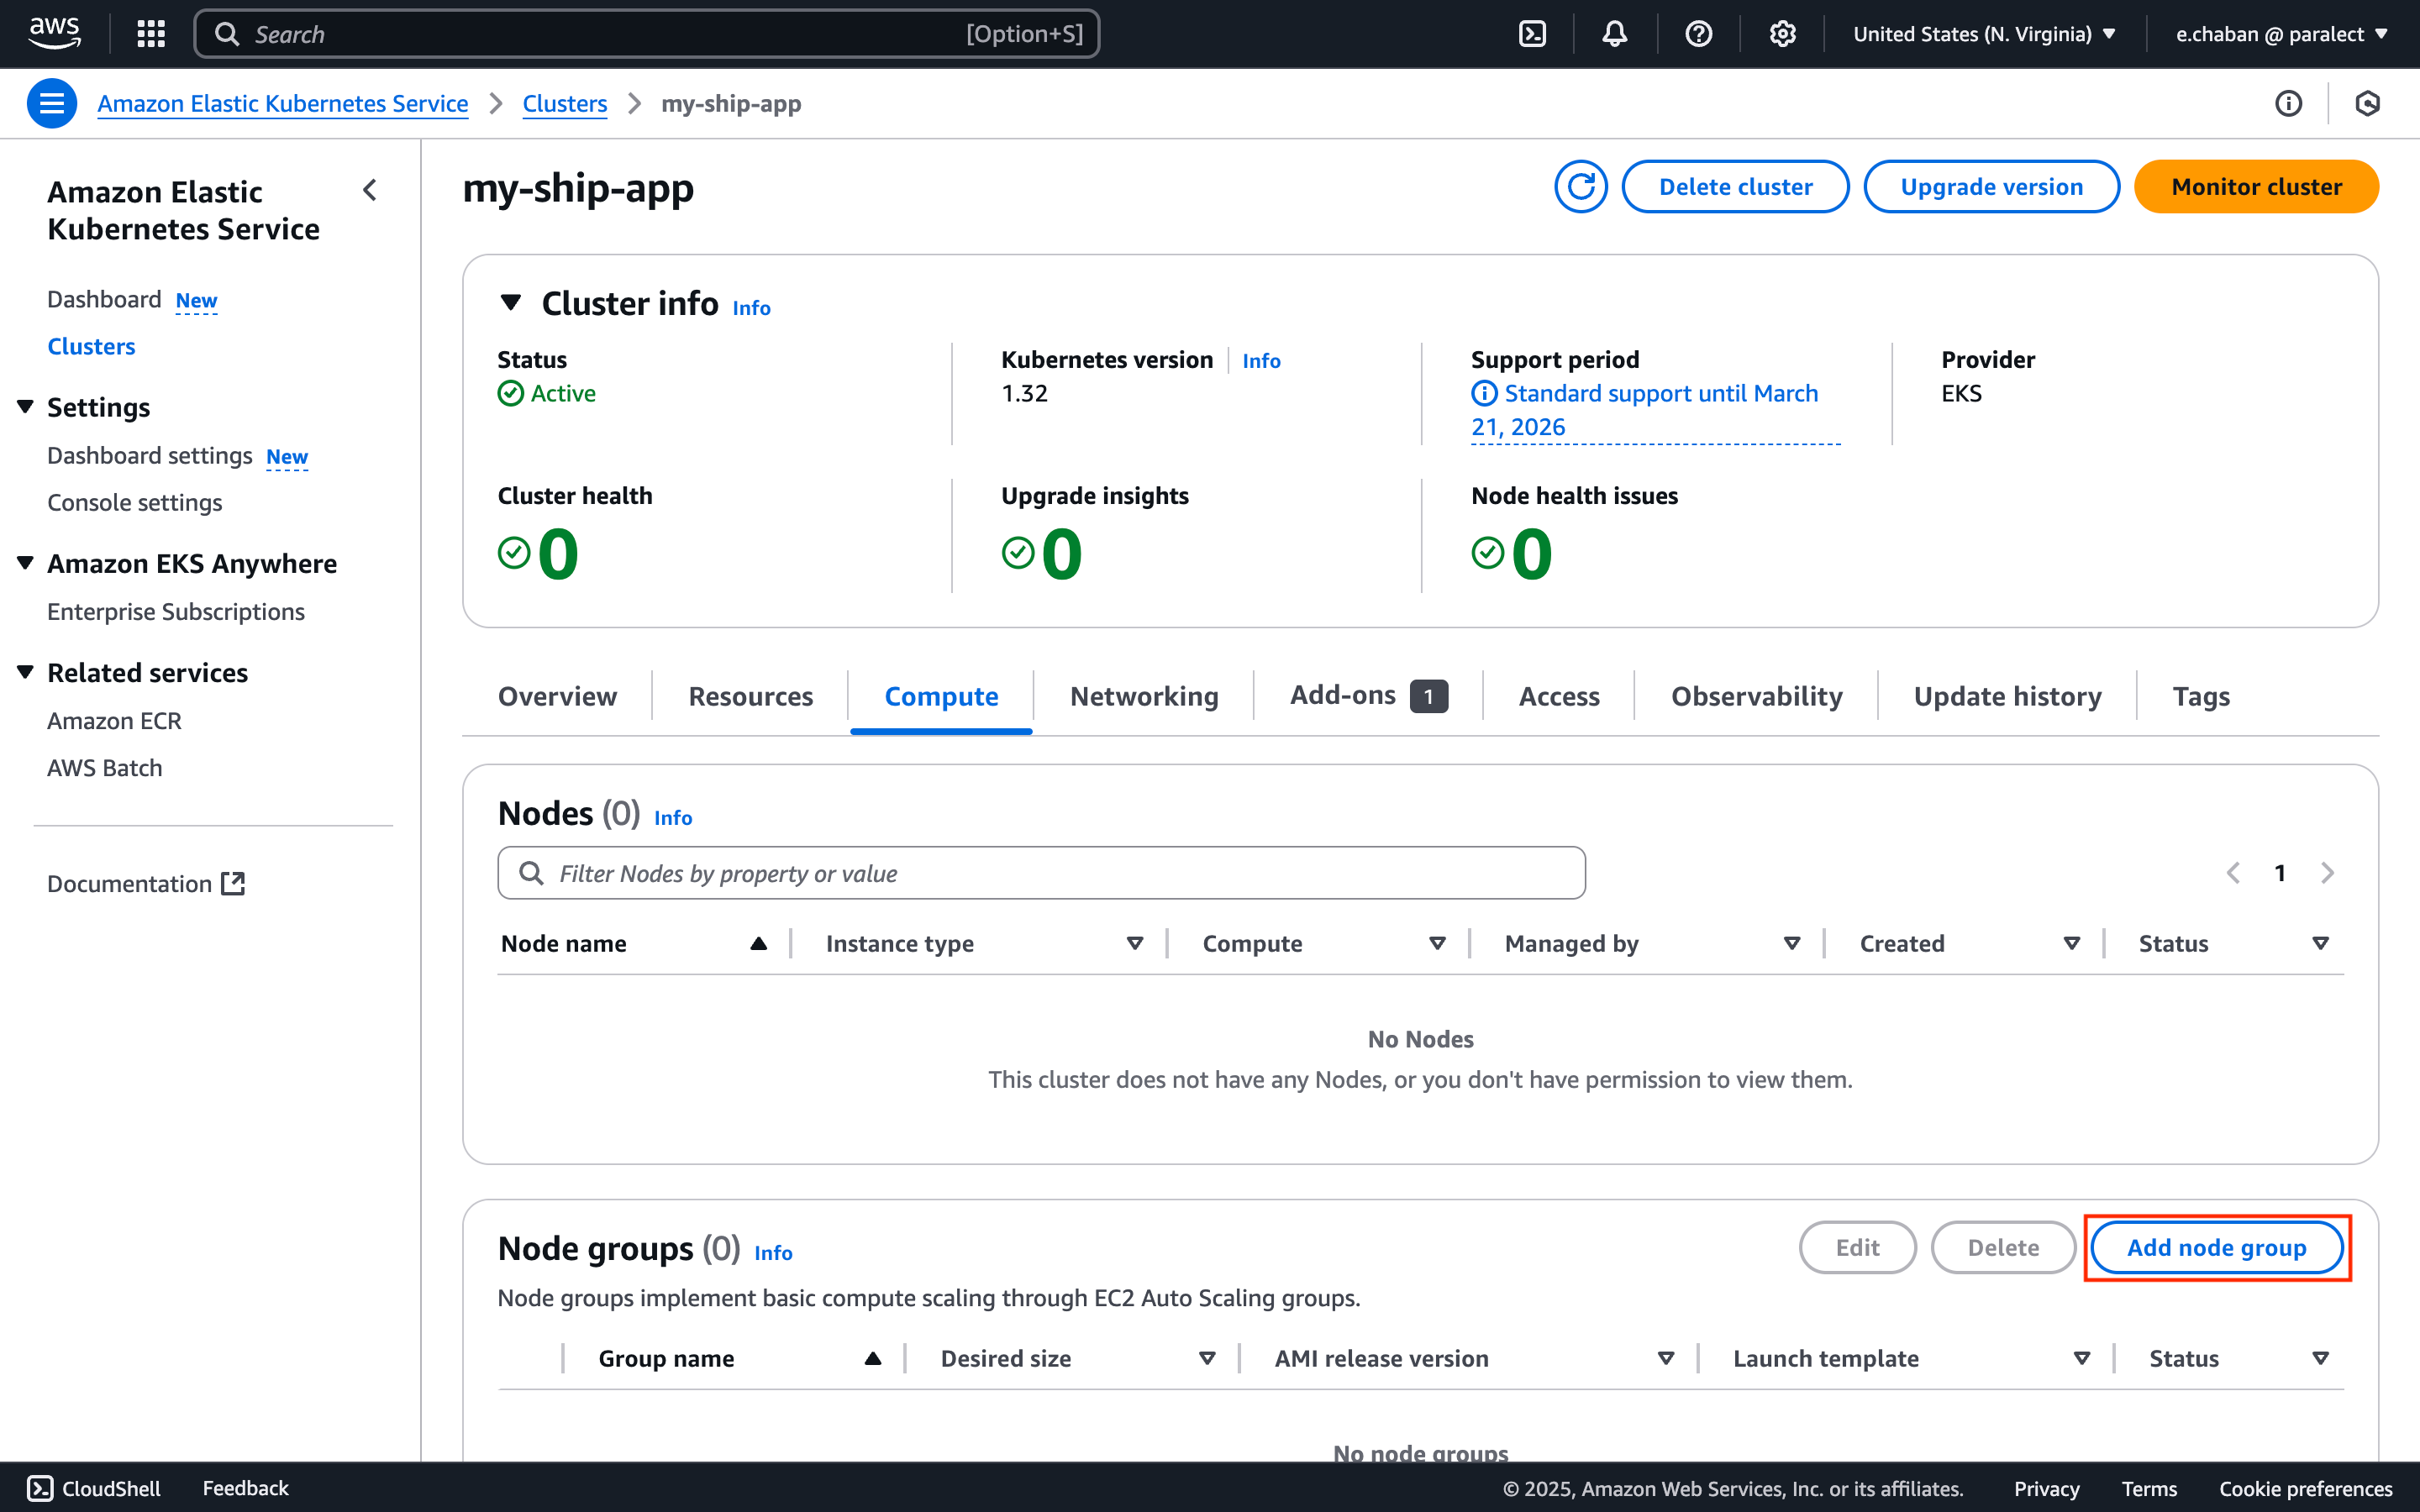
Kubernetes Cluster
Now let’s create EKS cluster.Select Custom Configuration
Custom configuration Make sure to disable
EKS Auto Mode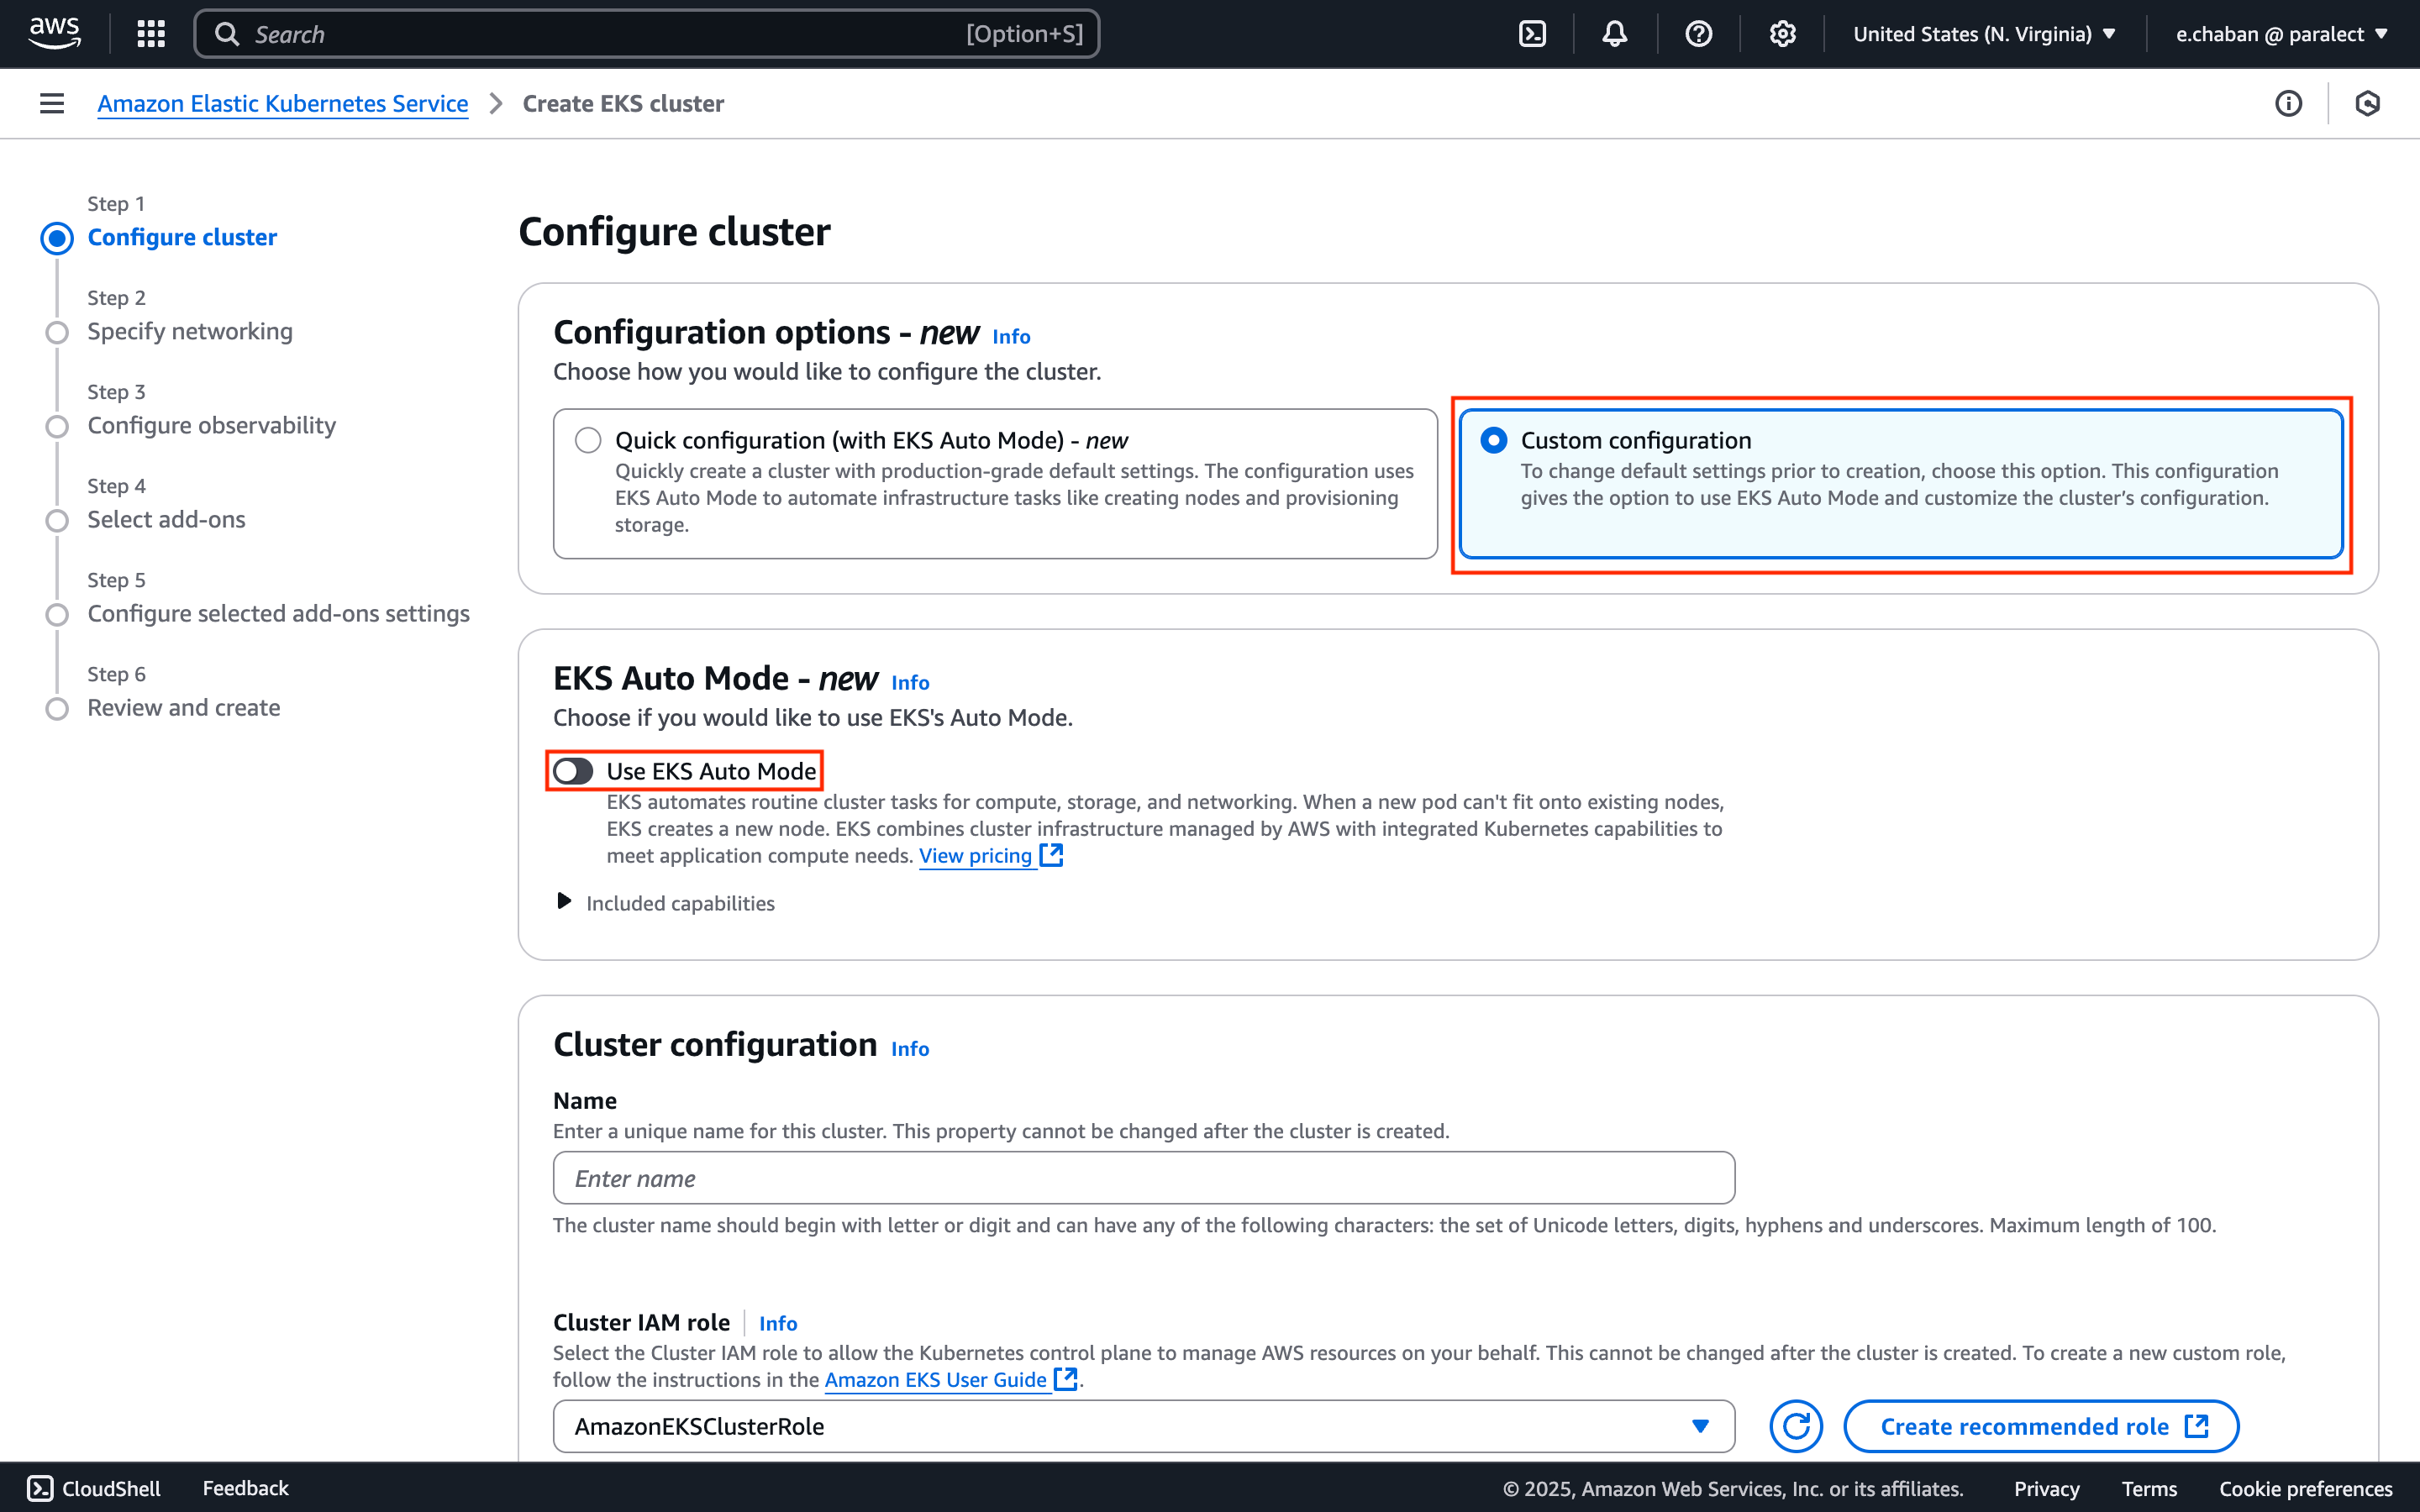
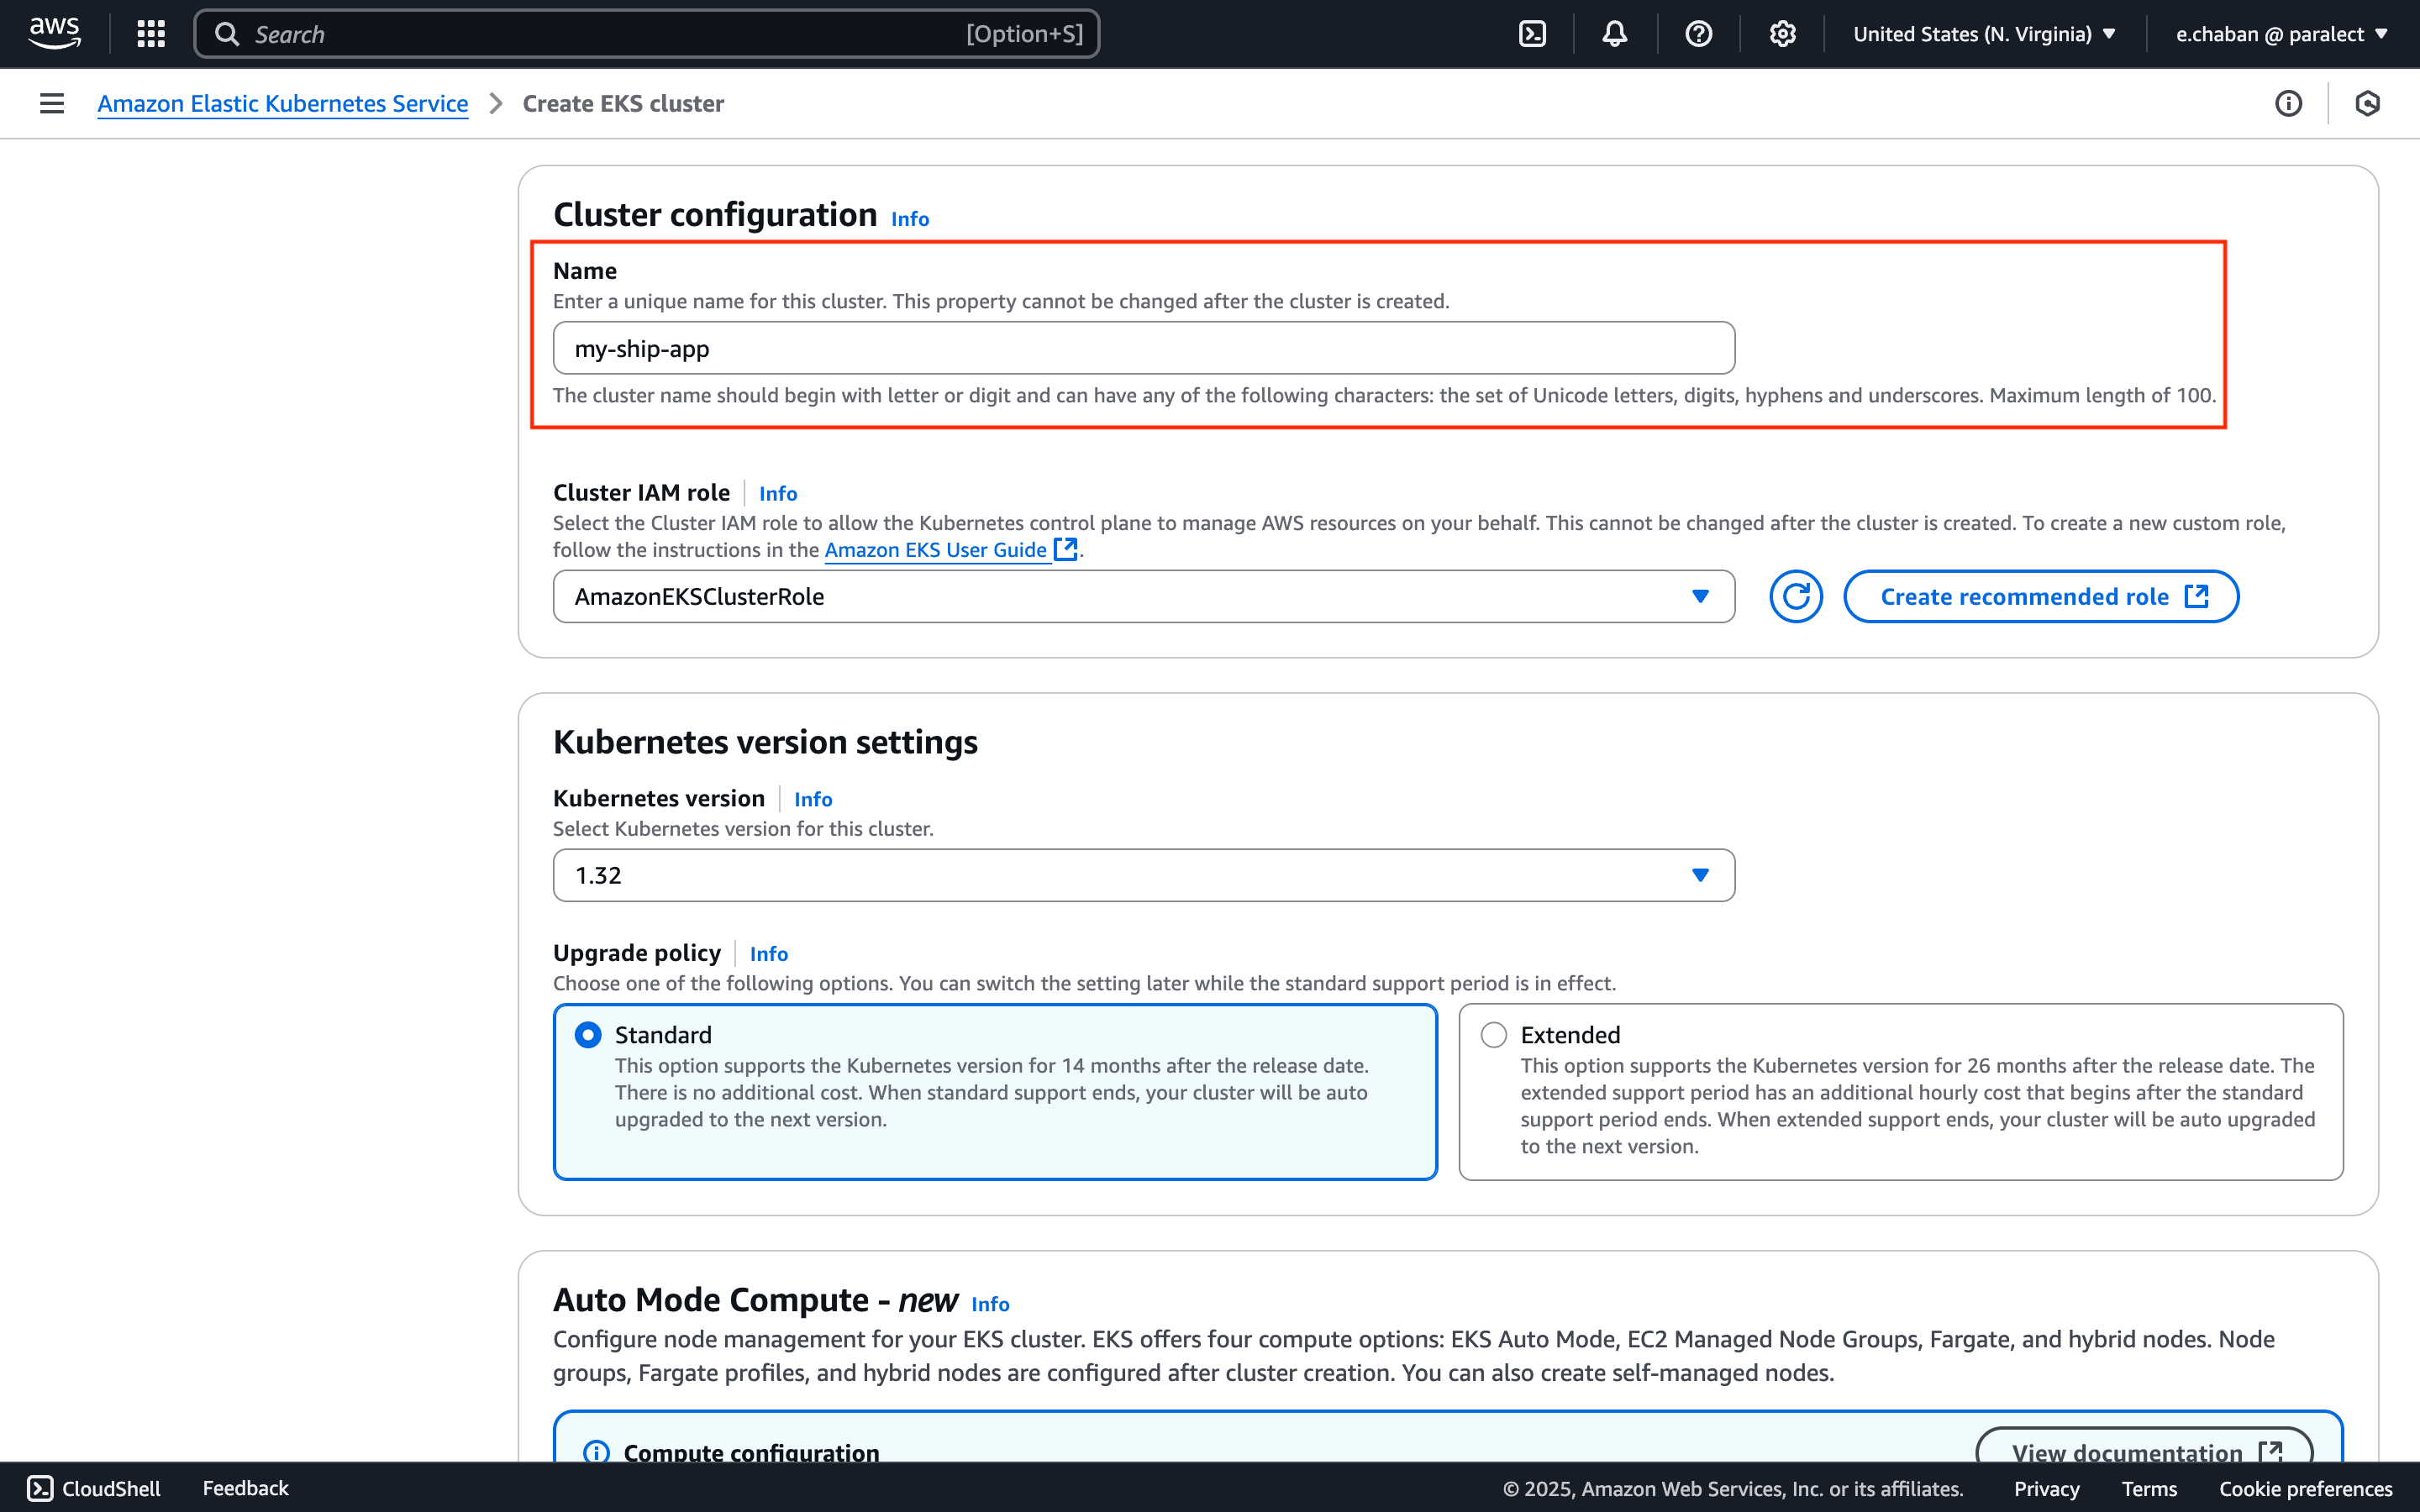
Name Your Cluster
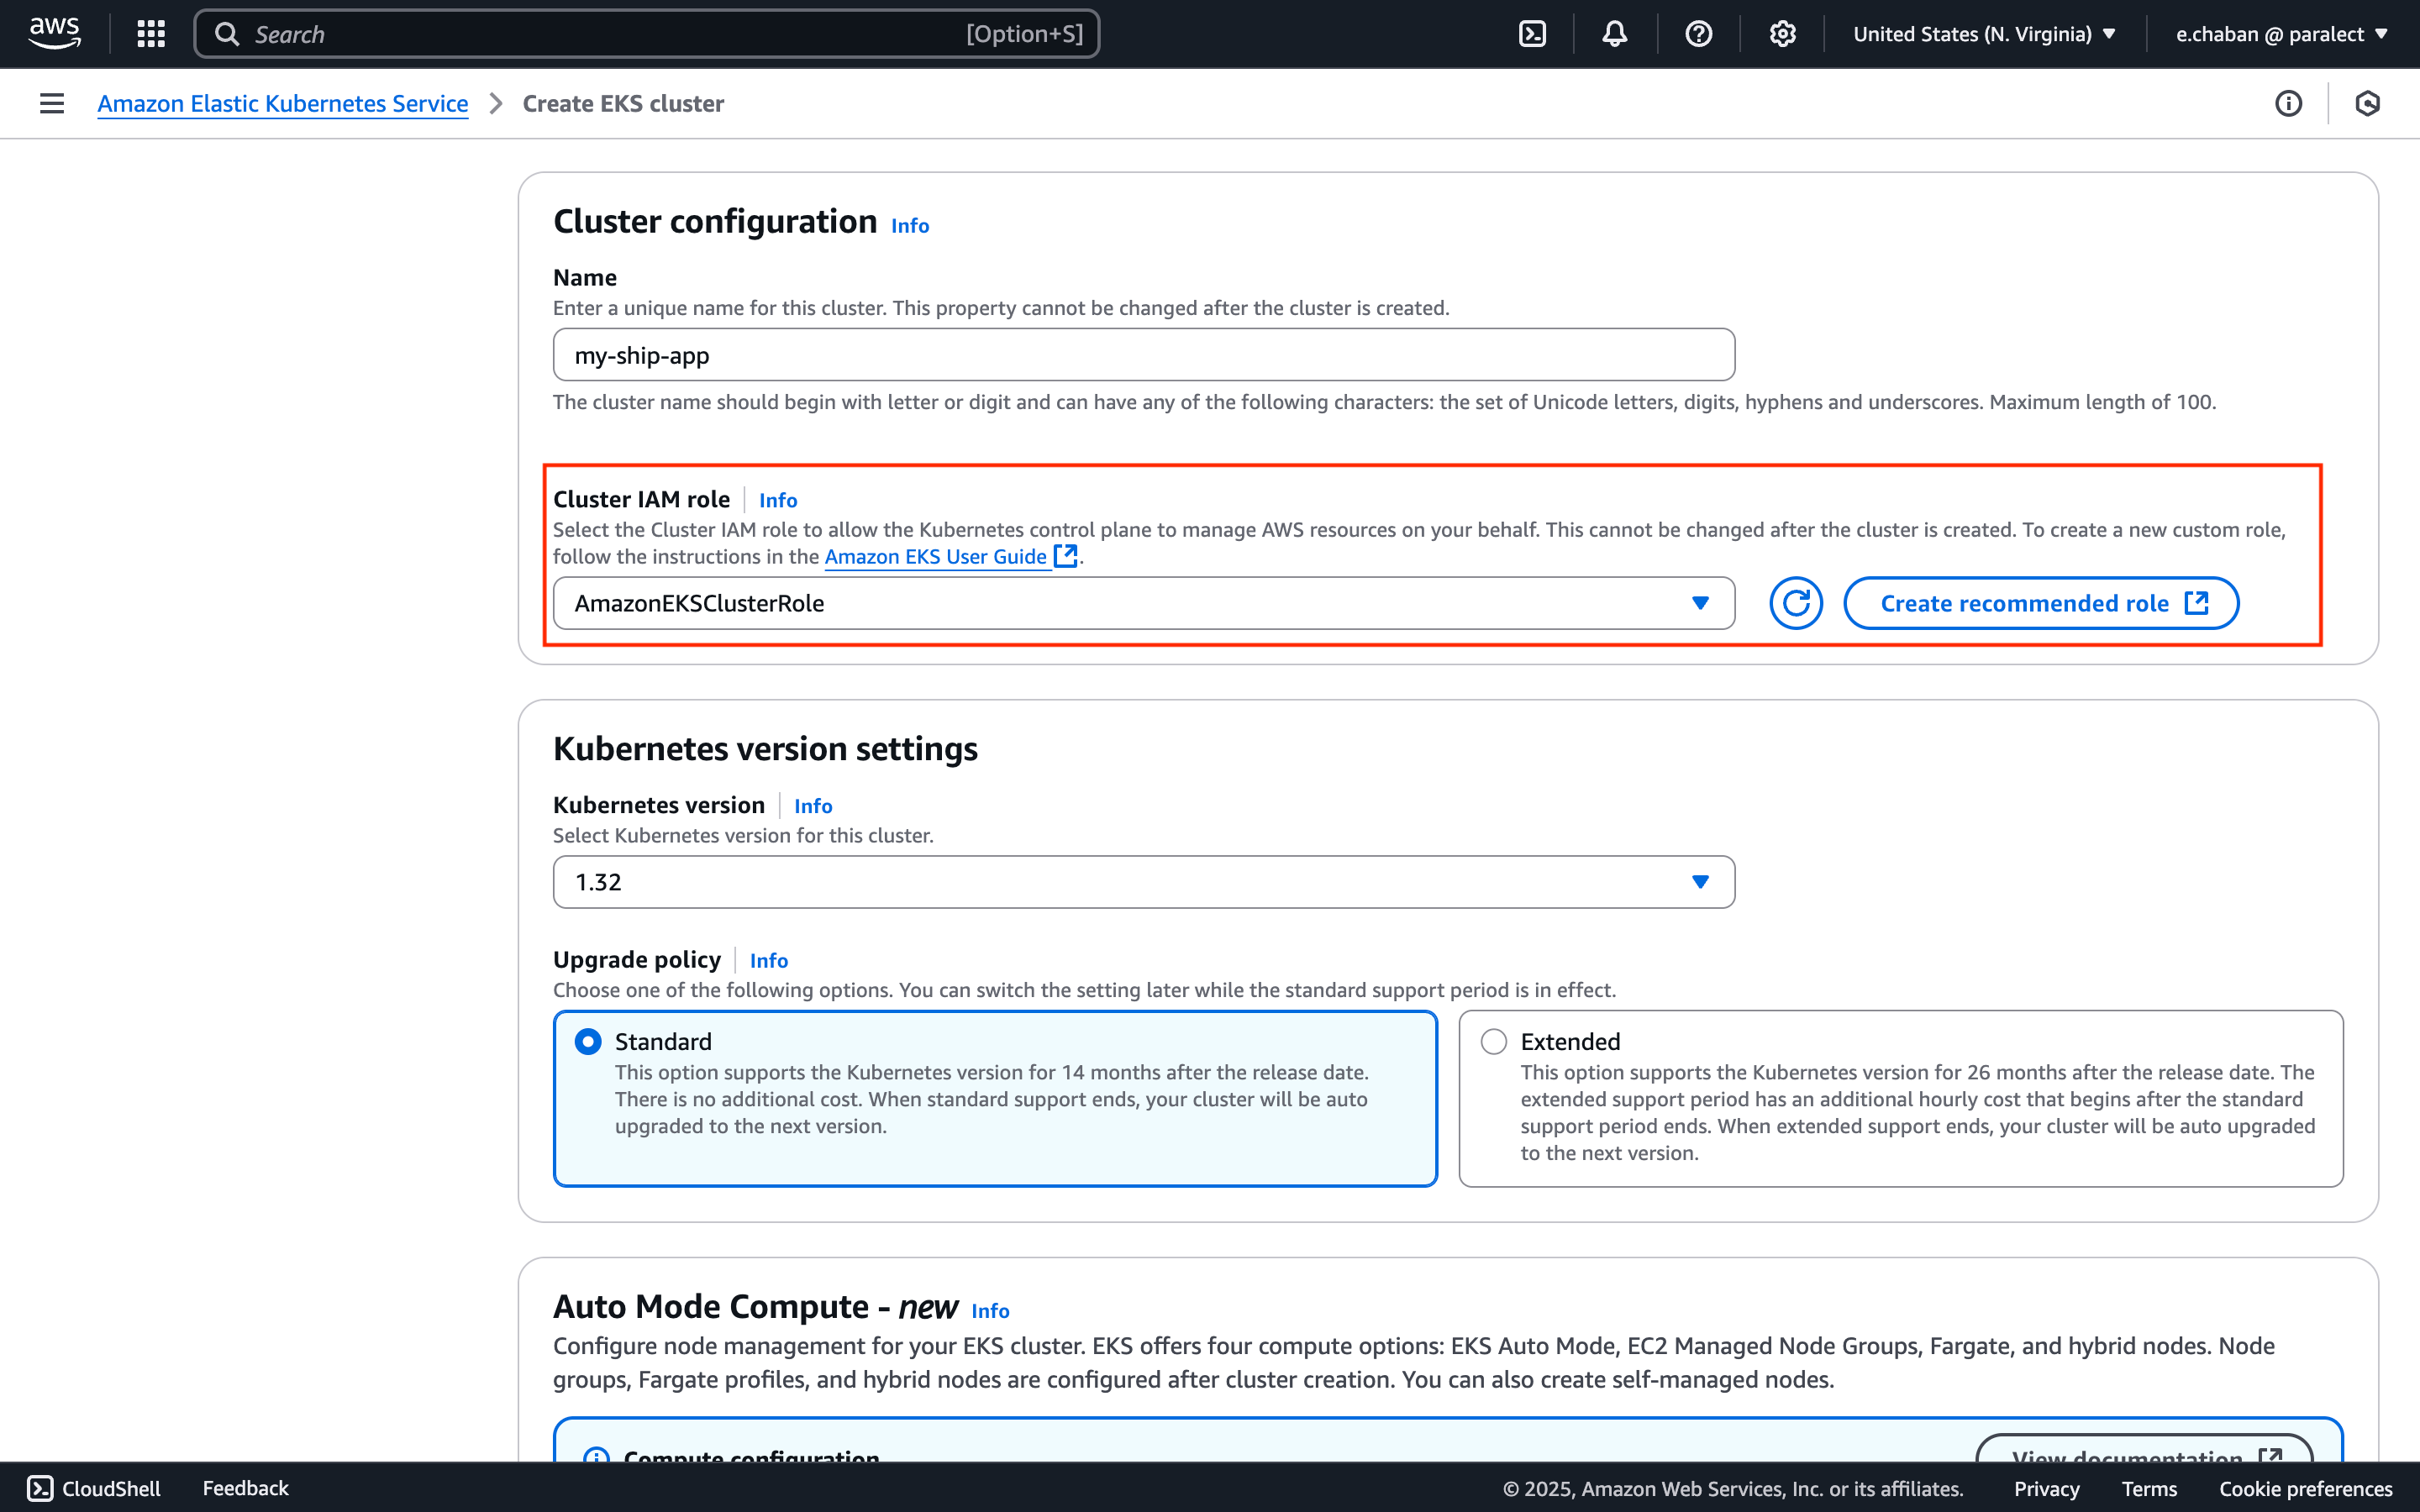
Configure Cluster IAM Role
Cluster IAM role:- Click the
Create recommended rolebutton - AWS will automatically create IAM roles with necessary EKS cluster permissions
- Return to cluster creation page and select the created policy
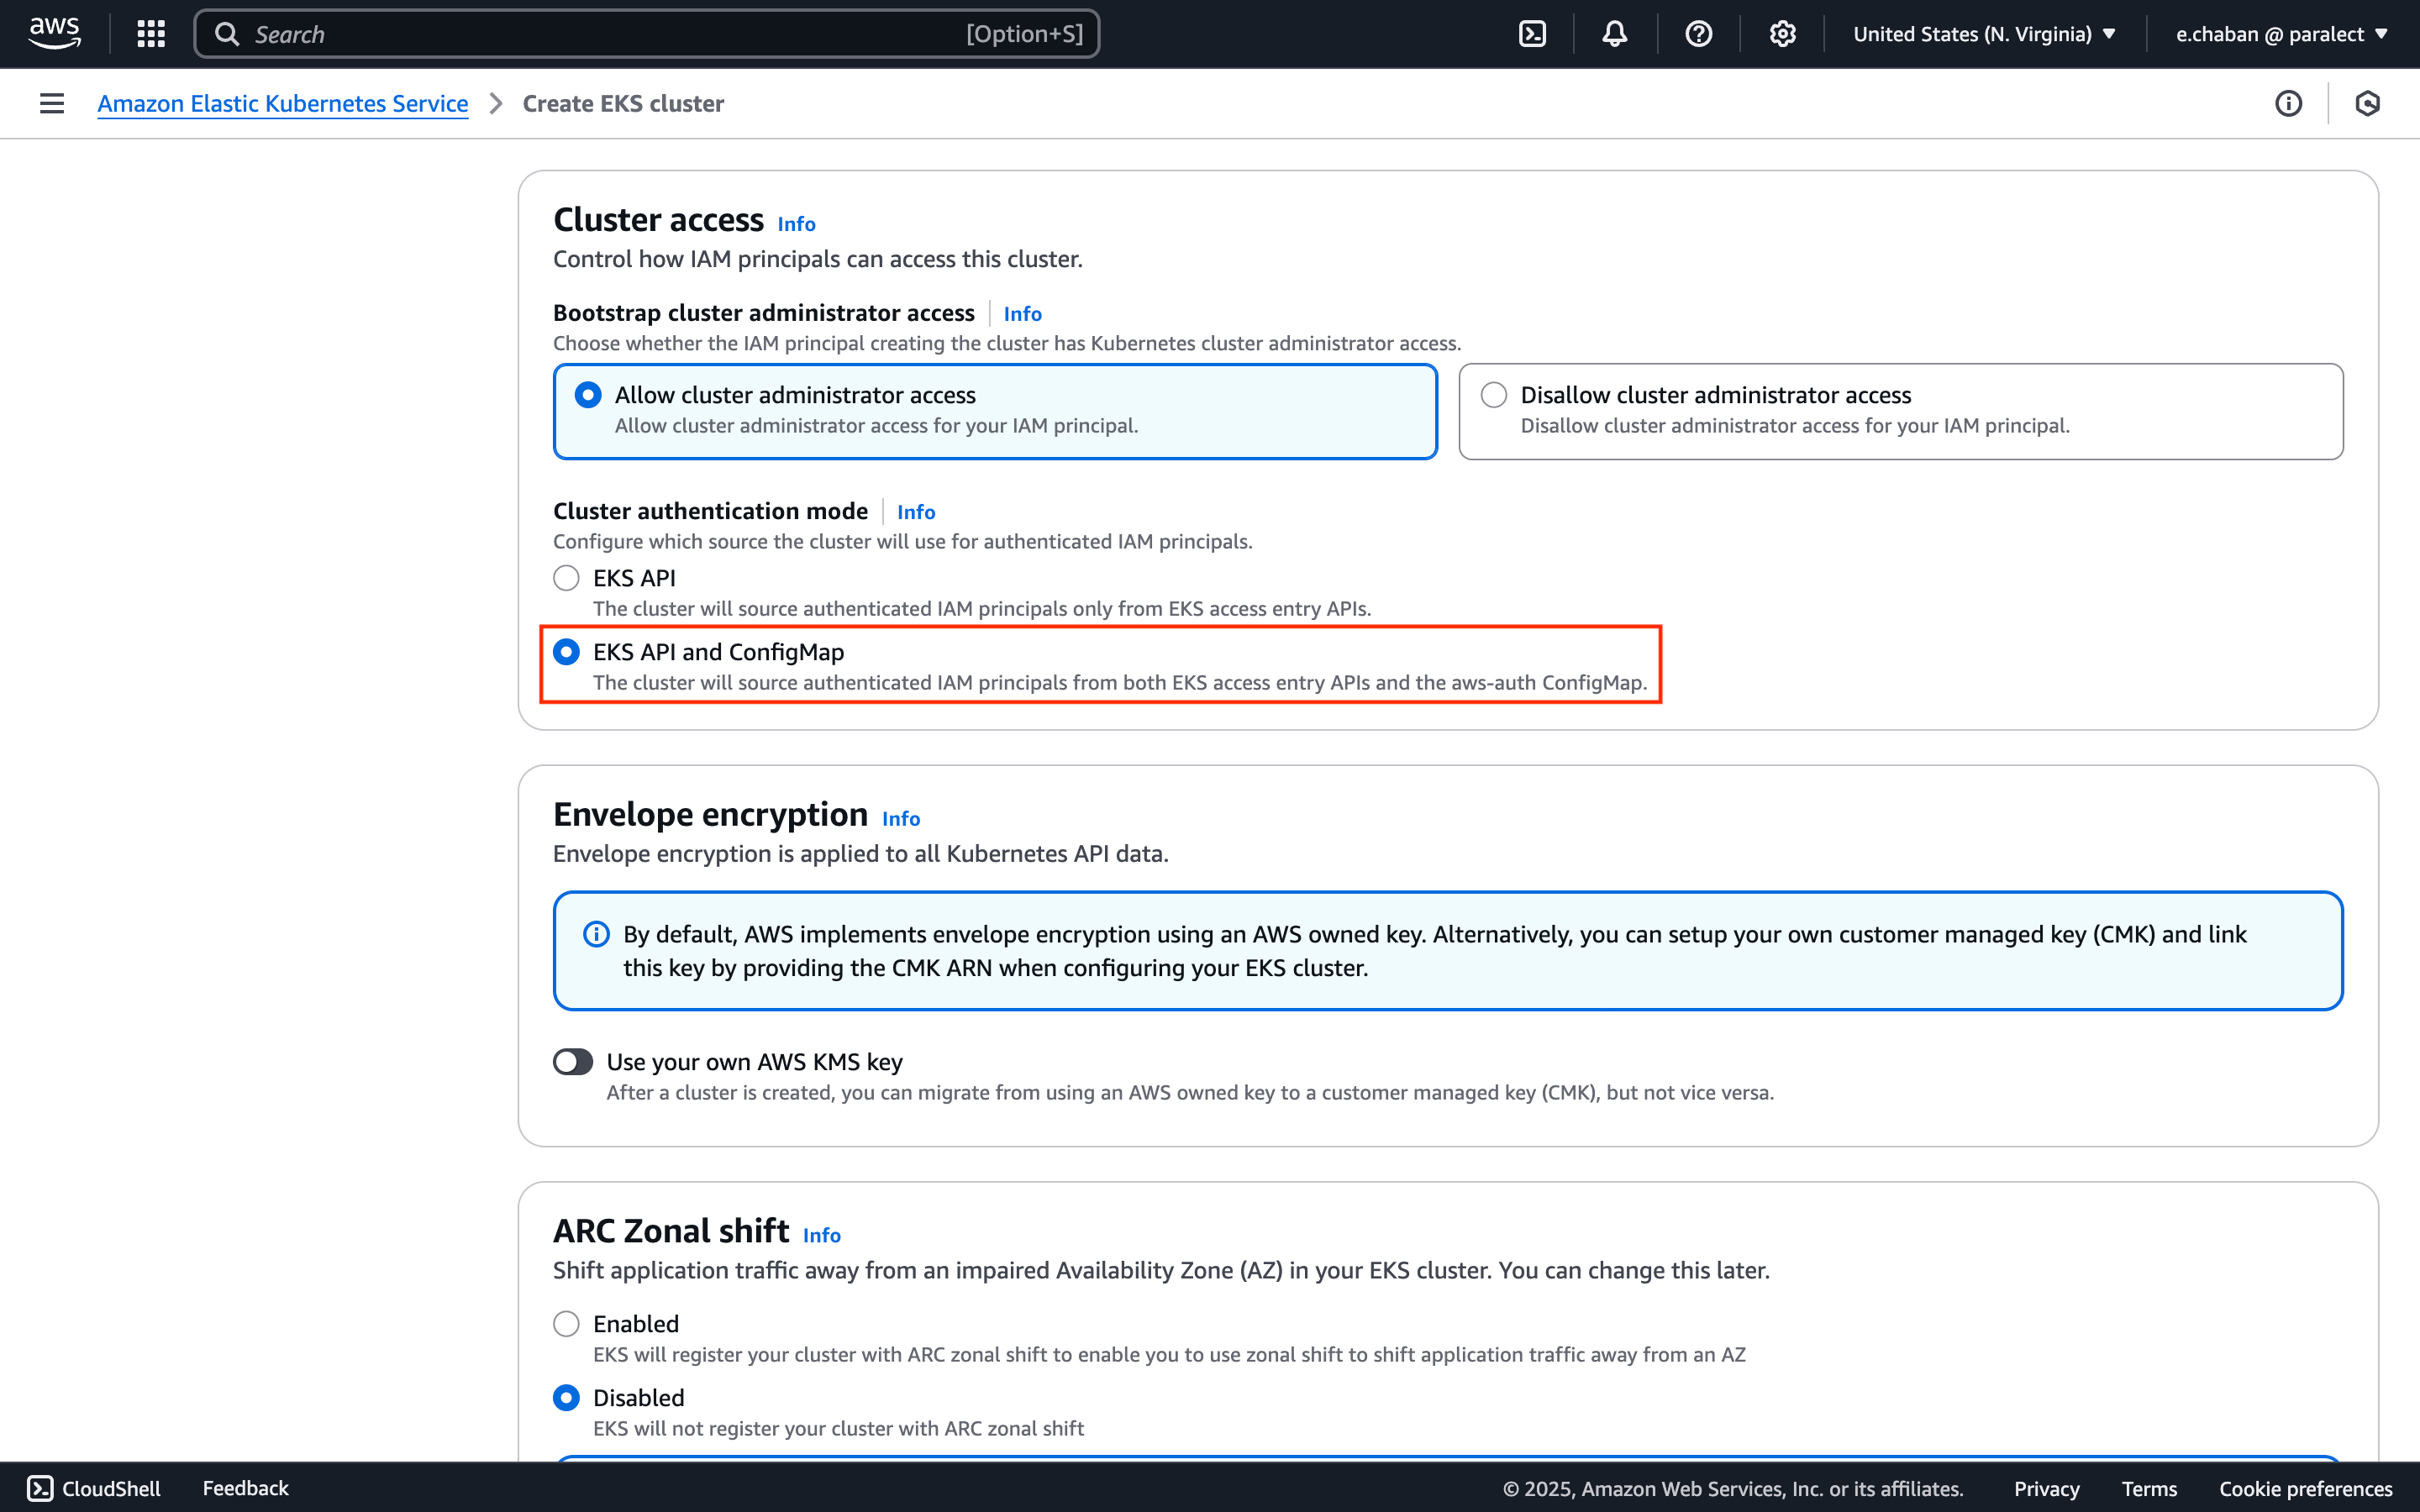
Set Authentication Mode
Cluster access section:- Set
Cluster authentication modetoEKS API and ConfigMap
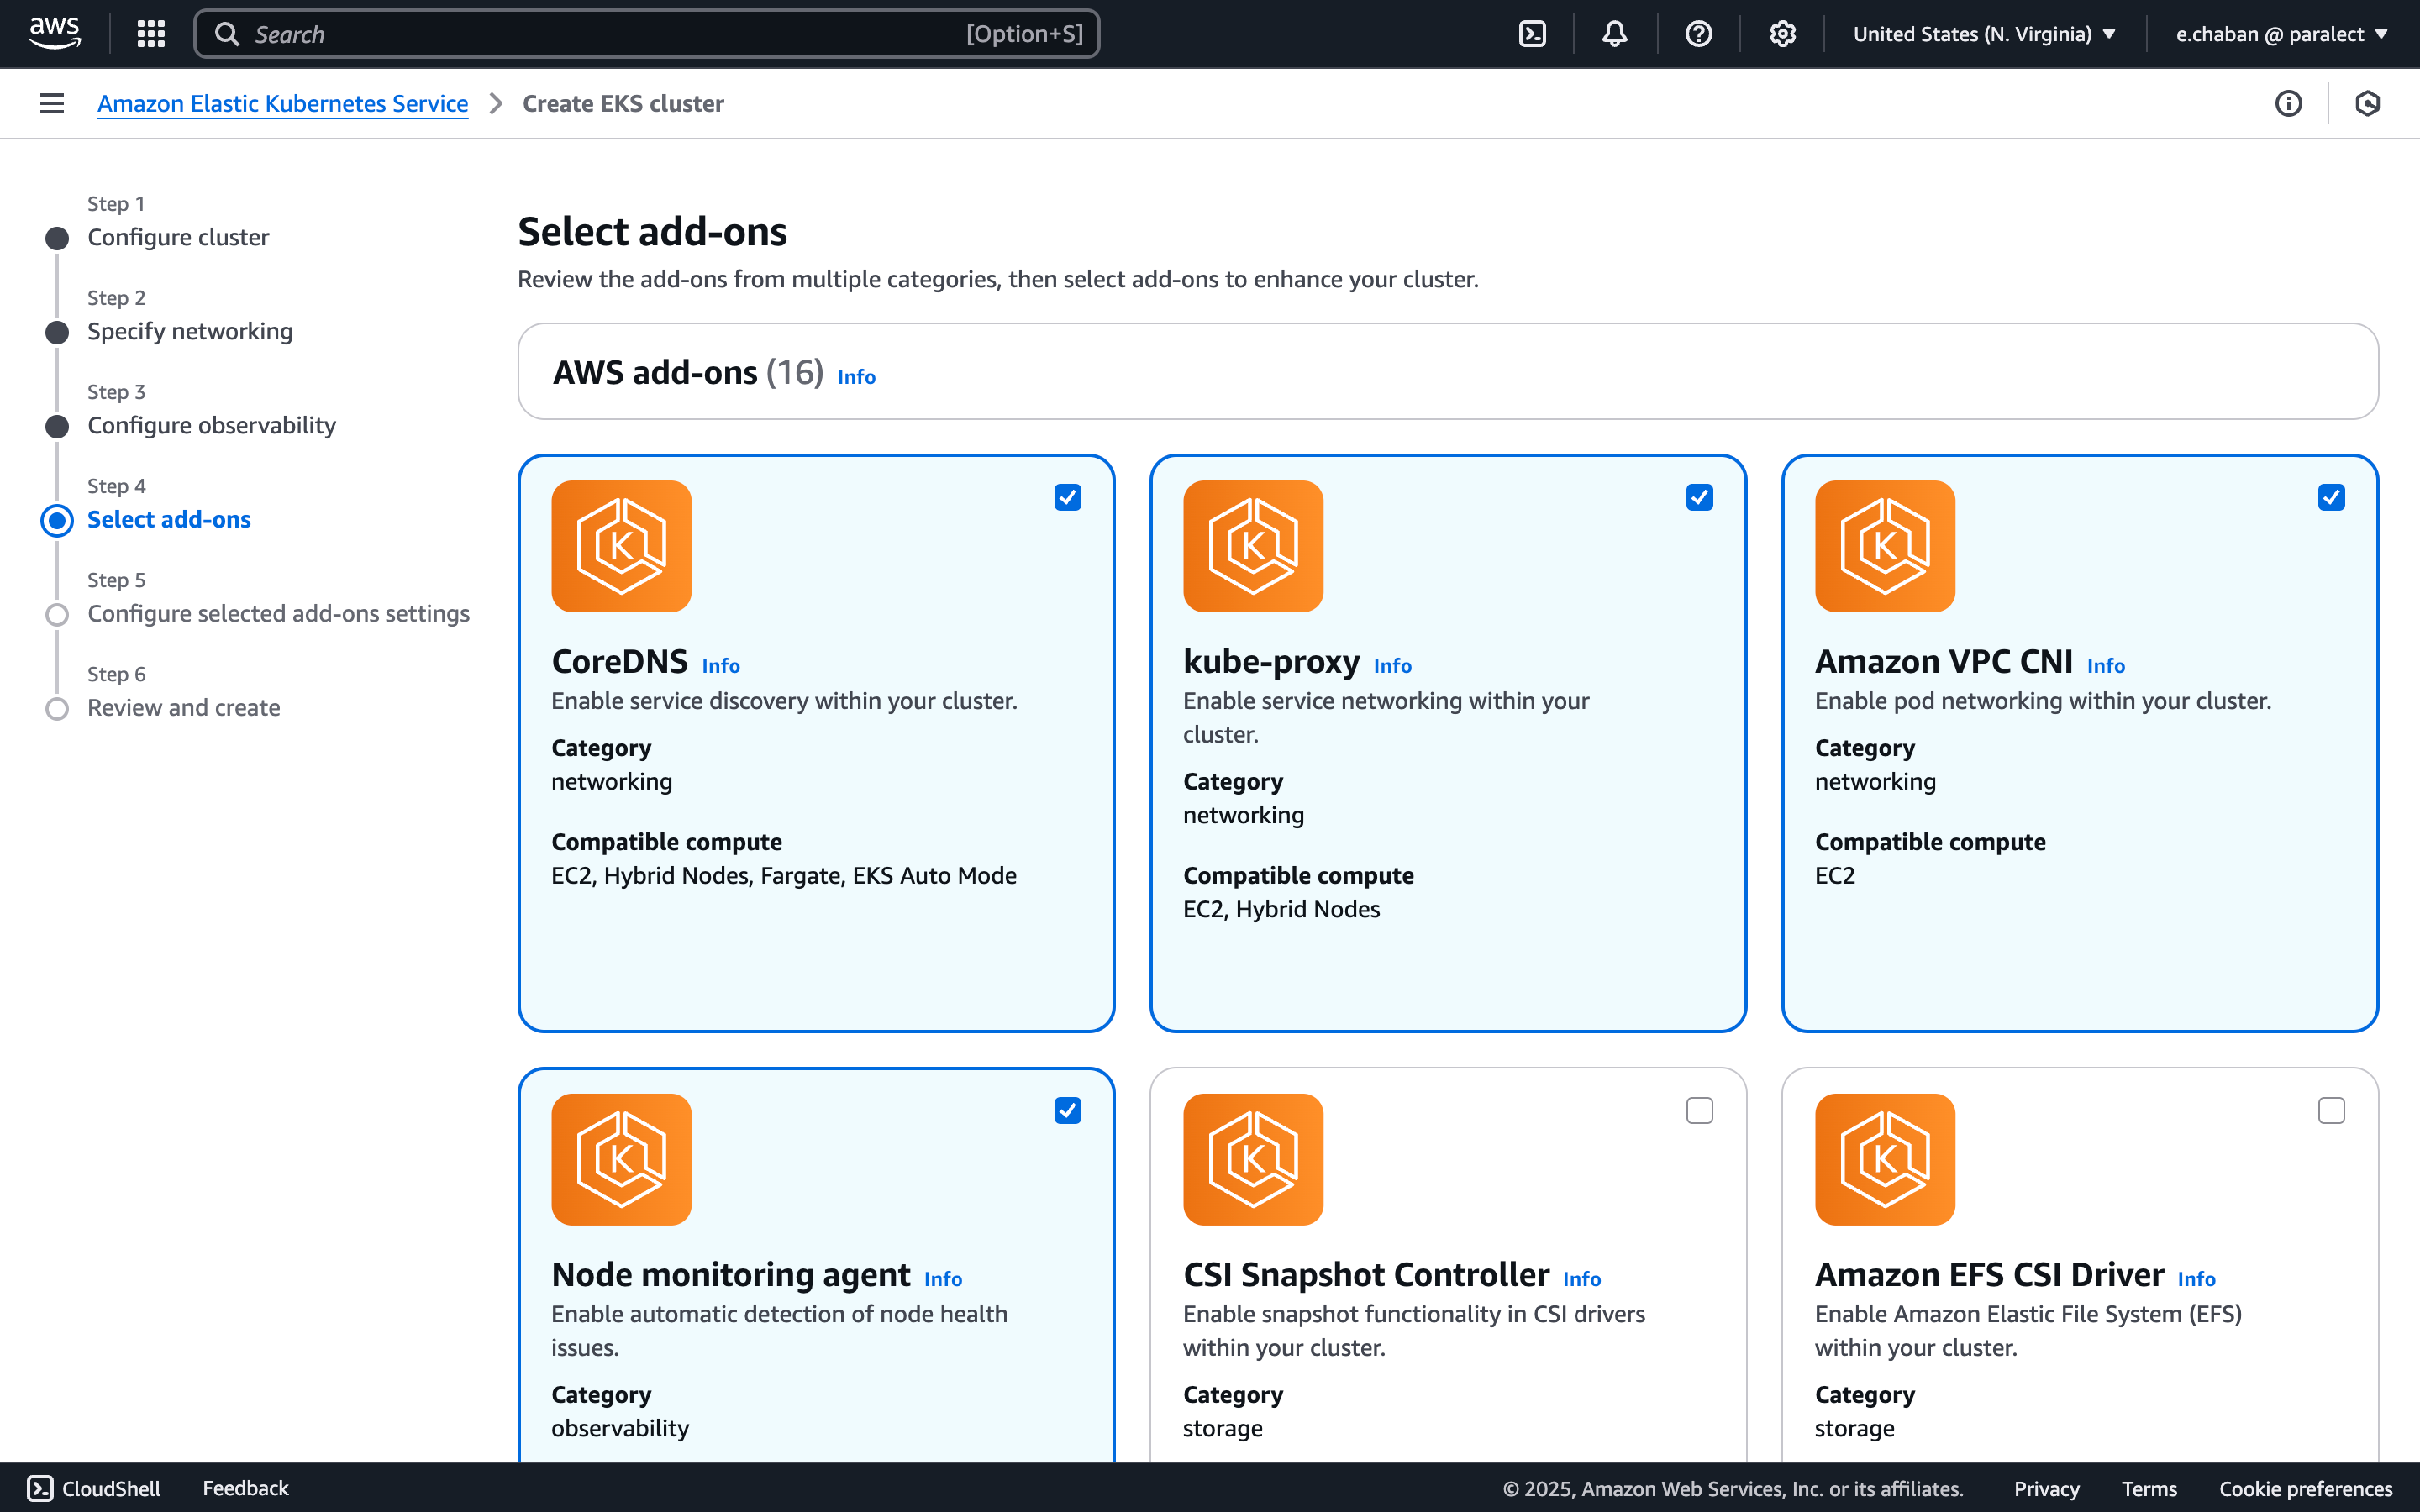
Configure Add-ons
- CoreDNS
- kube-proxy
- Amazon VPC CNI
- Node monitoring agent
Review and Create
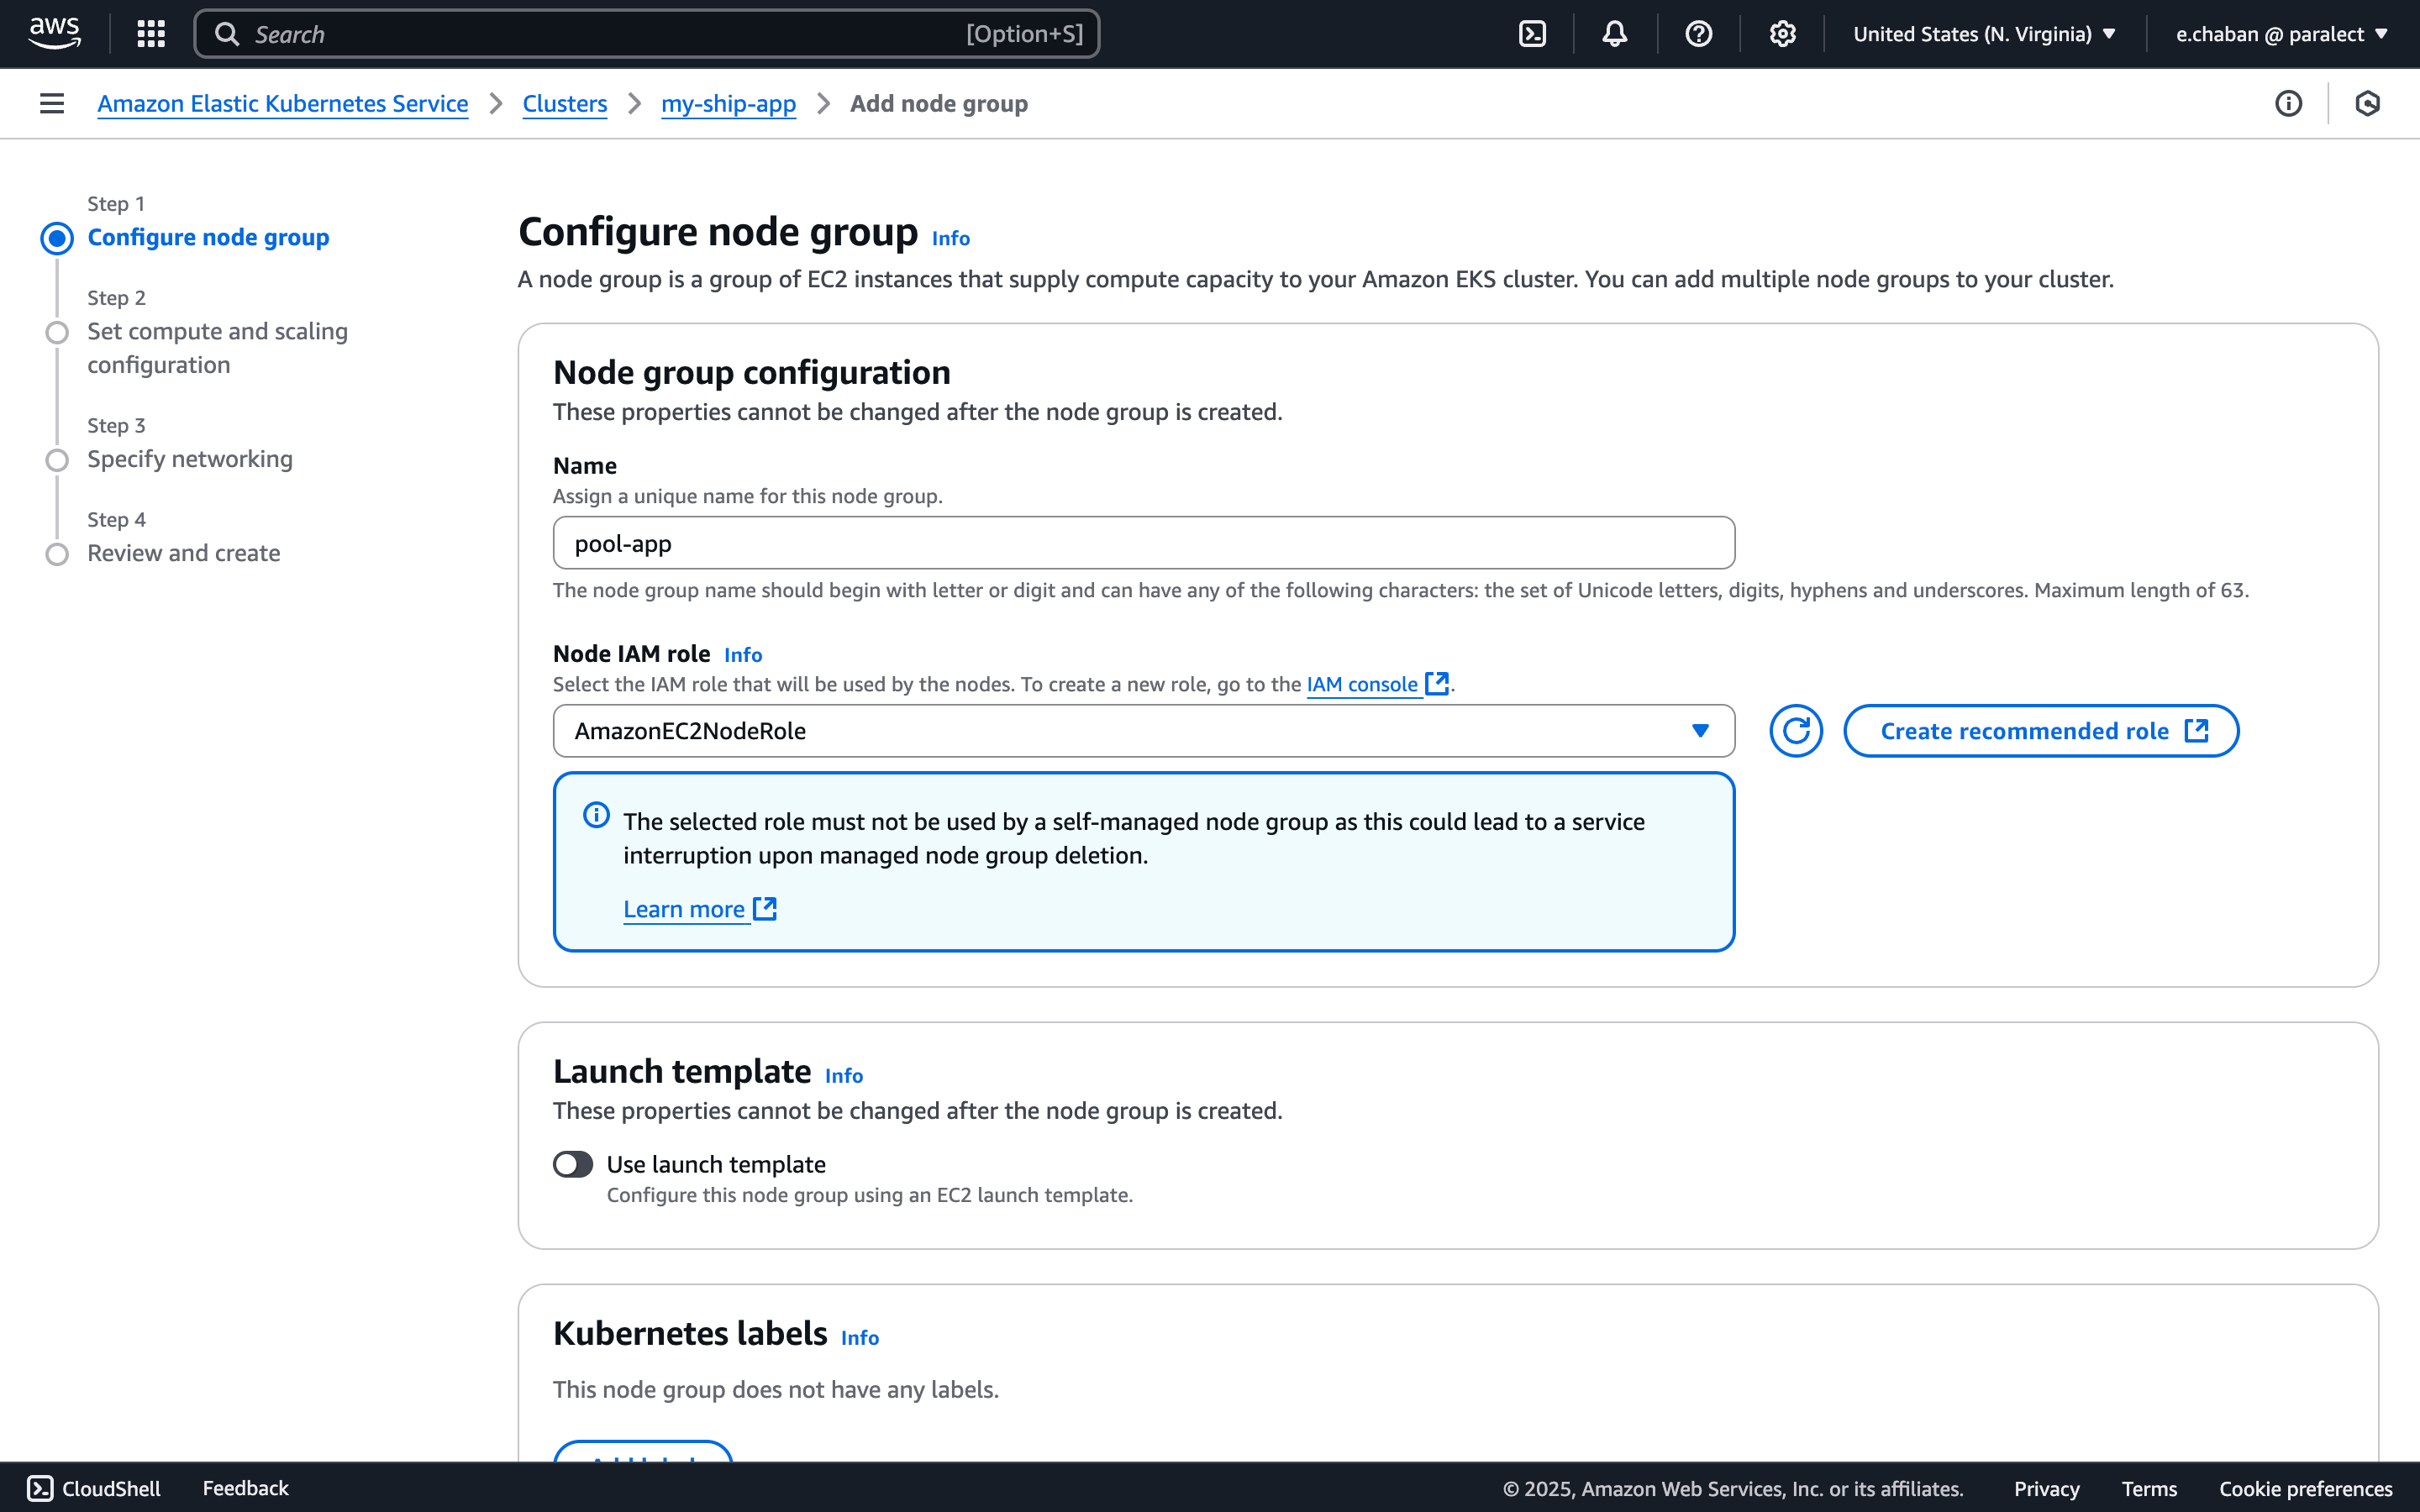
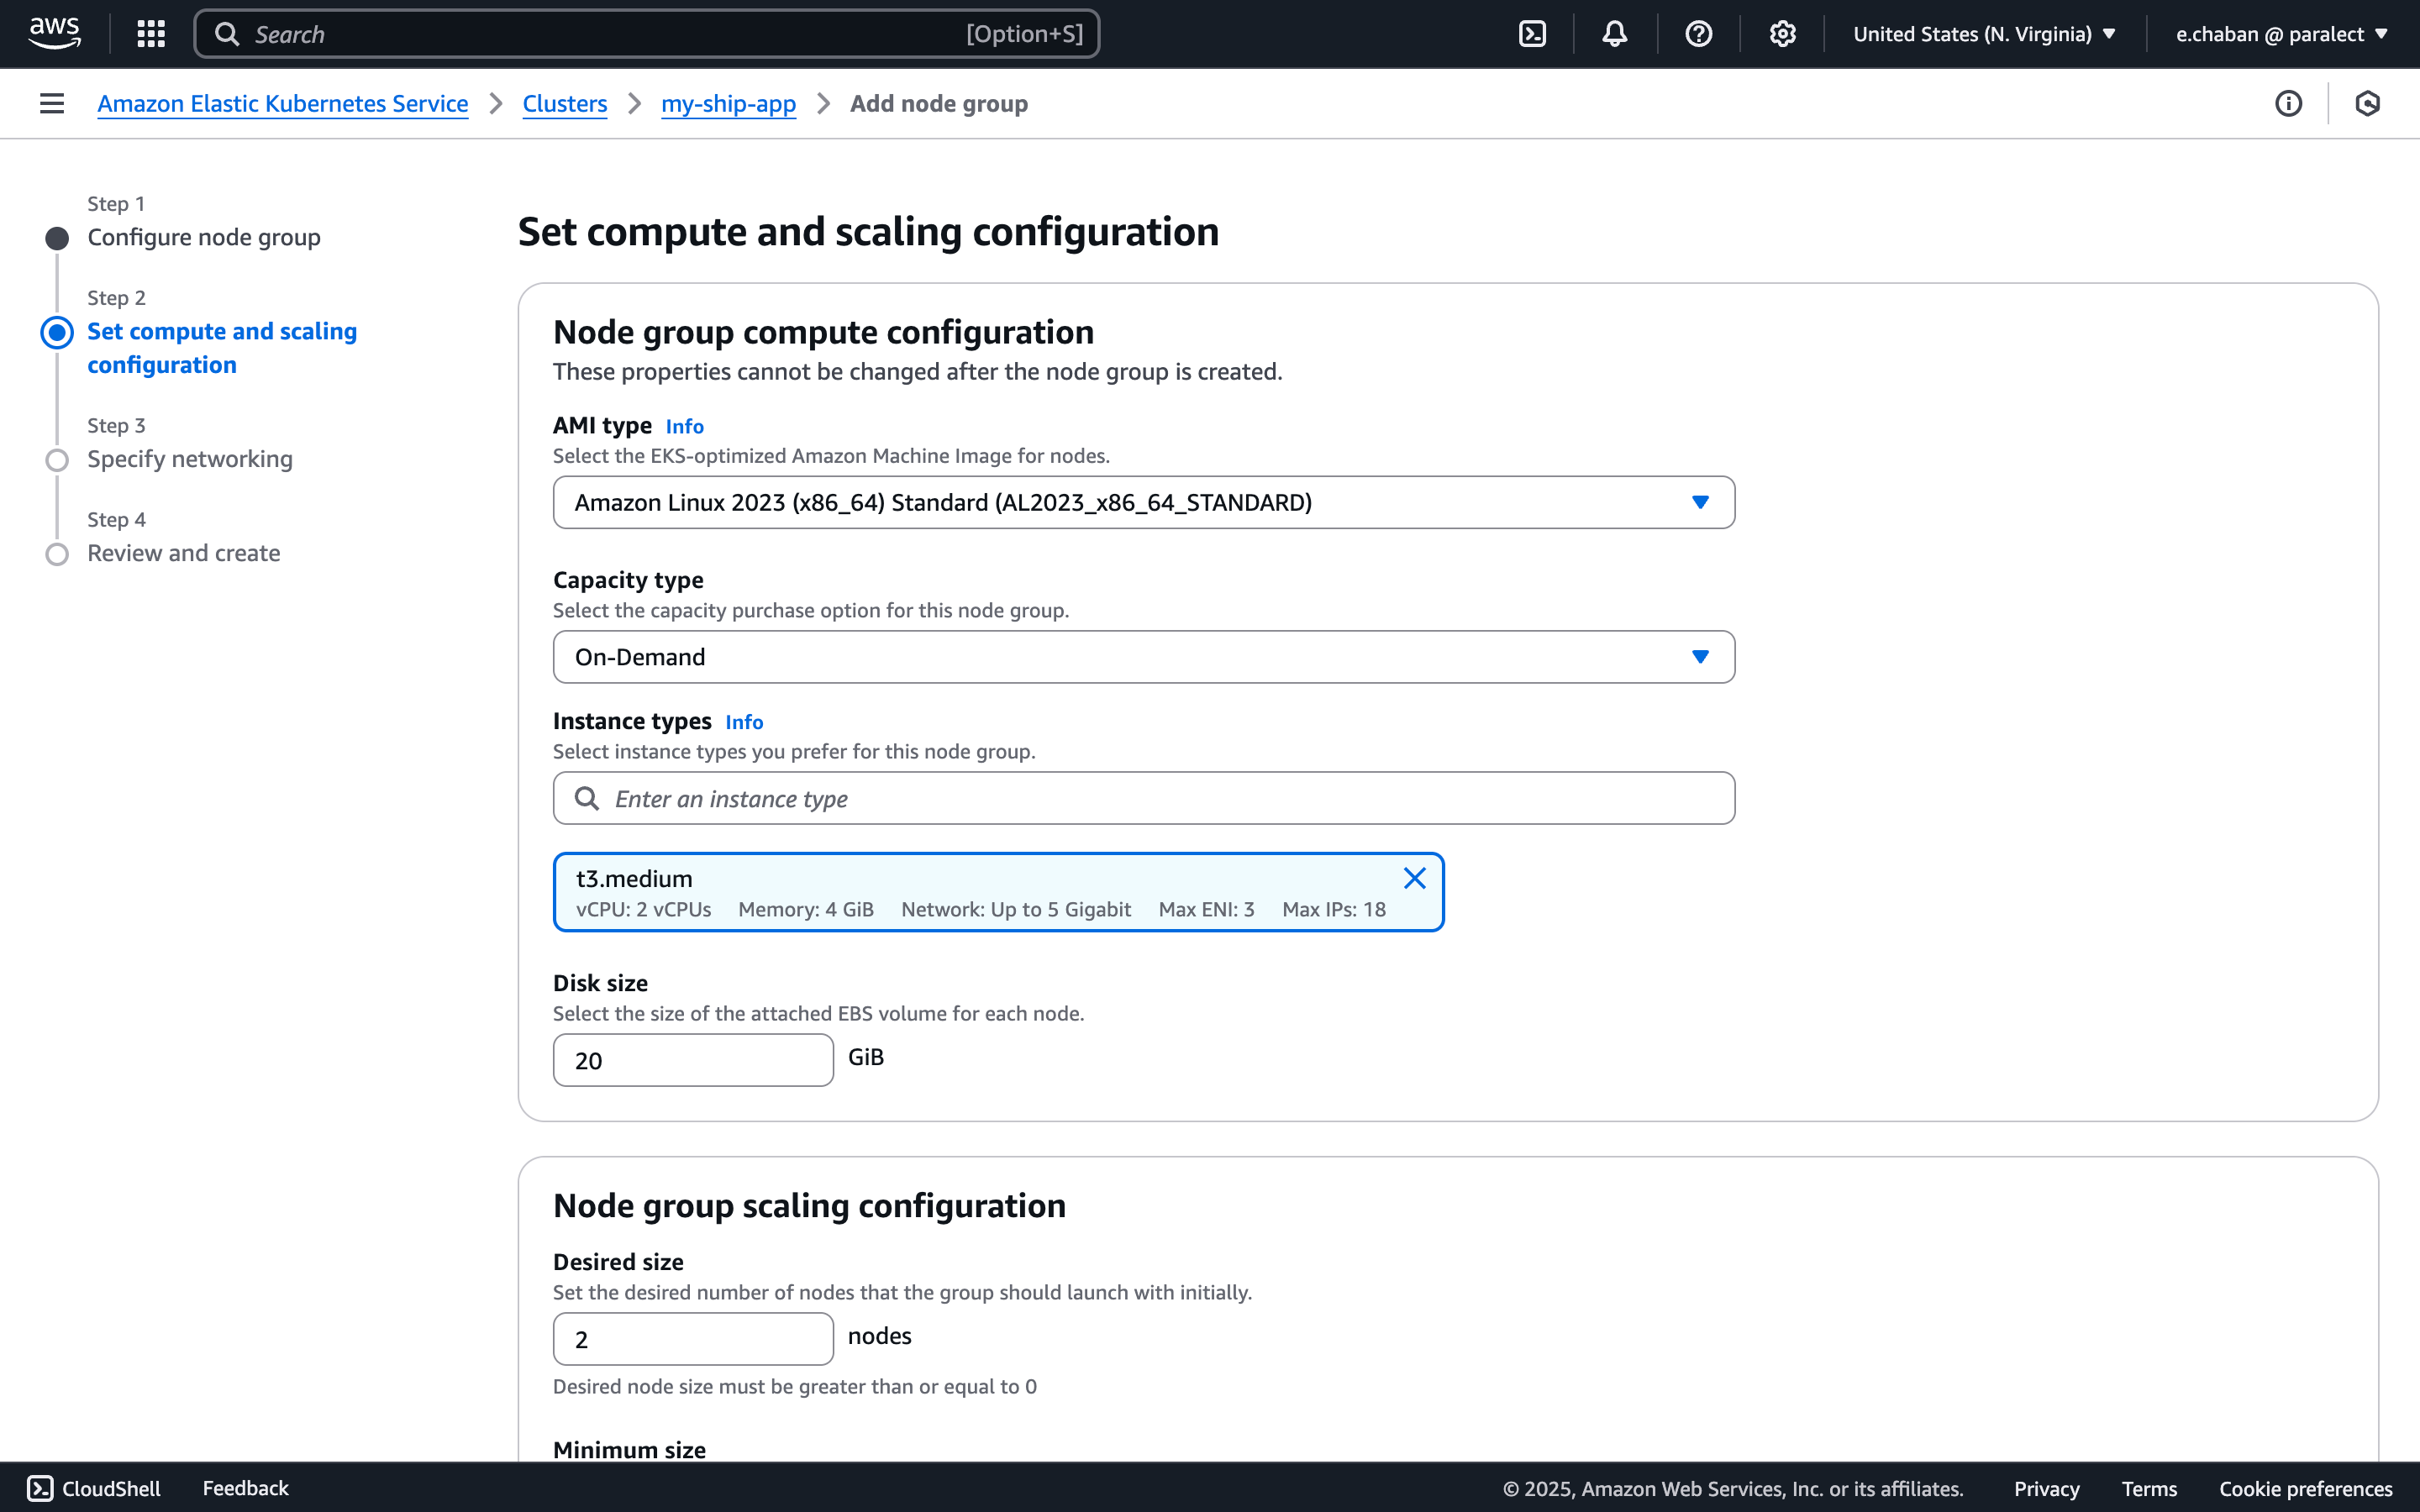
pool-app and select the relevant Node IAM role from the list.
If you don’t have any IAM roles here, click the Create recommended role button. You will be prompted to create properly configured IAM roles with all necessary permissions.
Accessing a cluster from a local machine
Update kubeconfig
us-east-1 with your cluster’s region and my-ship-app with your cluster name.Switch to cluster context
kubectx in your terminal and select your cluster from the list.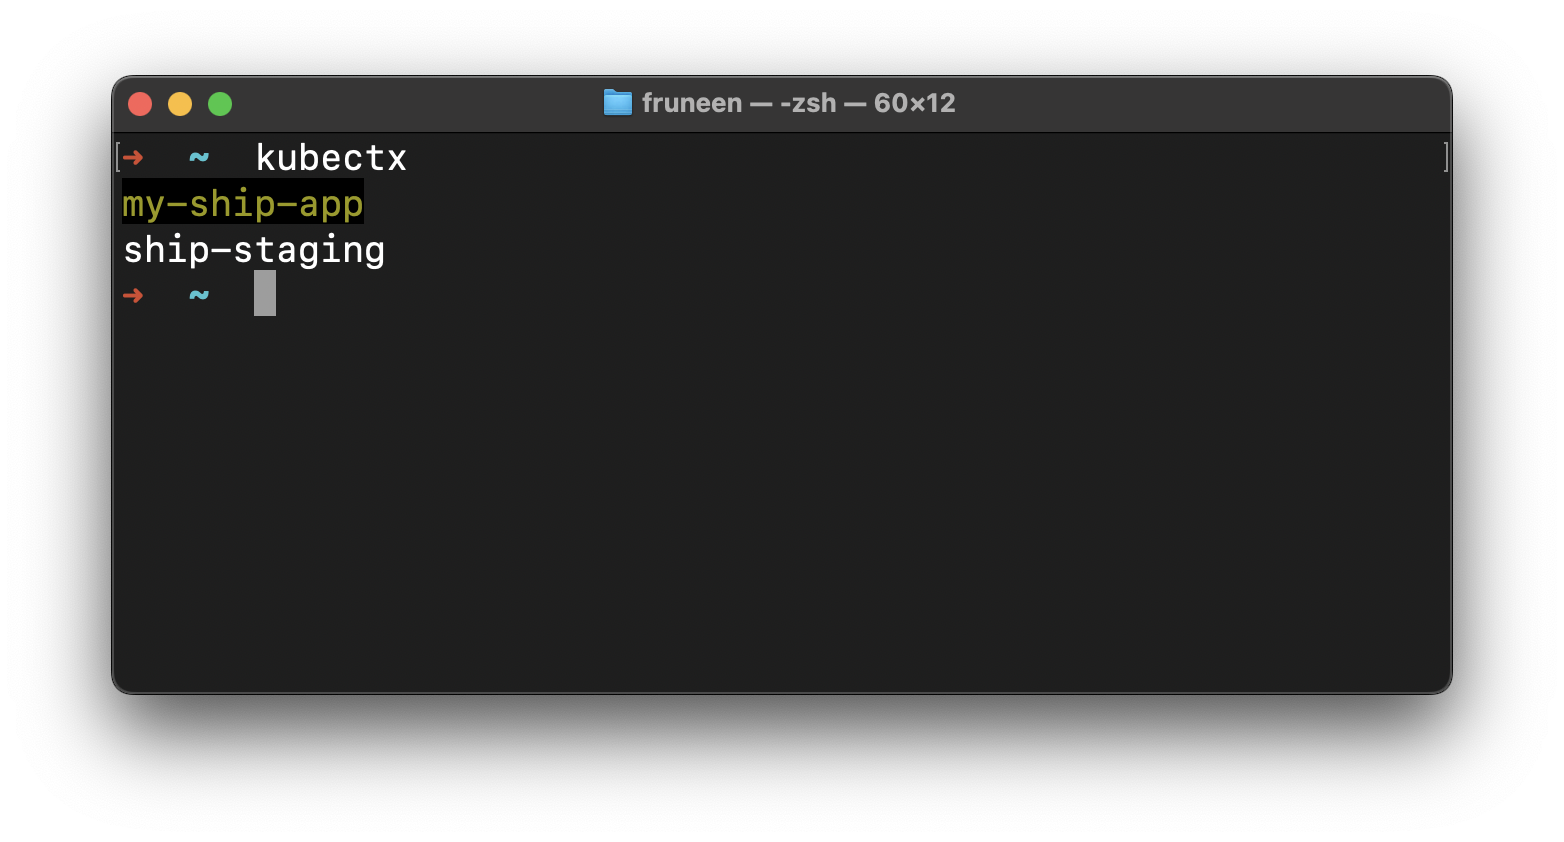
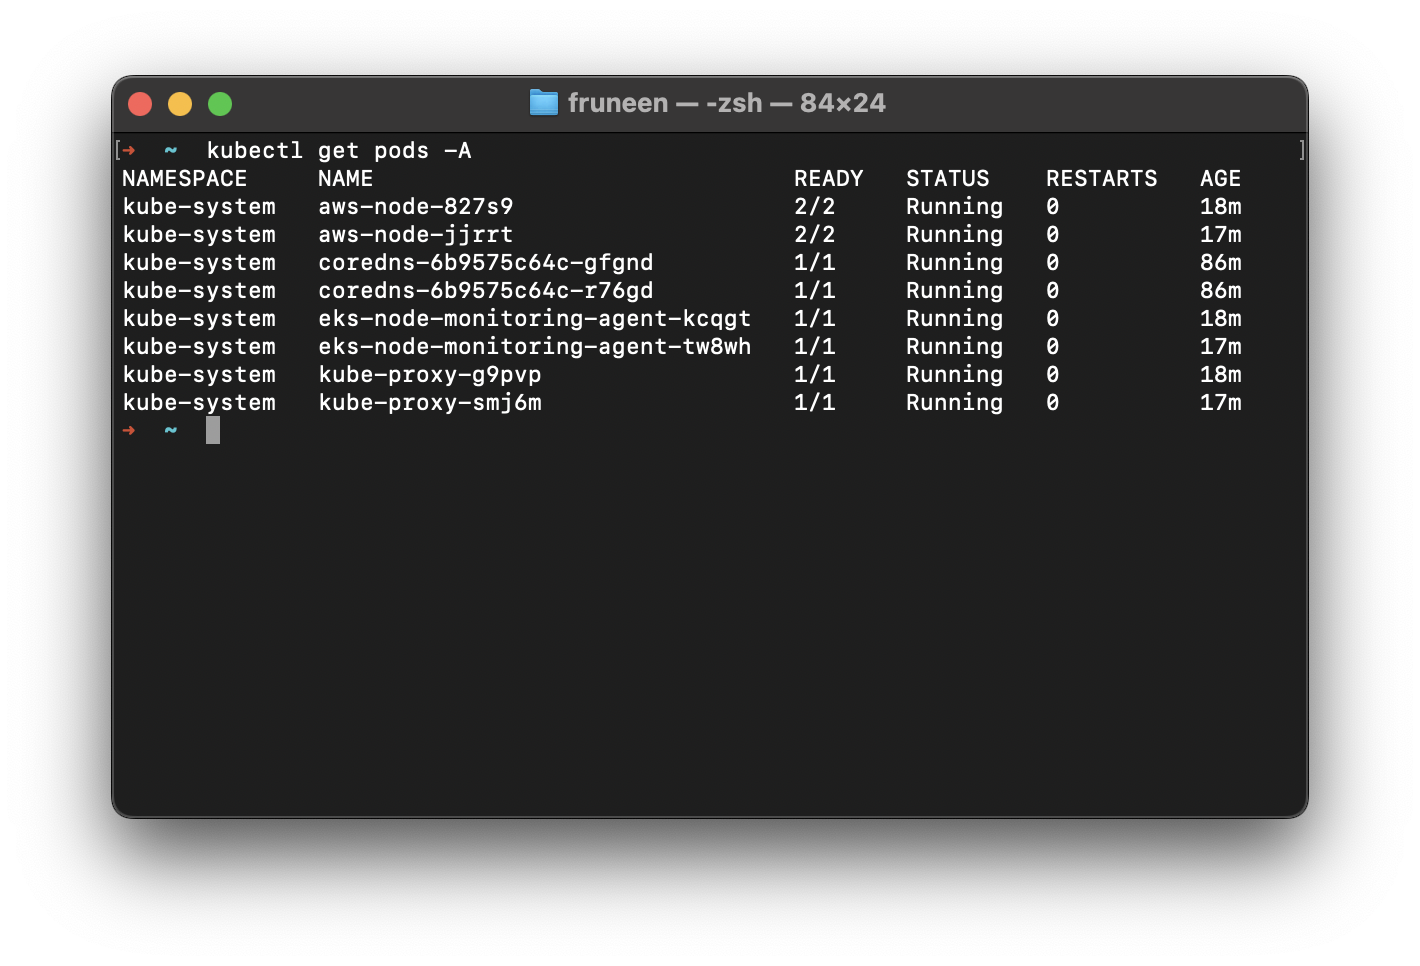
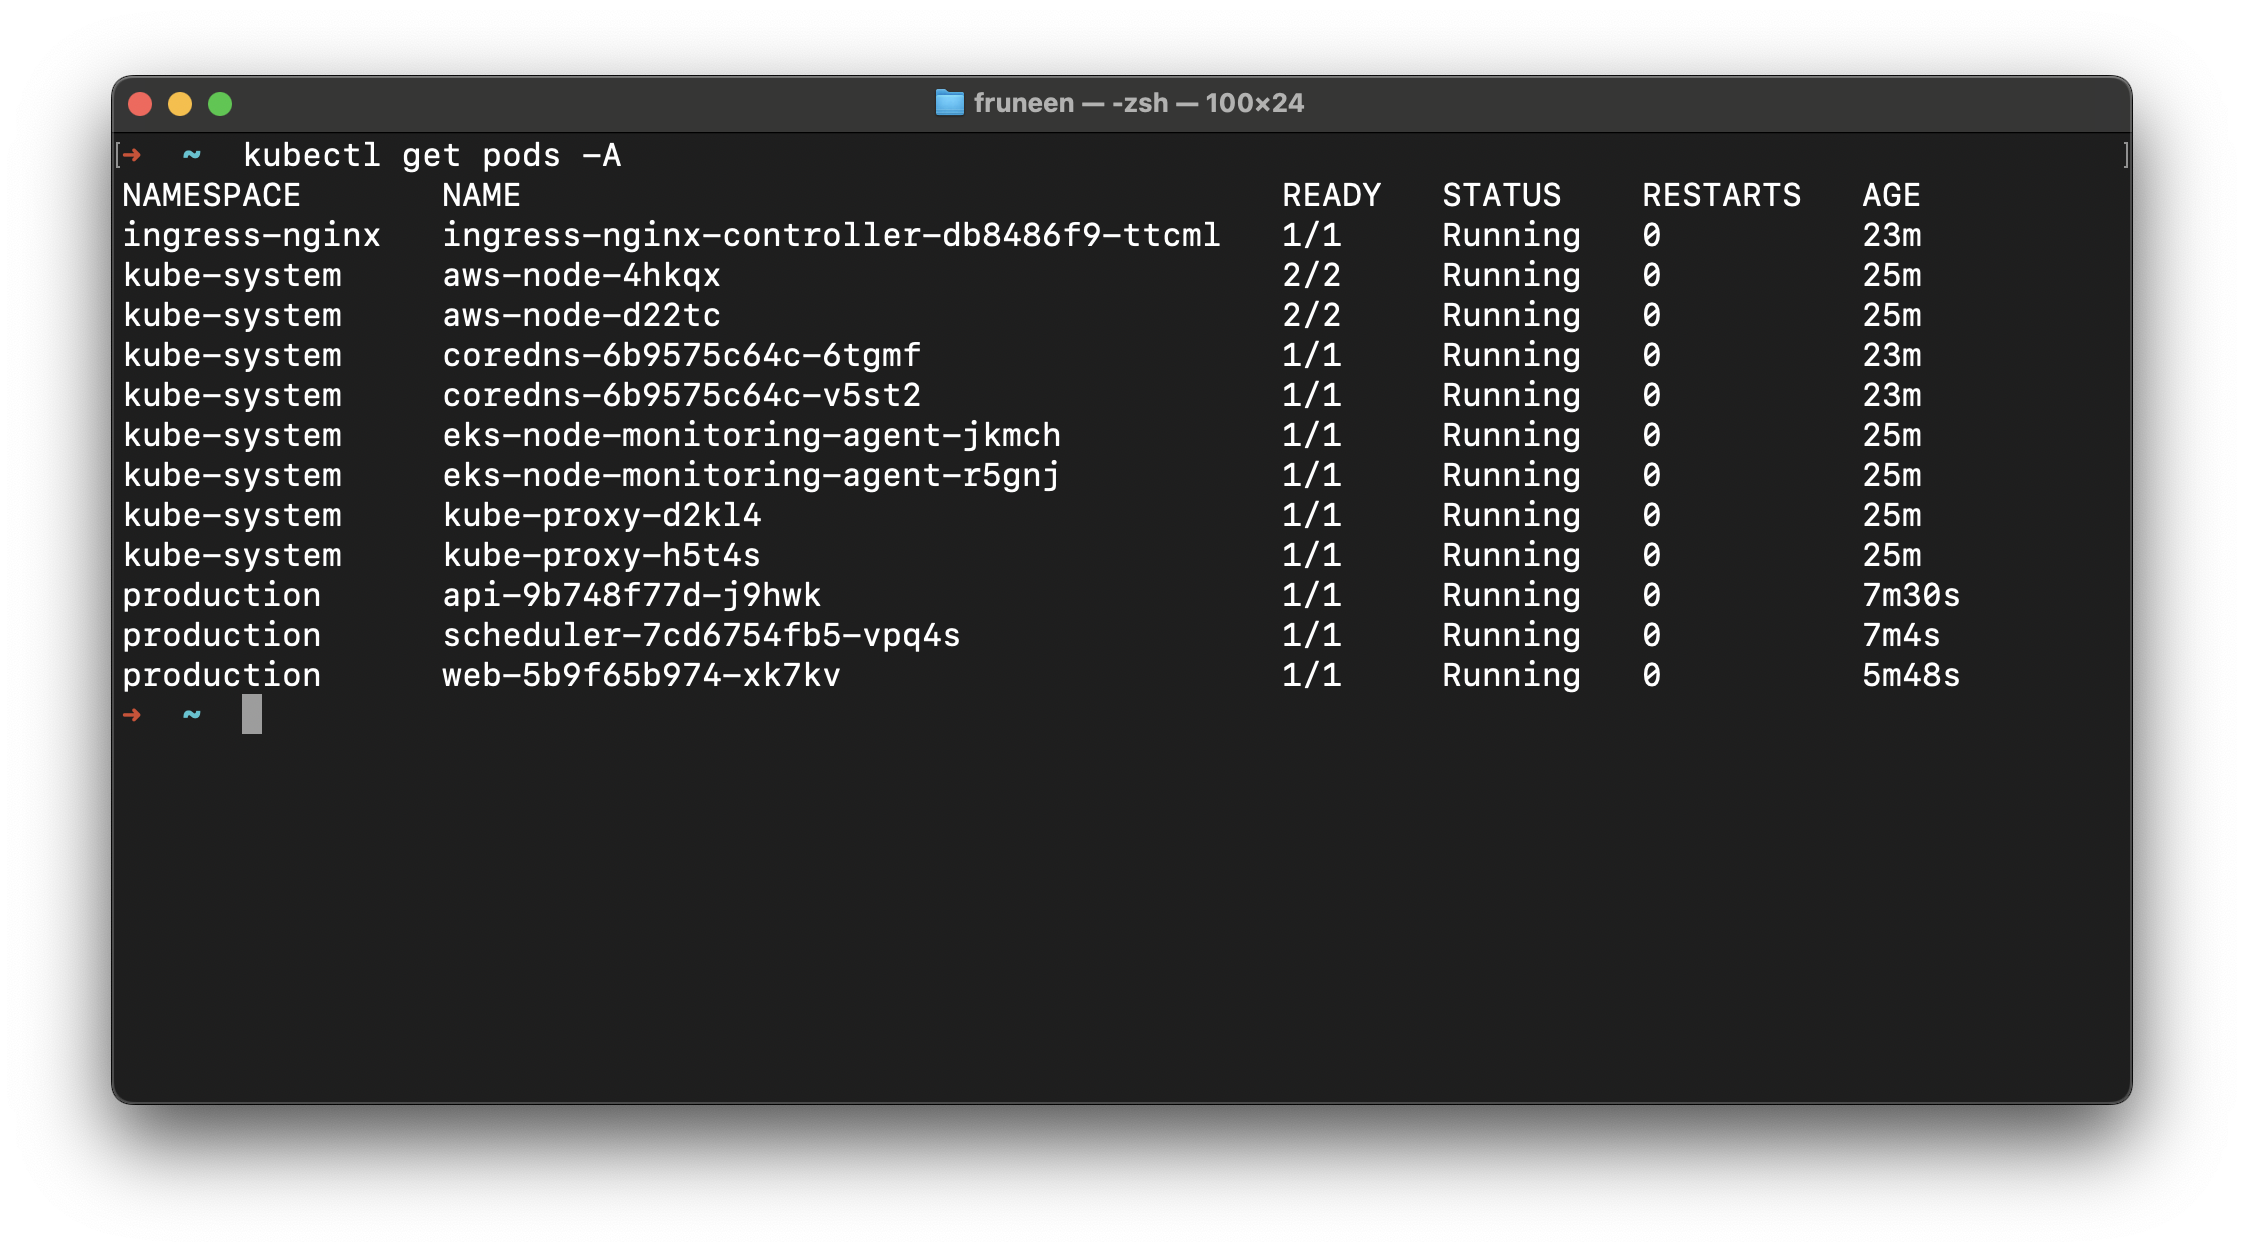
Verify cluster access
Ingress NGINX Controller
ingress-nginx is an Ingress controller for Kubernetes using NGINX as a reverse proxy and load balancer.Navigate to dependencies directory
deploy/dependencies directory in your terminal.Configure Helm Values (Optional)
eks.amazonaws.com/nodegroup value in values.yaml.gotmpl:Install dependencies
Review and apply changes
DNS and SSL
Get Load Balancer Address
EXTERNAL-IP column.Domain Naming Convention
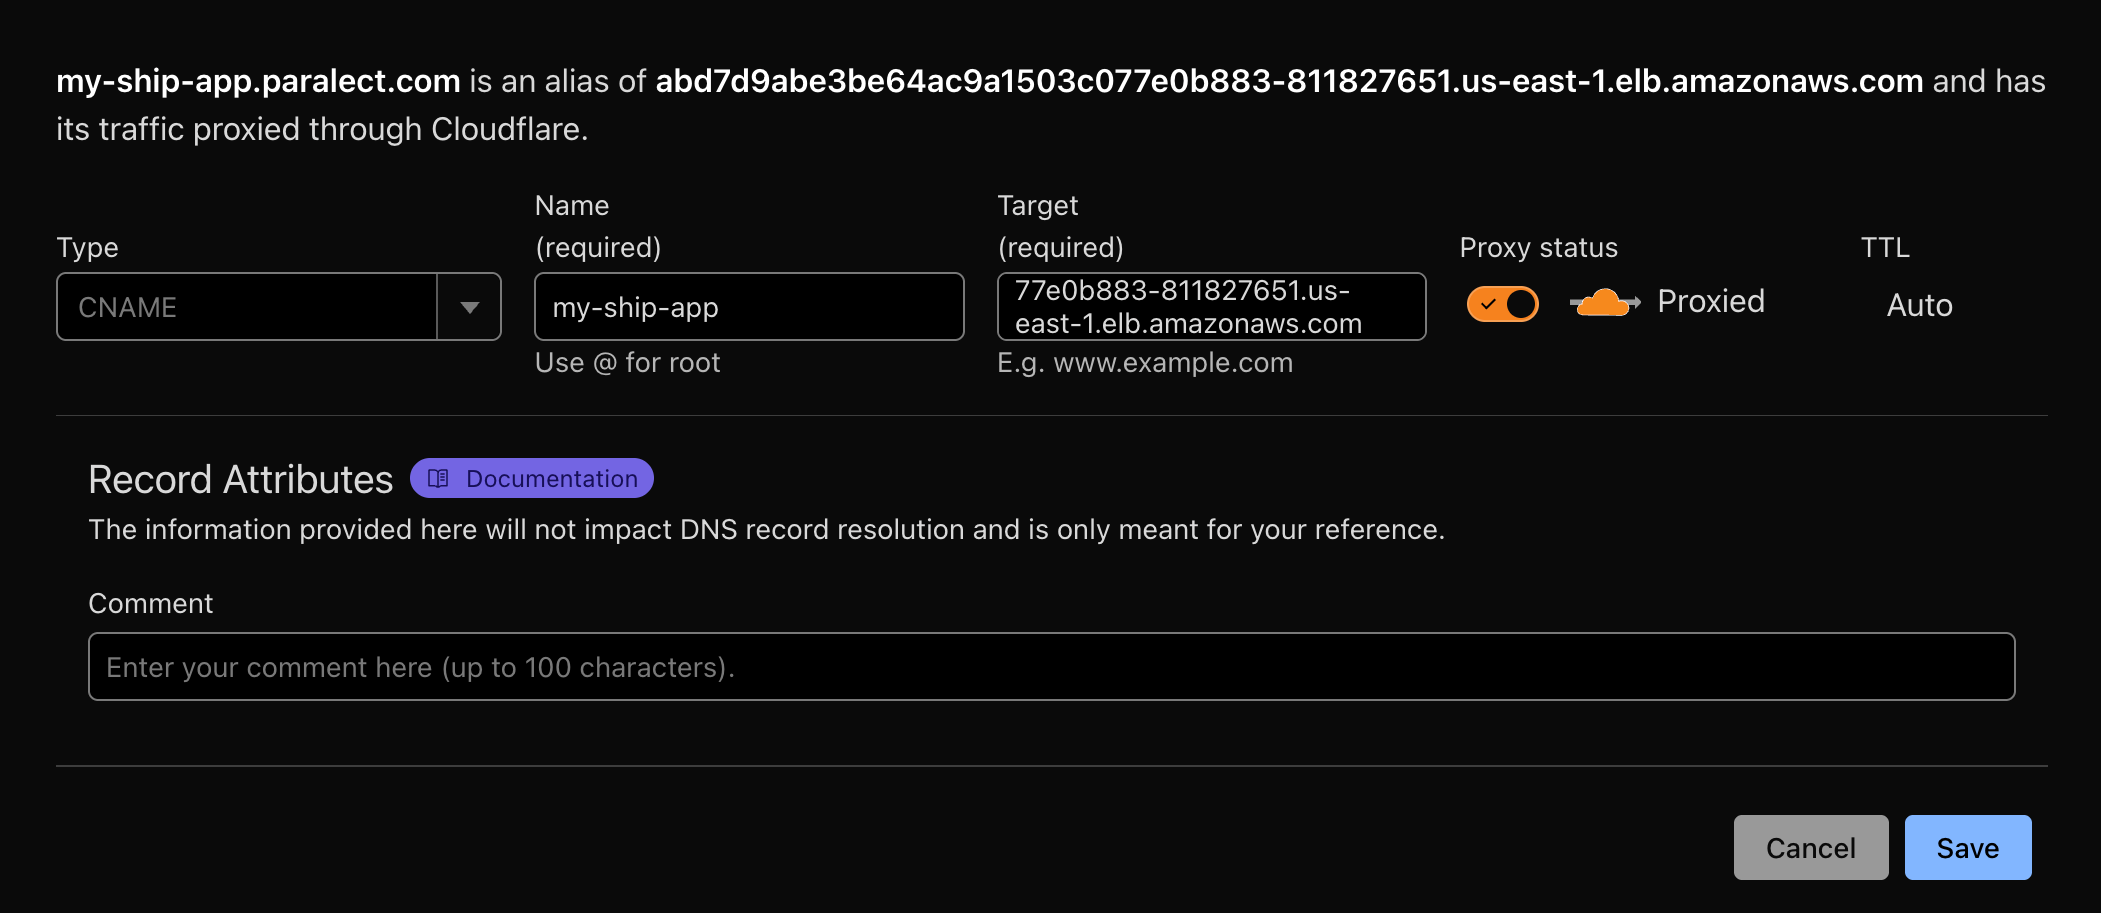
Configure DNS in Cloudflare
- First, ensure you have a domain in Cloudflare. You can either:
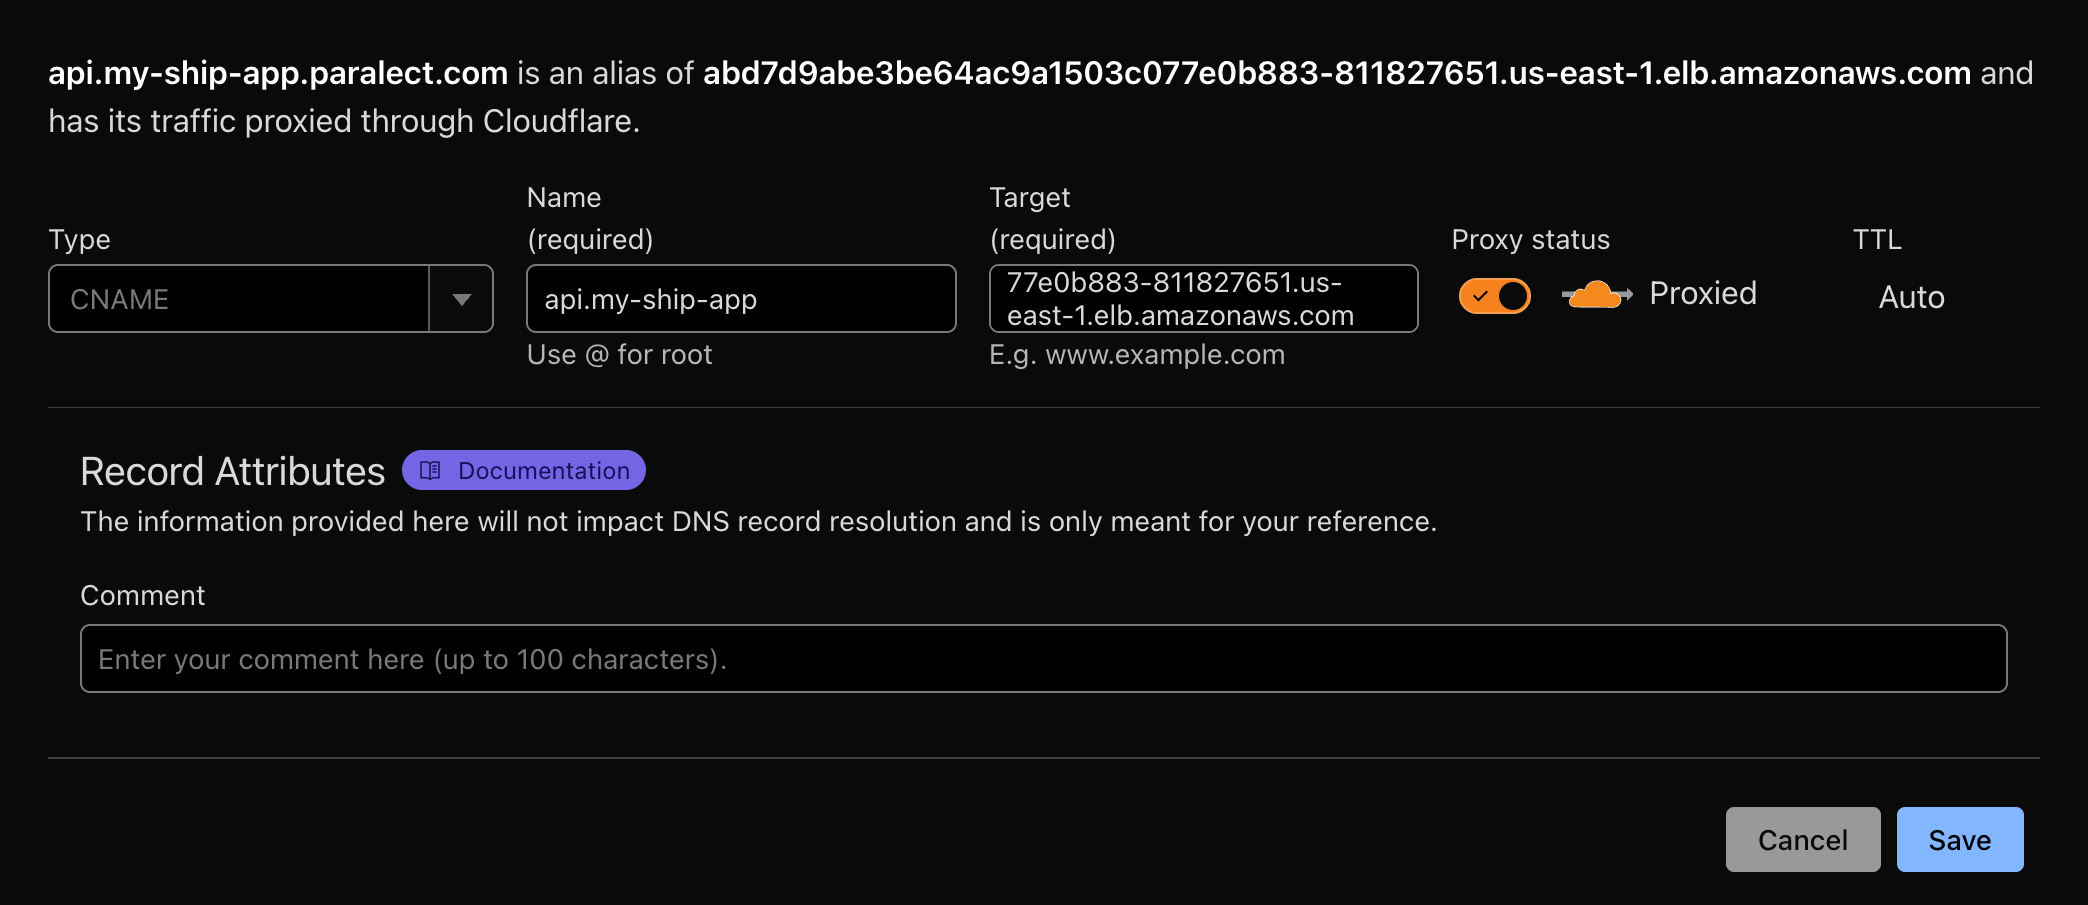
- In the Cloudflare DNS tab, create 2
CNAMErecords:
- One for Web interface
- One for API endpoint
- Route traffic through Cloudflare
- Generate SSL certificates automatically
Update Configuration Files
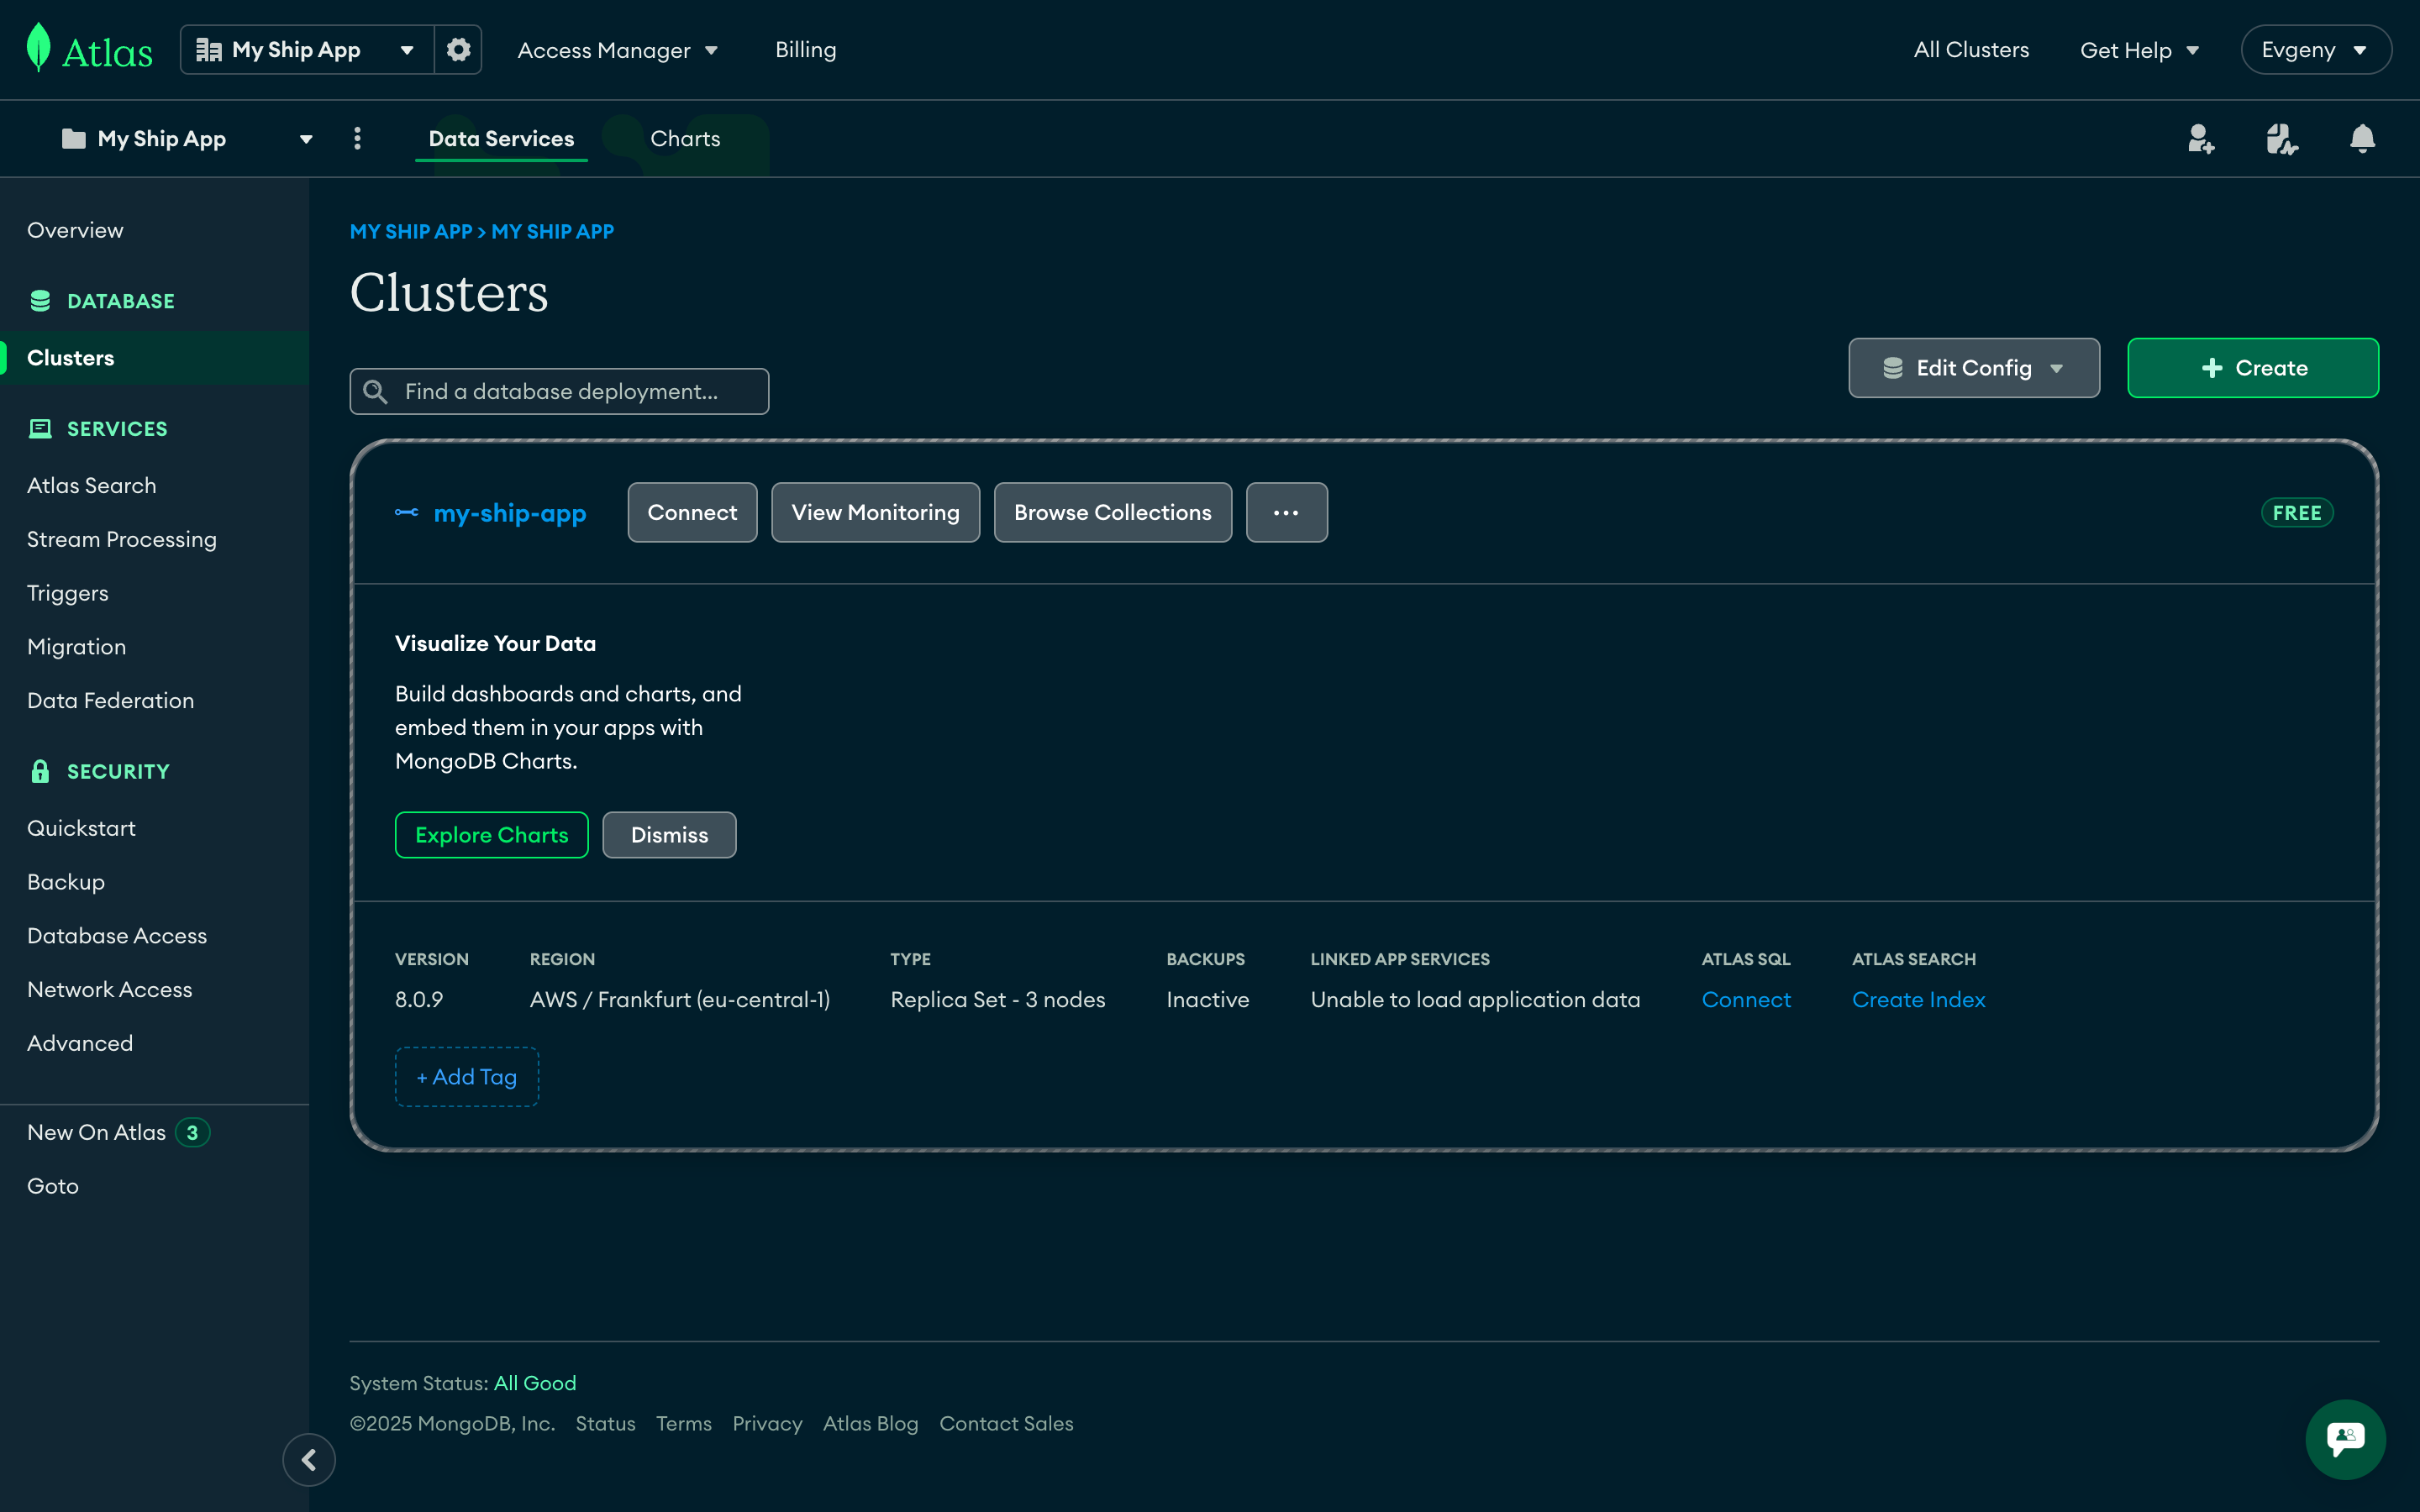
MongoDB Atlas
MongoDB Atlas is a fully managed cloud database service that provides automated backups, scaling, and security features. It offers 99.995% availability with global deployment options and seamless integration with AWS infrastructure.Cluster Creation
Access MongoDB Atlas
Deploy New Cluster
- Staging:
M0(Free tier) - Suitable for development and testing - Production:
M10or higher - Includes automated backups and advanced features
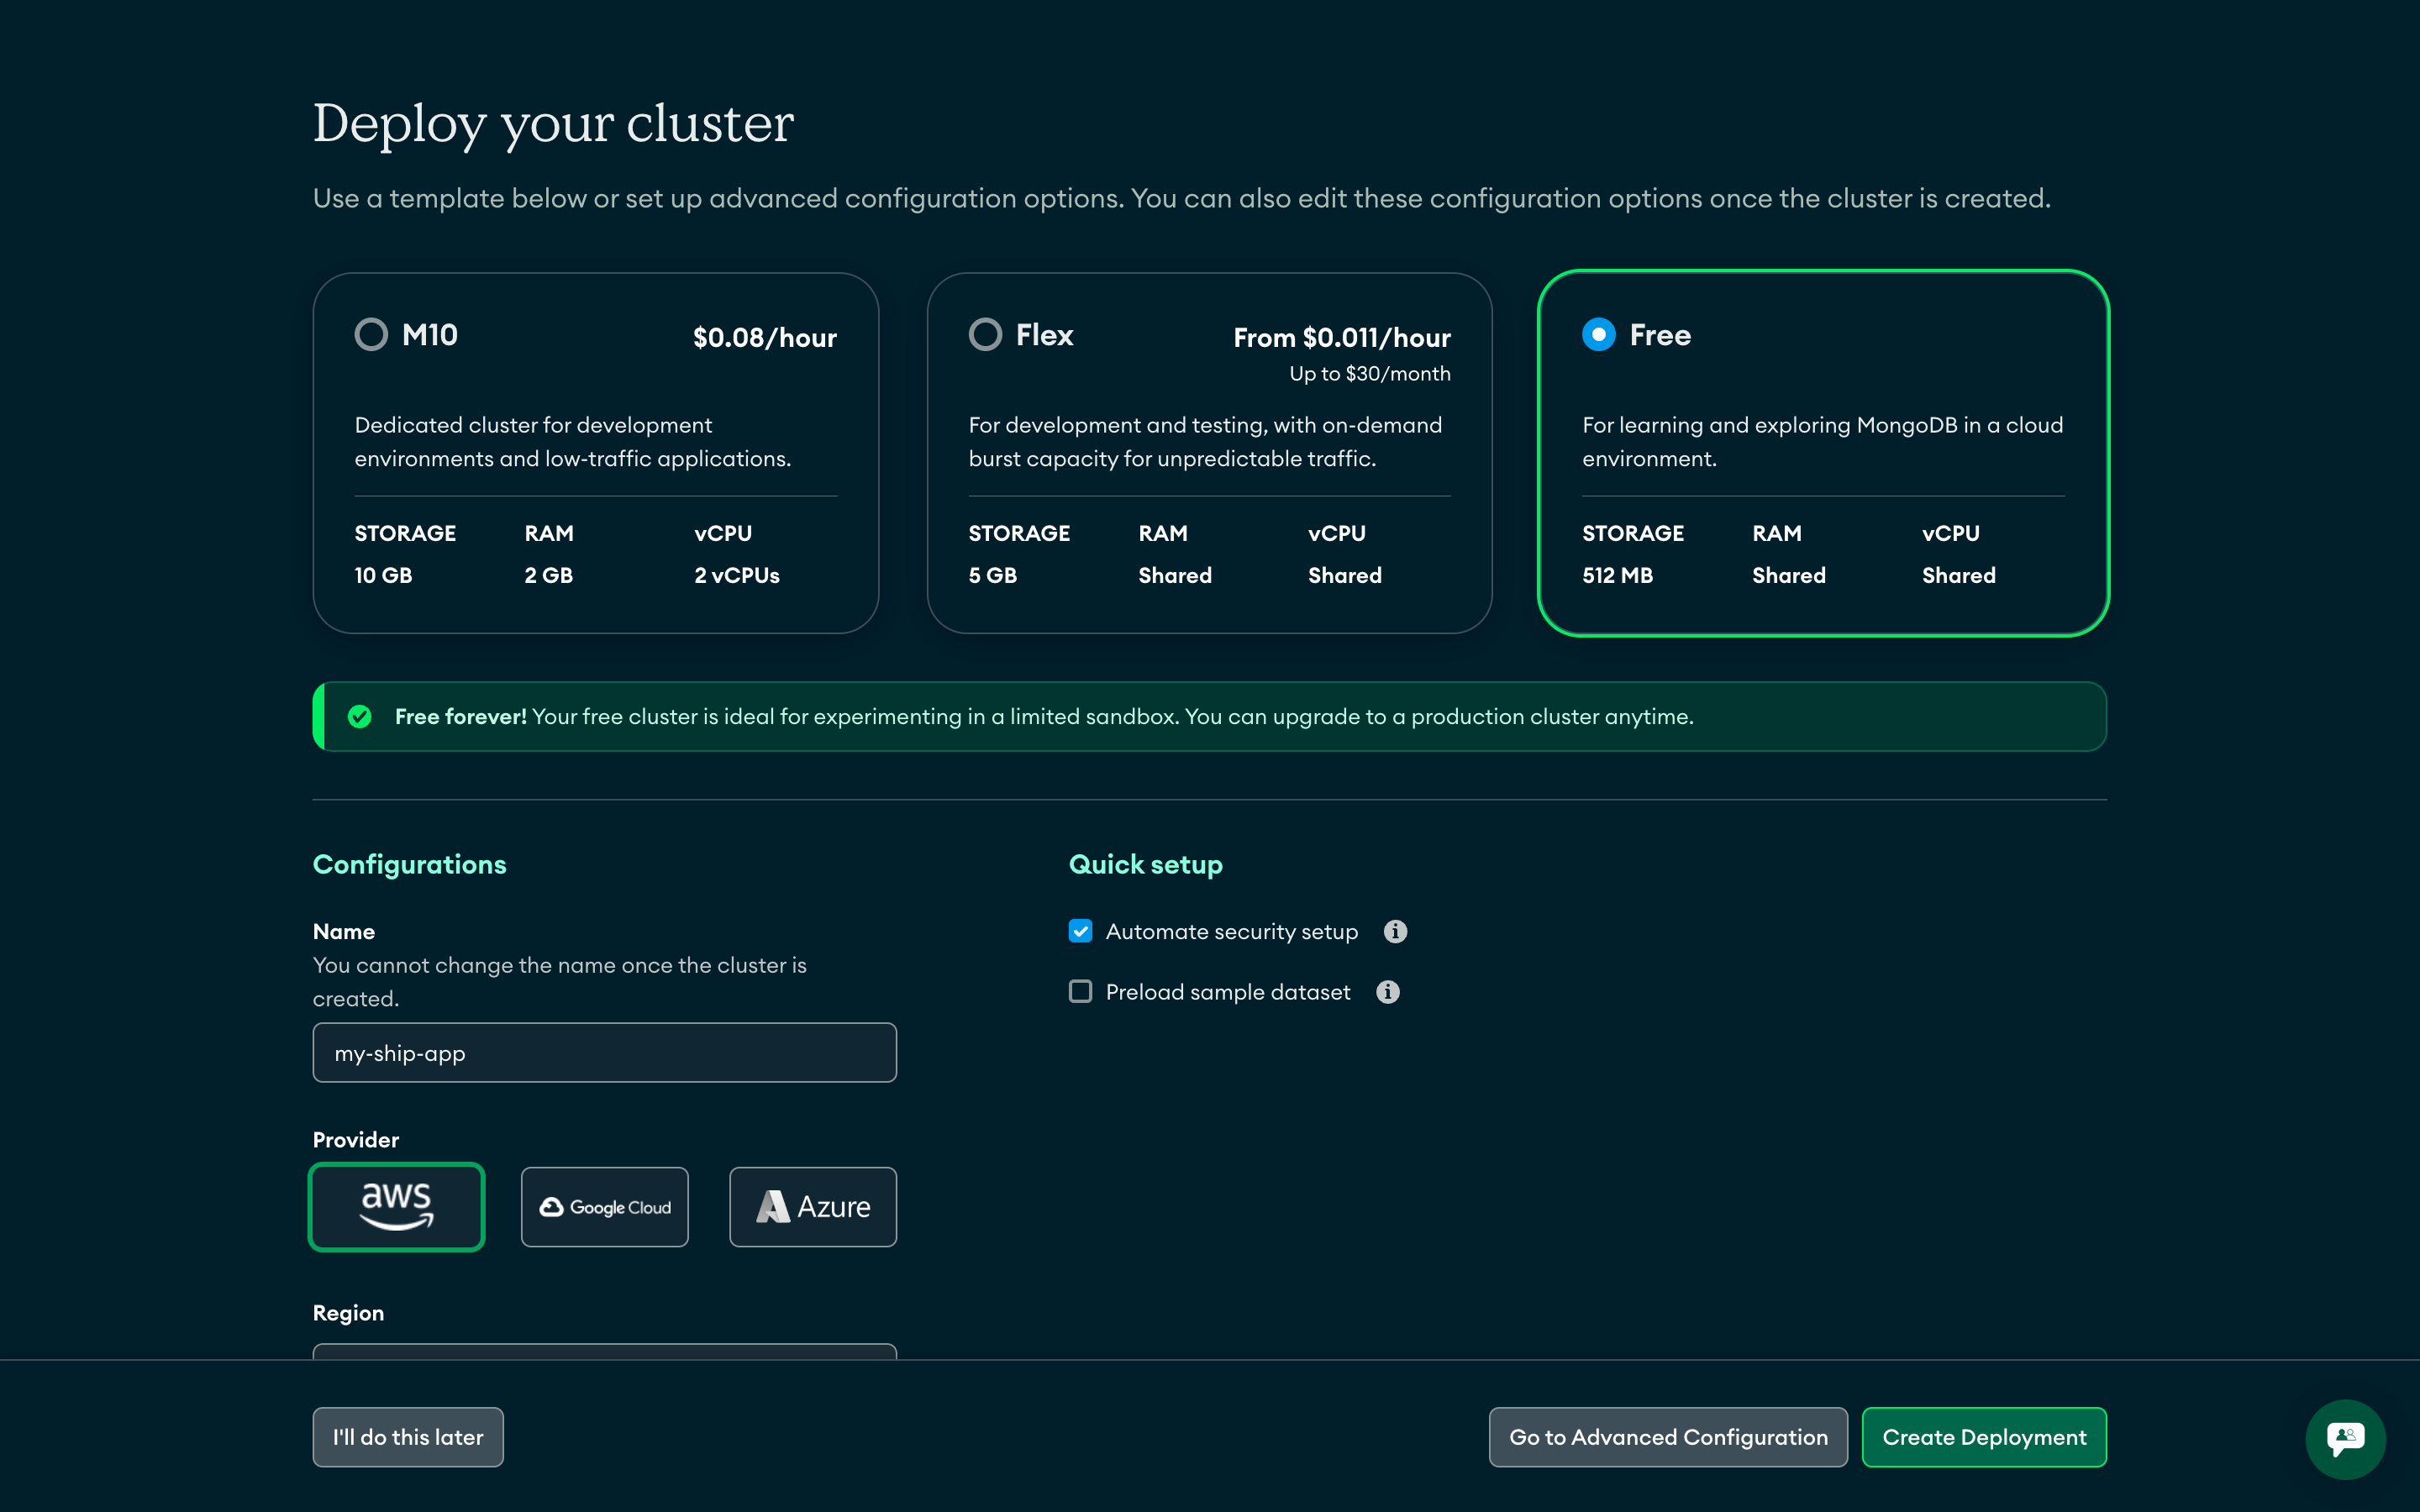
Configure Cluster Name
ship-production-cluster, ship-staging-cluster)Security Configuration
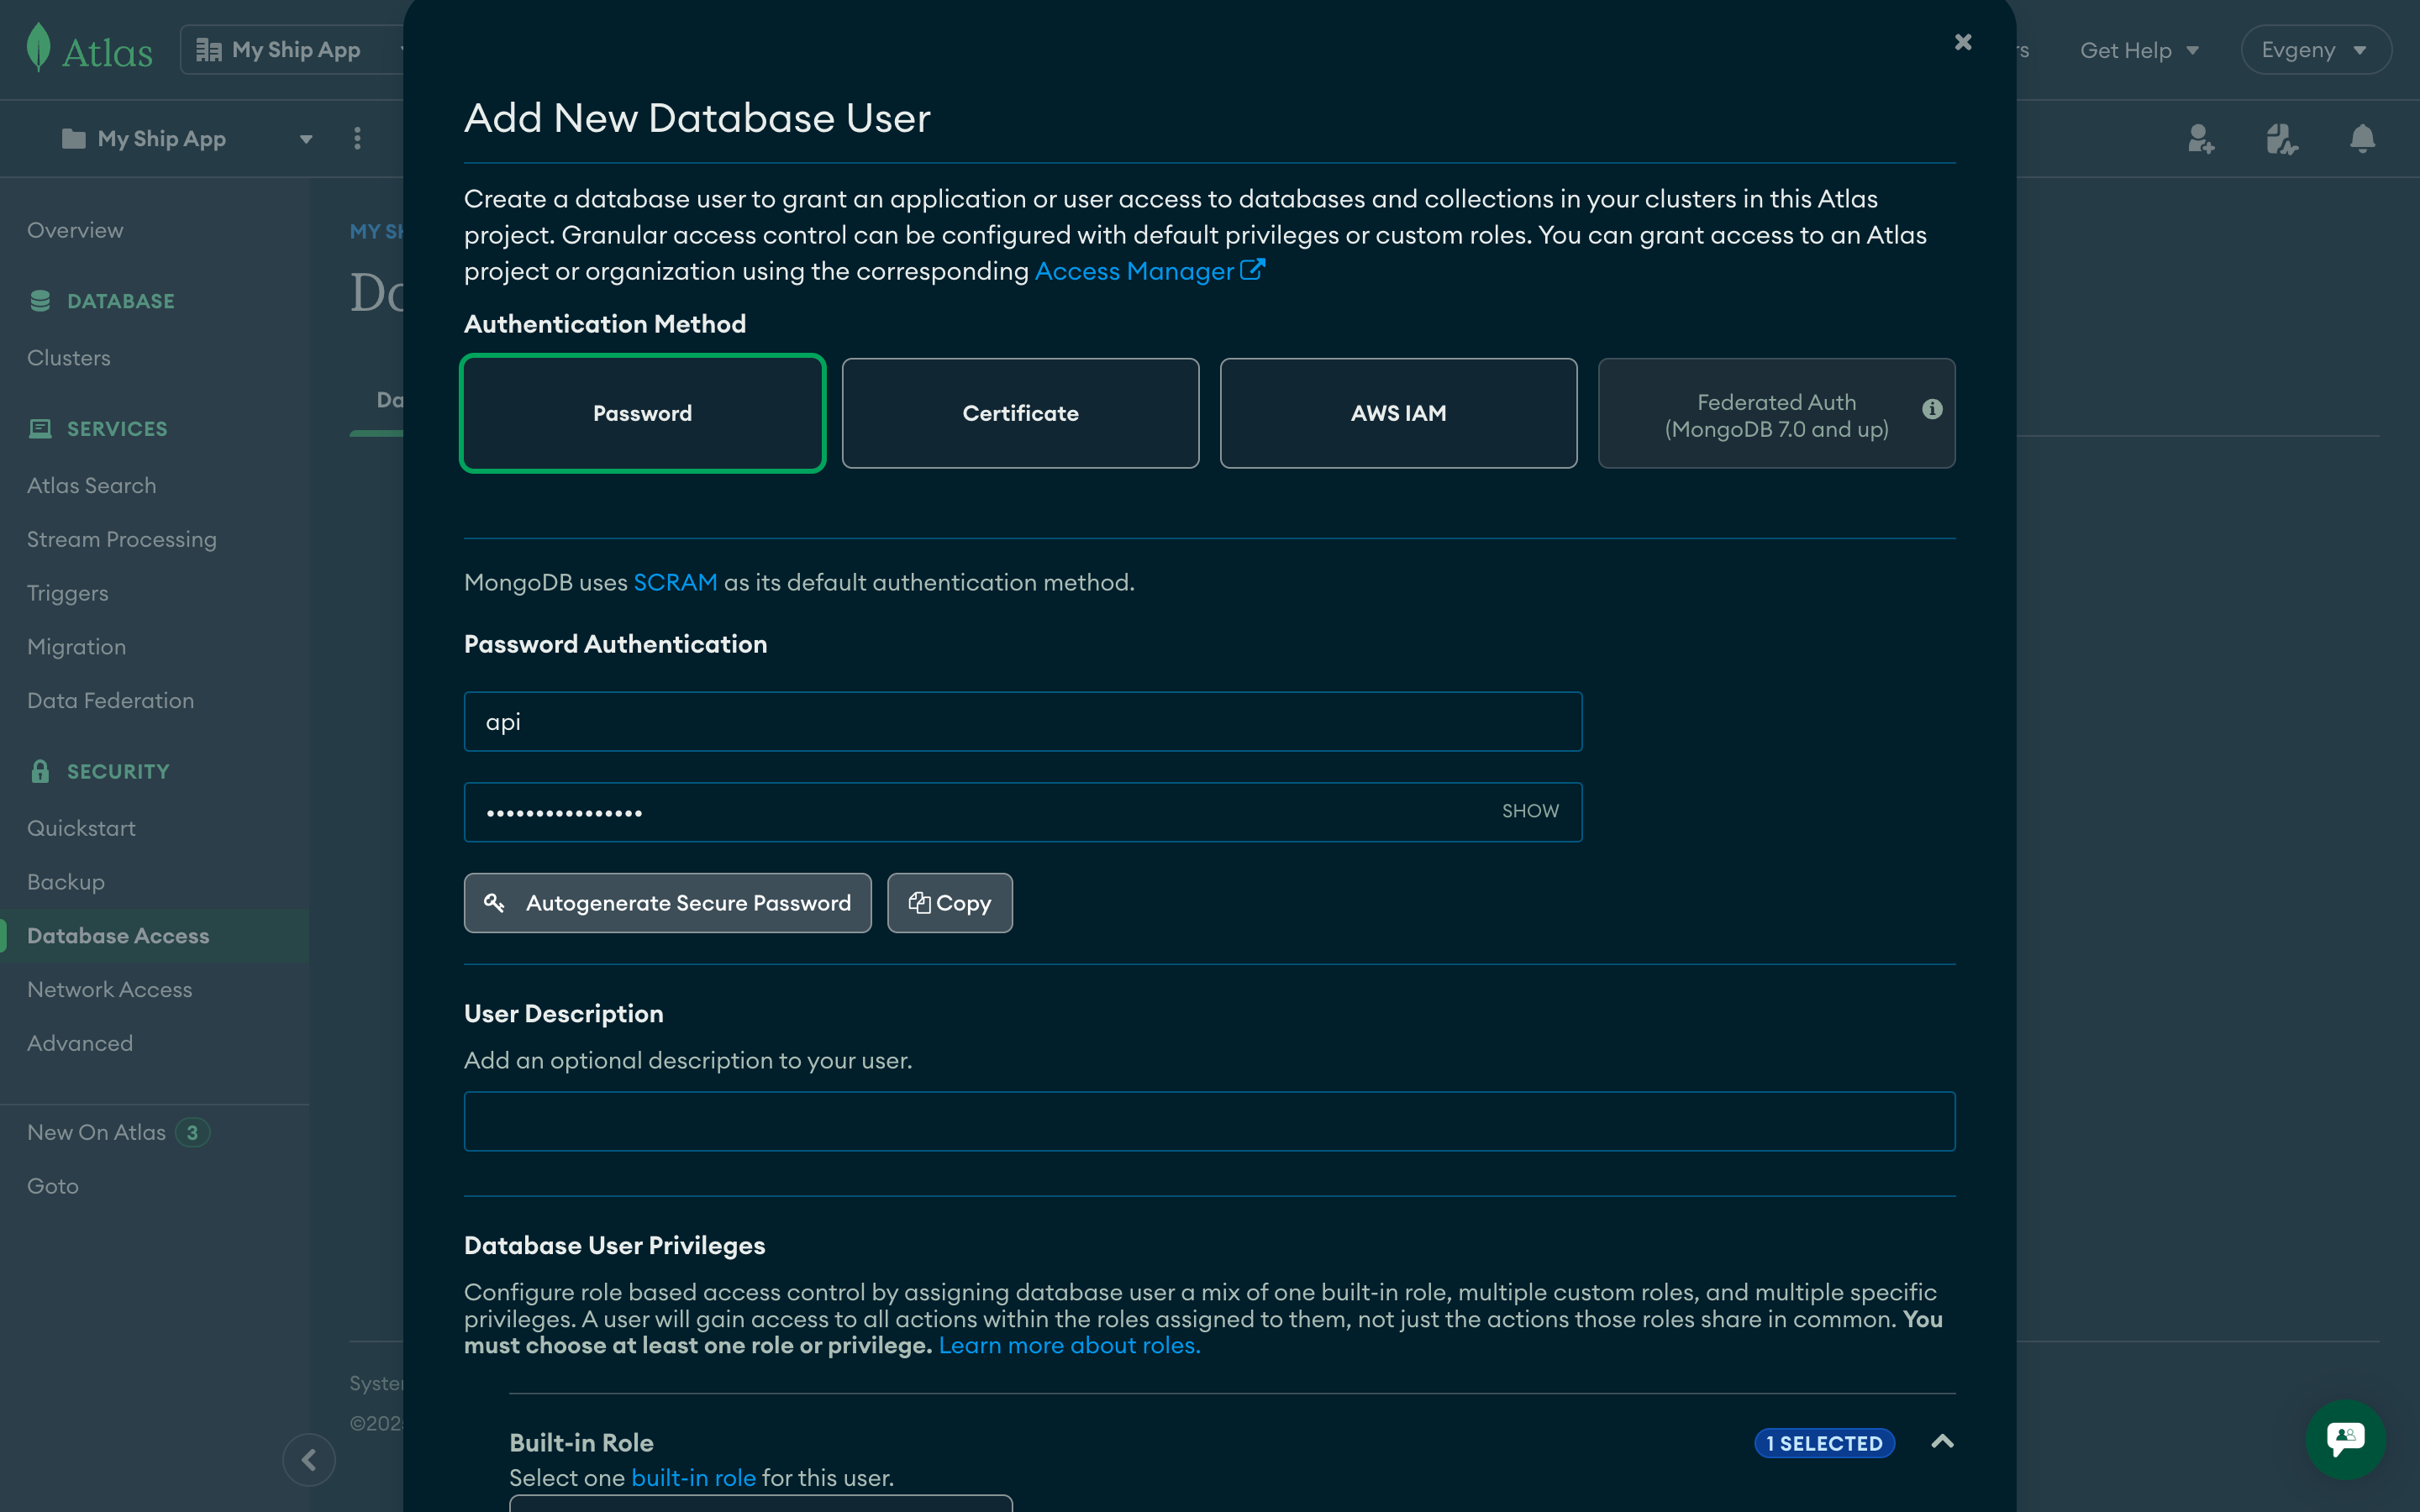
Create Database User
- Authentication Method: Password
- Username: Use environment-specific names (e.g.,
api-production,api-staging) - Password: Generate a strong password
- Database User Privileges: Read and write to any database
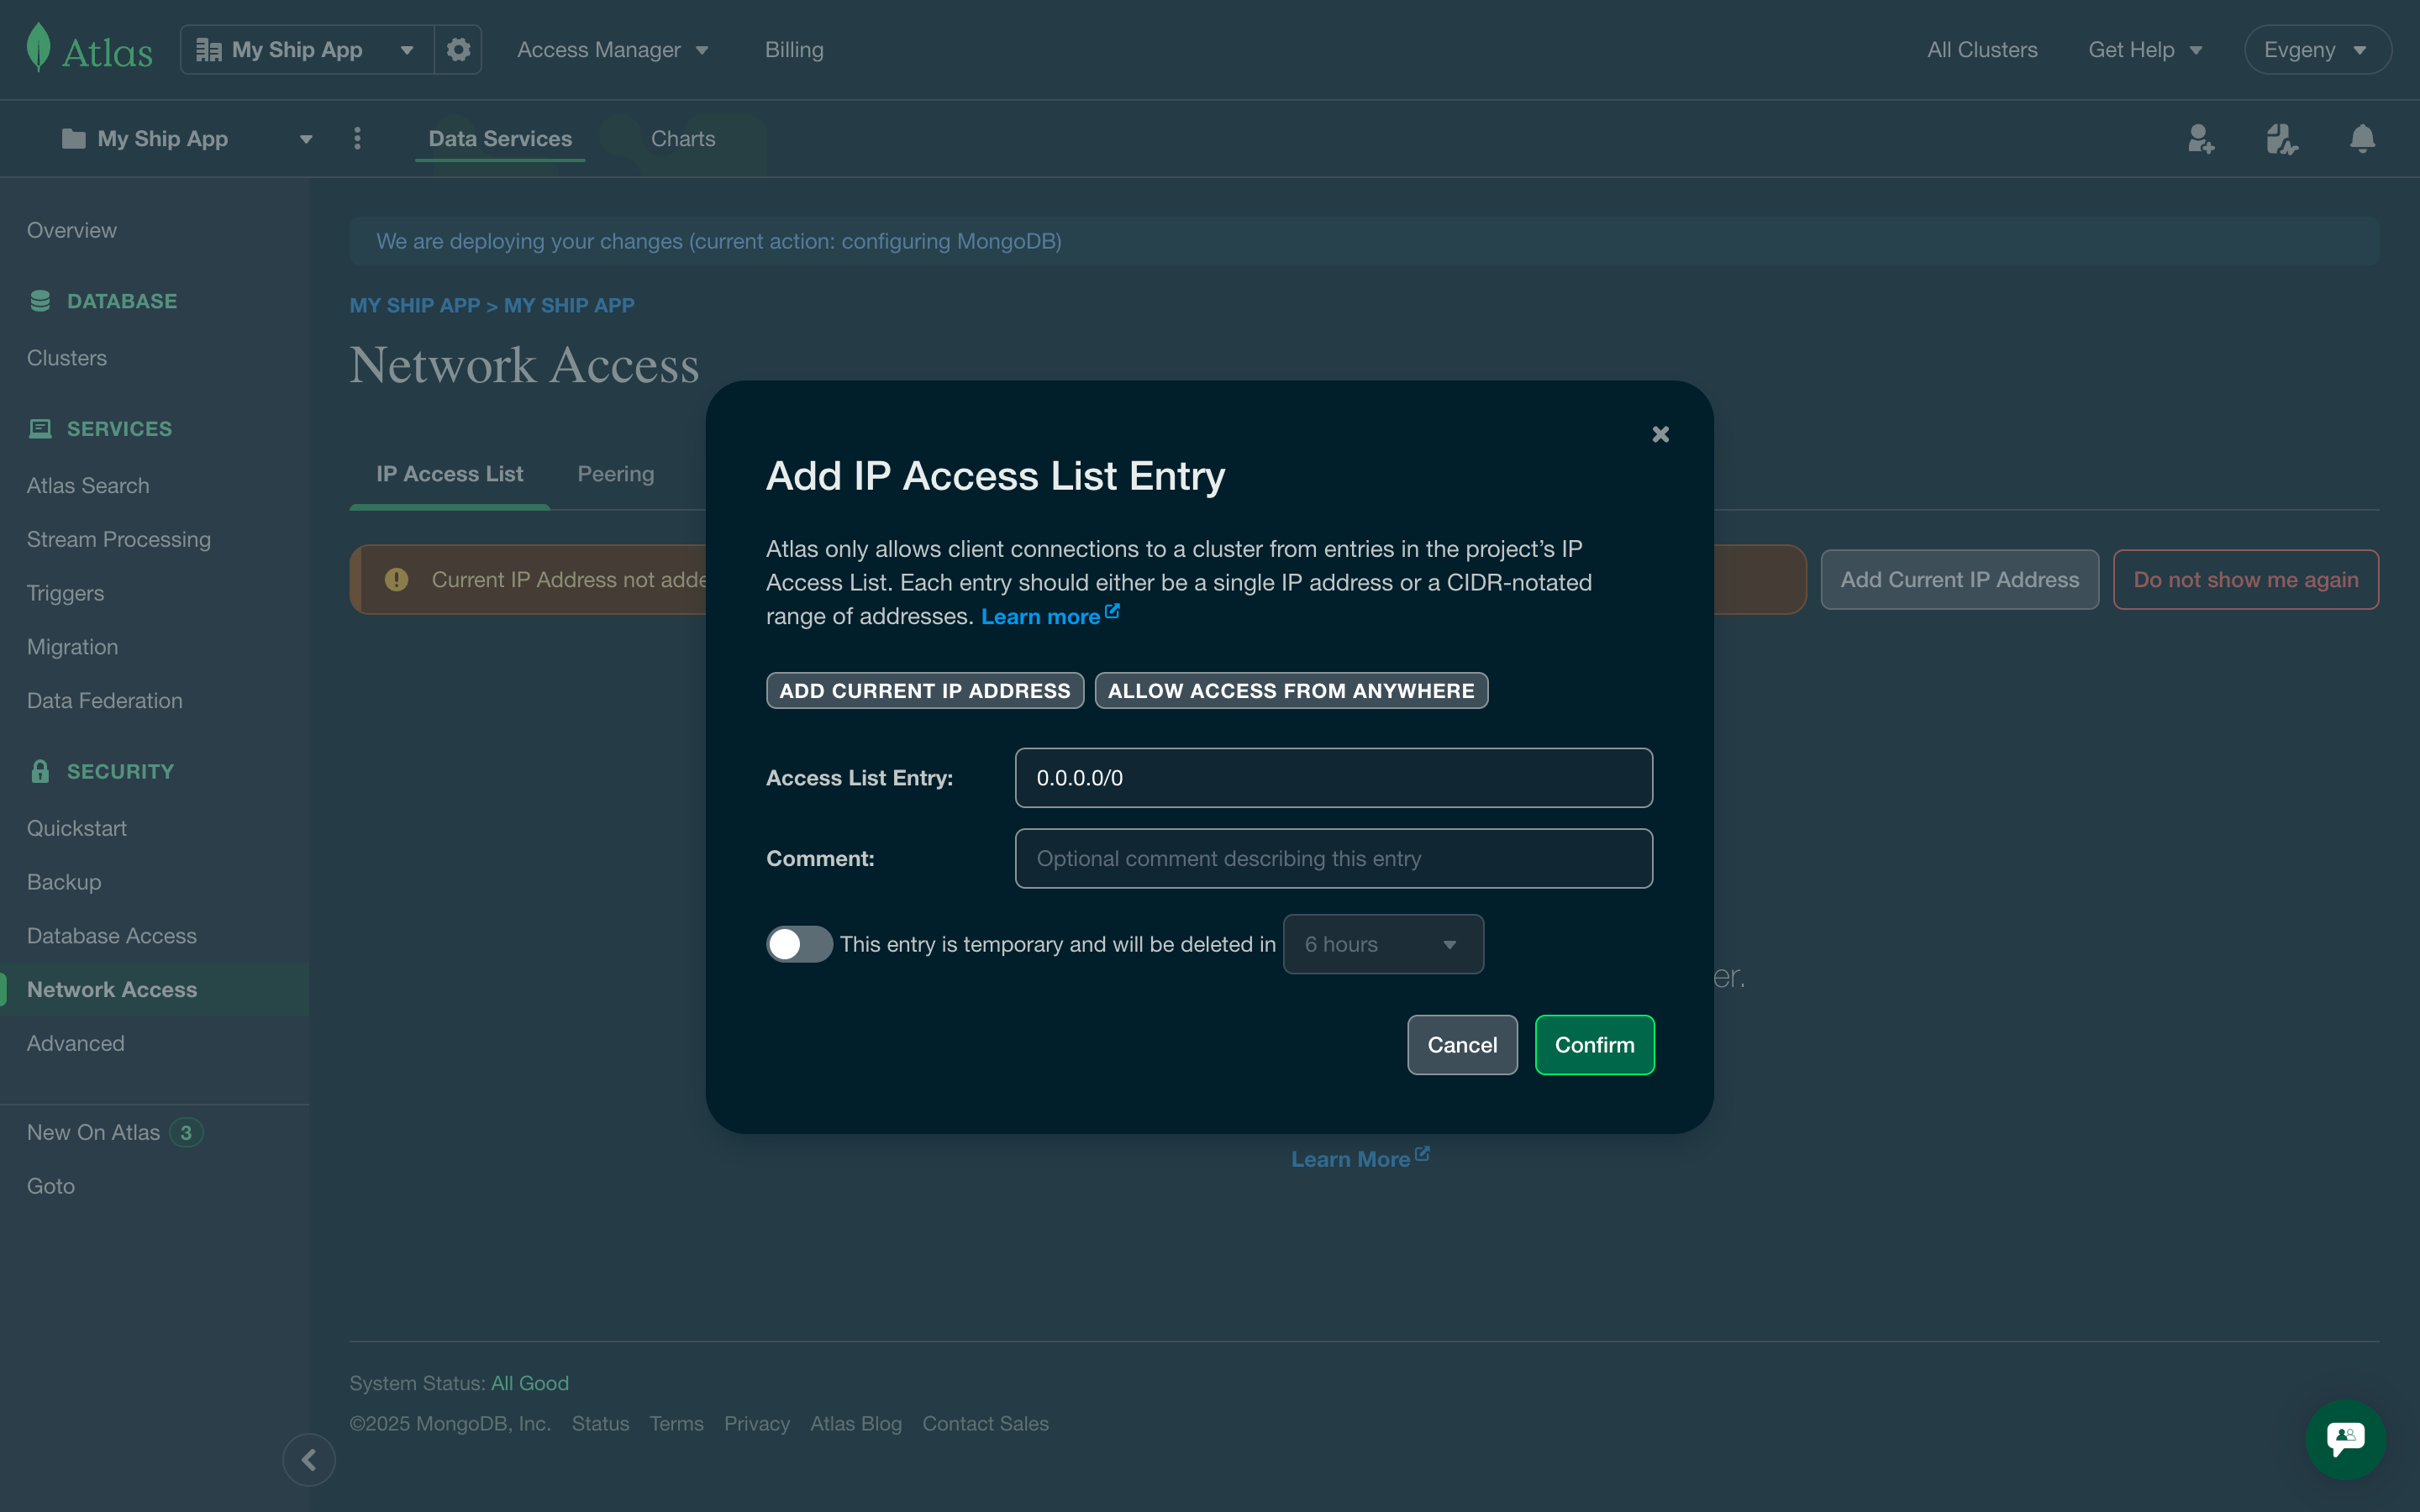
Configure Network Access
- Click Allow access from anywhere to allow connections from any IP with valid credentials
- For production, consider restricting to specific IP ranges for enhanced security
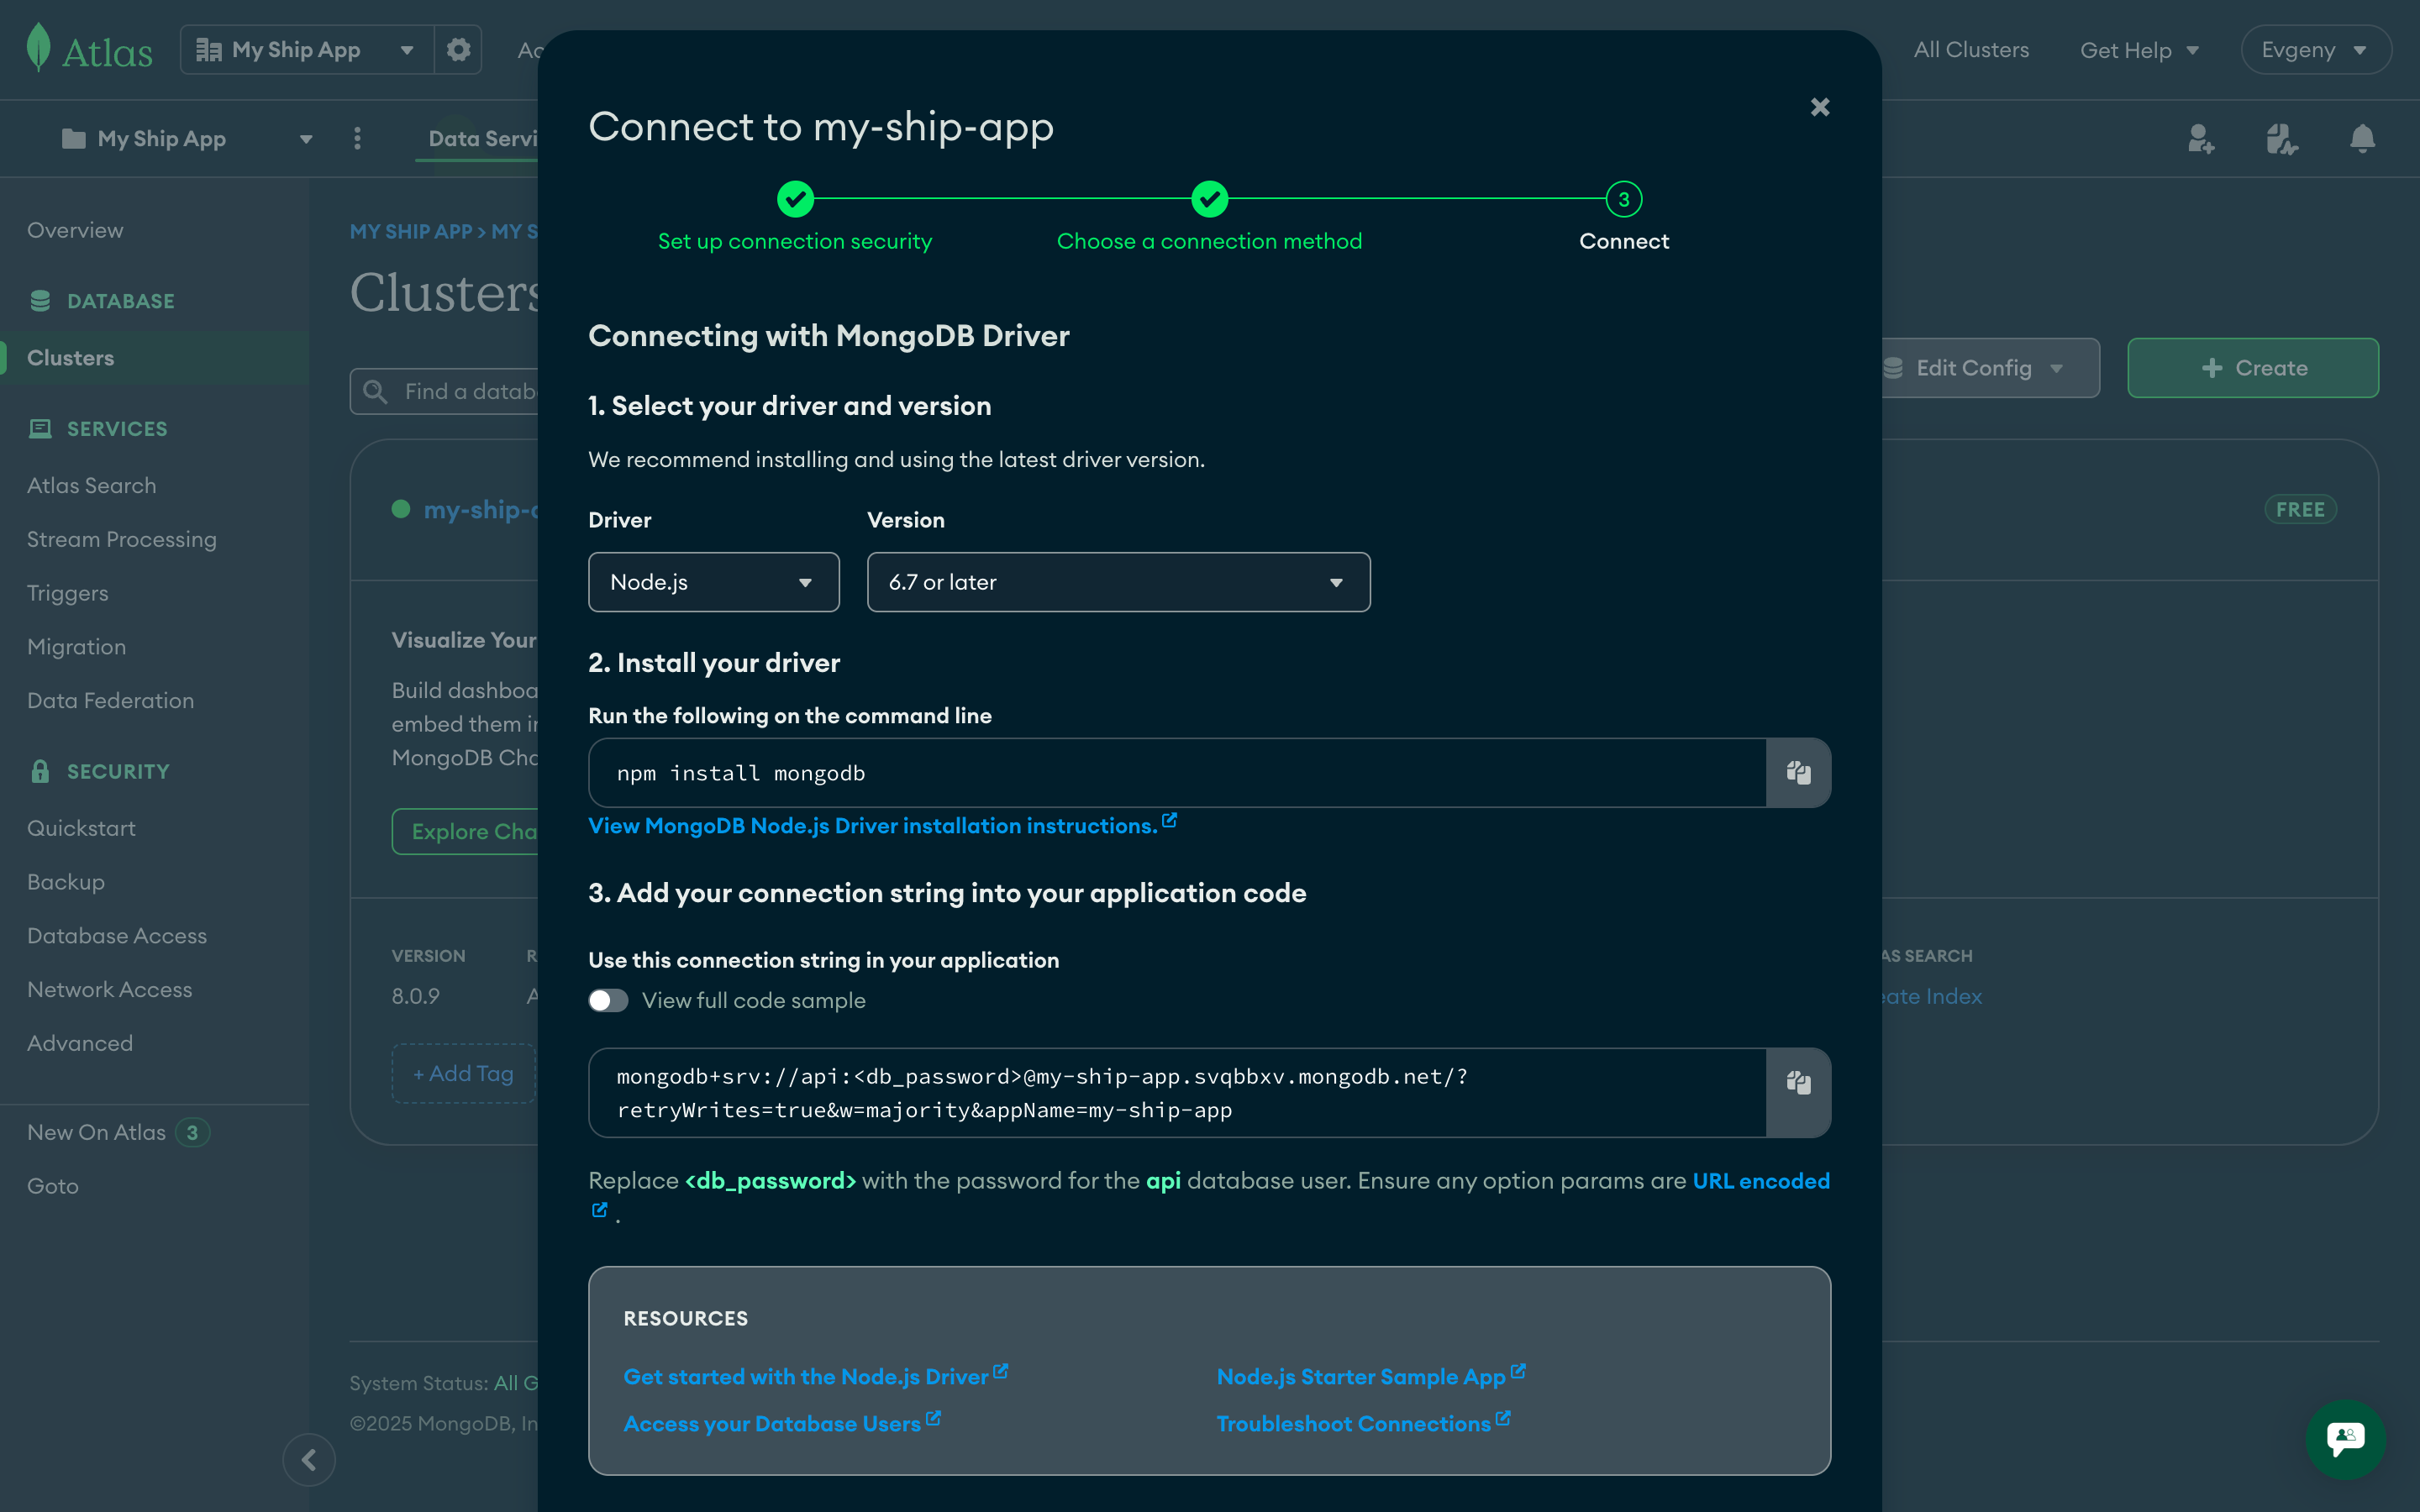
Get Connection String
Access Connection Details
Copy Connection String
- Select Drivers in the “Connect your application” section
- Choose Node.js driver and latest version
- Copy the connection string and replace
<db_password>with your actual password
Save Connection Details
Environment variables
Kubernetes applications require proper environment variable configuration for both API and Web components. This section covers how to set up and manage environment variables securely using Kubernetes secrets and configuration files.API Environment Variables
For the API deployment, you need to set up environment variables using Kubernetes secrets to securely manage sensitive configuration data.Environment Variable Details
APP_ENV
APP_ENV
MONGO_URI
MONGO_URI
mongodb+srv://username:password@cluster.mongodb.net. Each environment should use a separate database cluster or at minimum separate credentials.MONGO_DB_NAME
MONGO_DB_NAME
API_URL
API_URL
WEB_URL
WEB_URL
Setting up Kubernetes Secrets
Create namespaces and secret objects
Initialize secret storage
APP_ENV variable to initialize secret storage for k8sec:Verify secret creation
Prepare environment file
.env.production file with all required variables:Import secrets to Kubernetes
Web Environment Variables
The web application uses Next.js environment variables that are embedded at build time and made available in the browser. Unlike API secrets, these variables are stored directly in the GitHub repository.NEXT_PUBLIC_) contain only public configuration like URLs and API endpoints. They don’t include sensitive data like passwords or API keys, making them safe to store in version control. These values are already exposed to users in the browser, so repository storage doesn’t create additional security risks.Configuration Files
Web environment variables are stored in separate files for each deployment environment:Environment Variables Reference
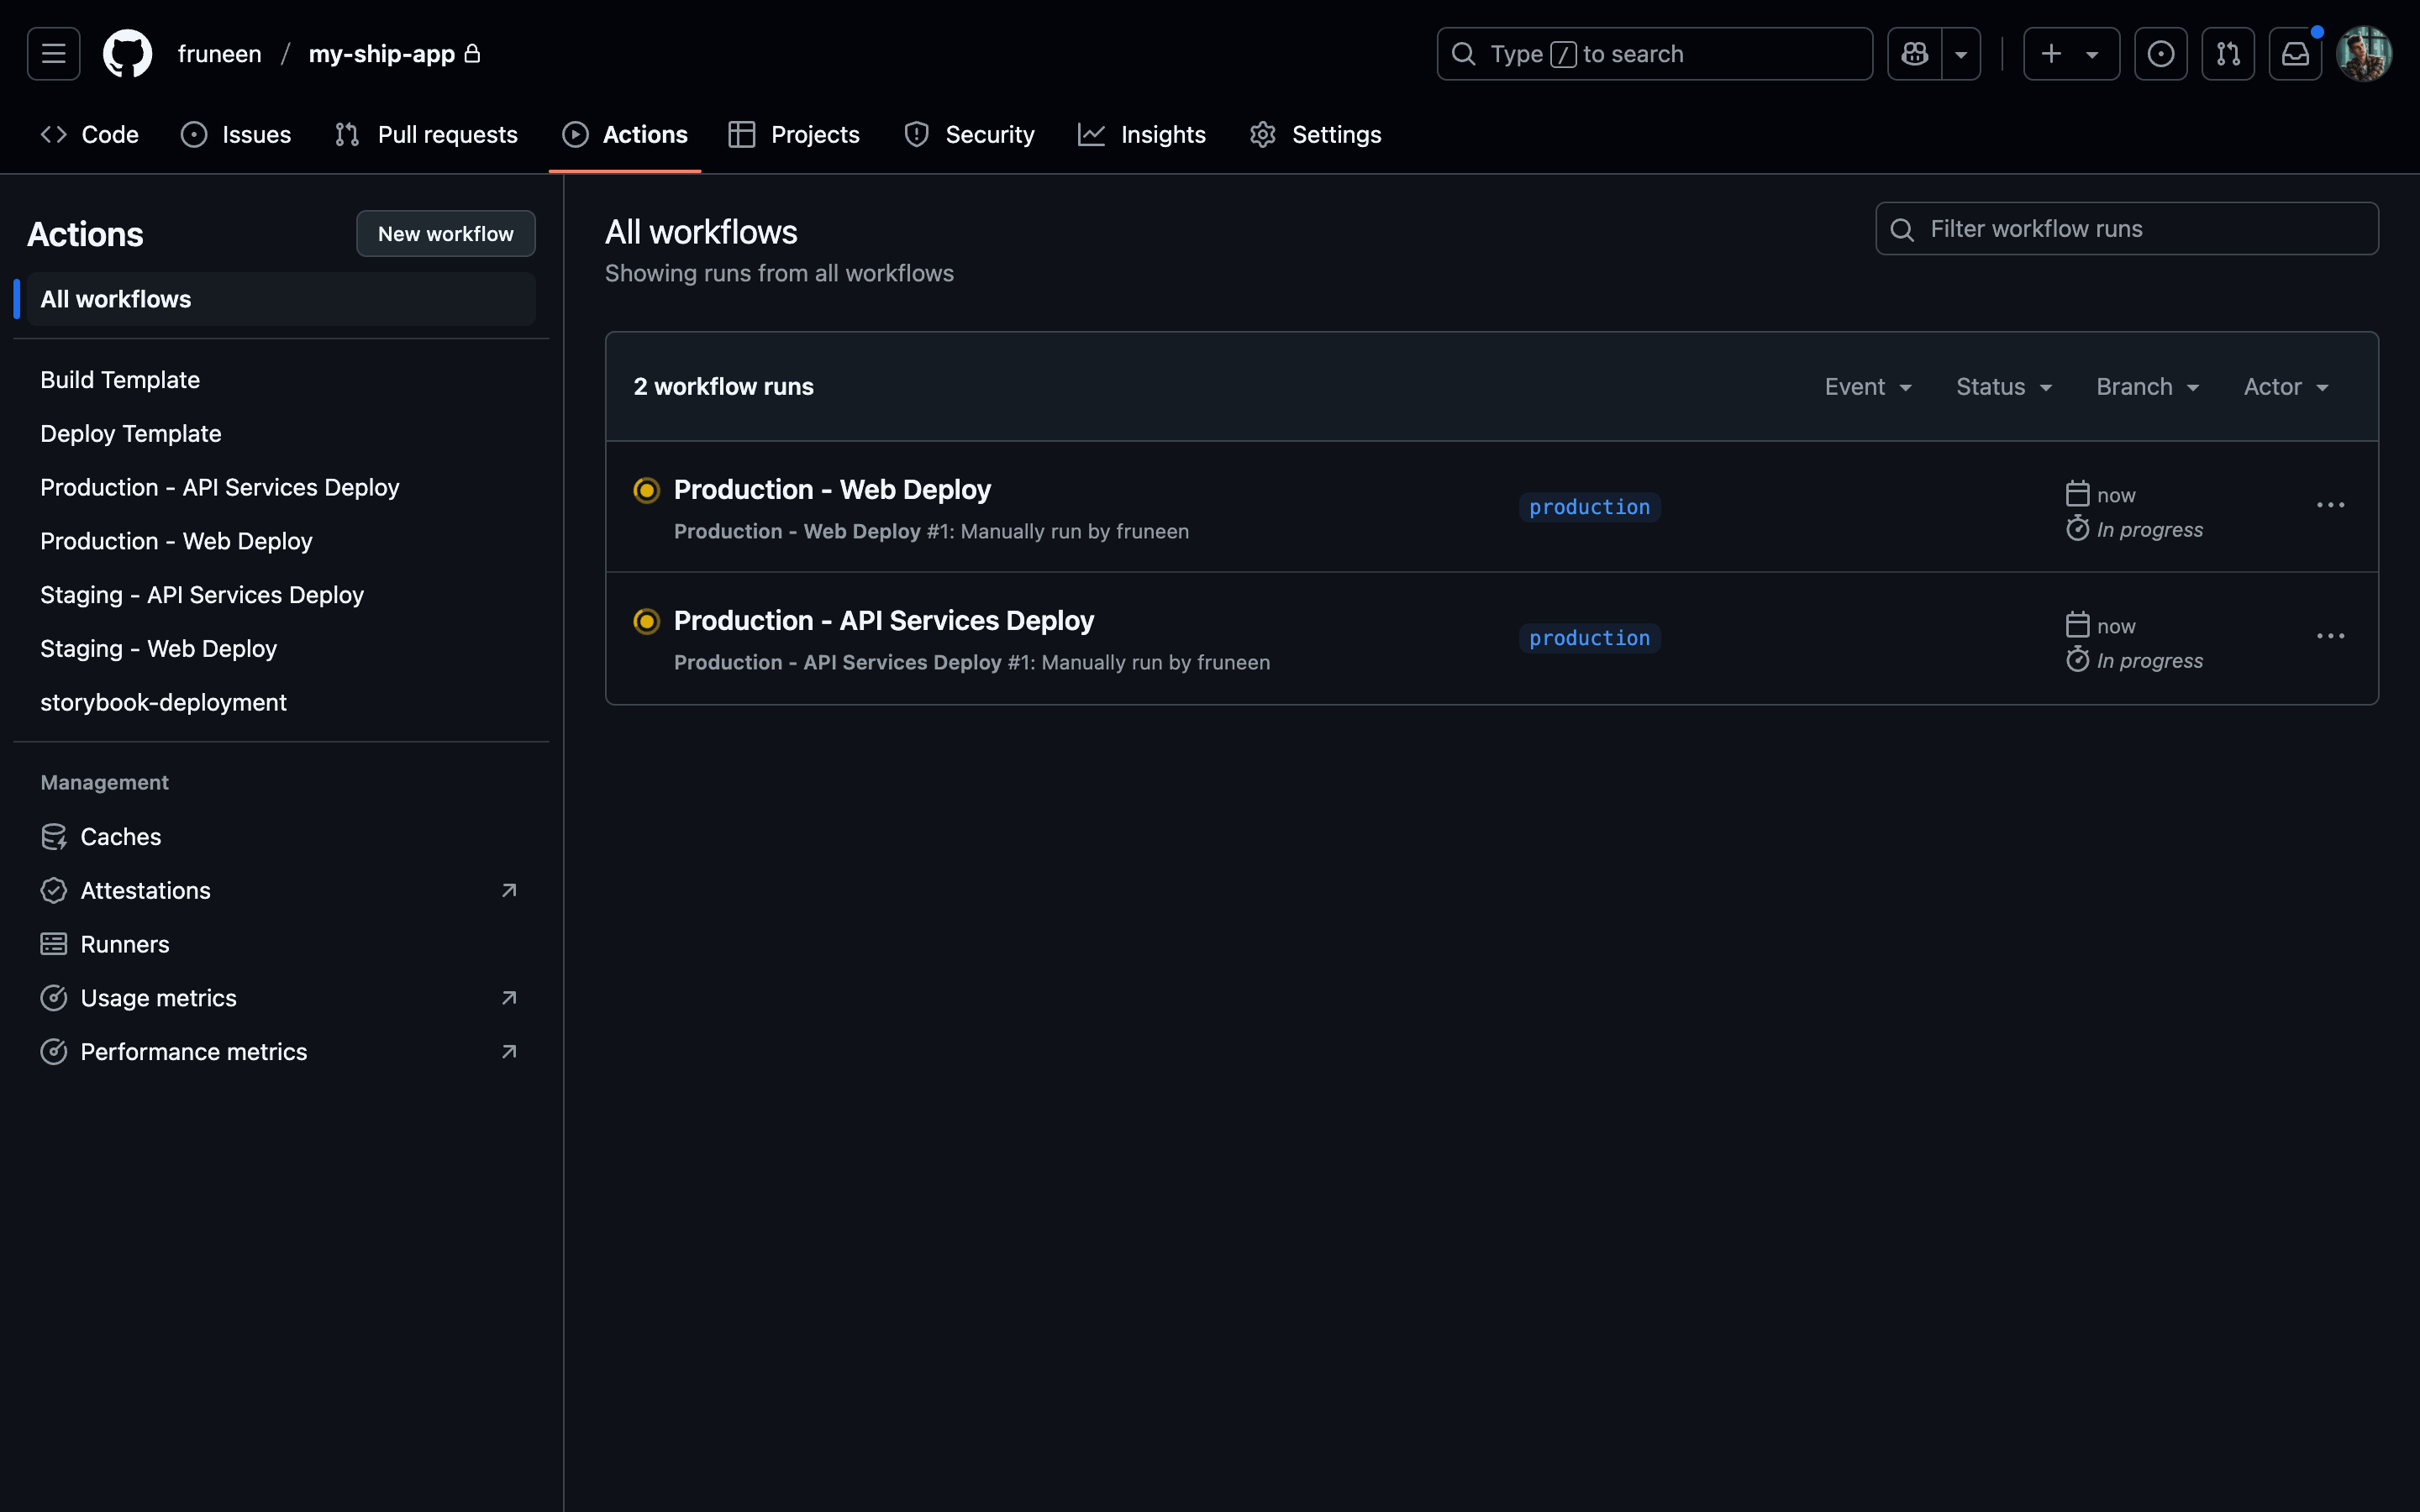
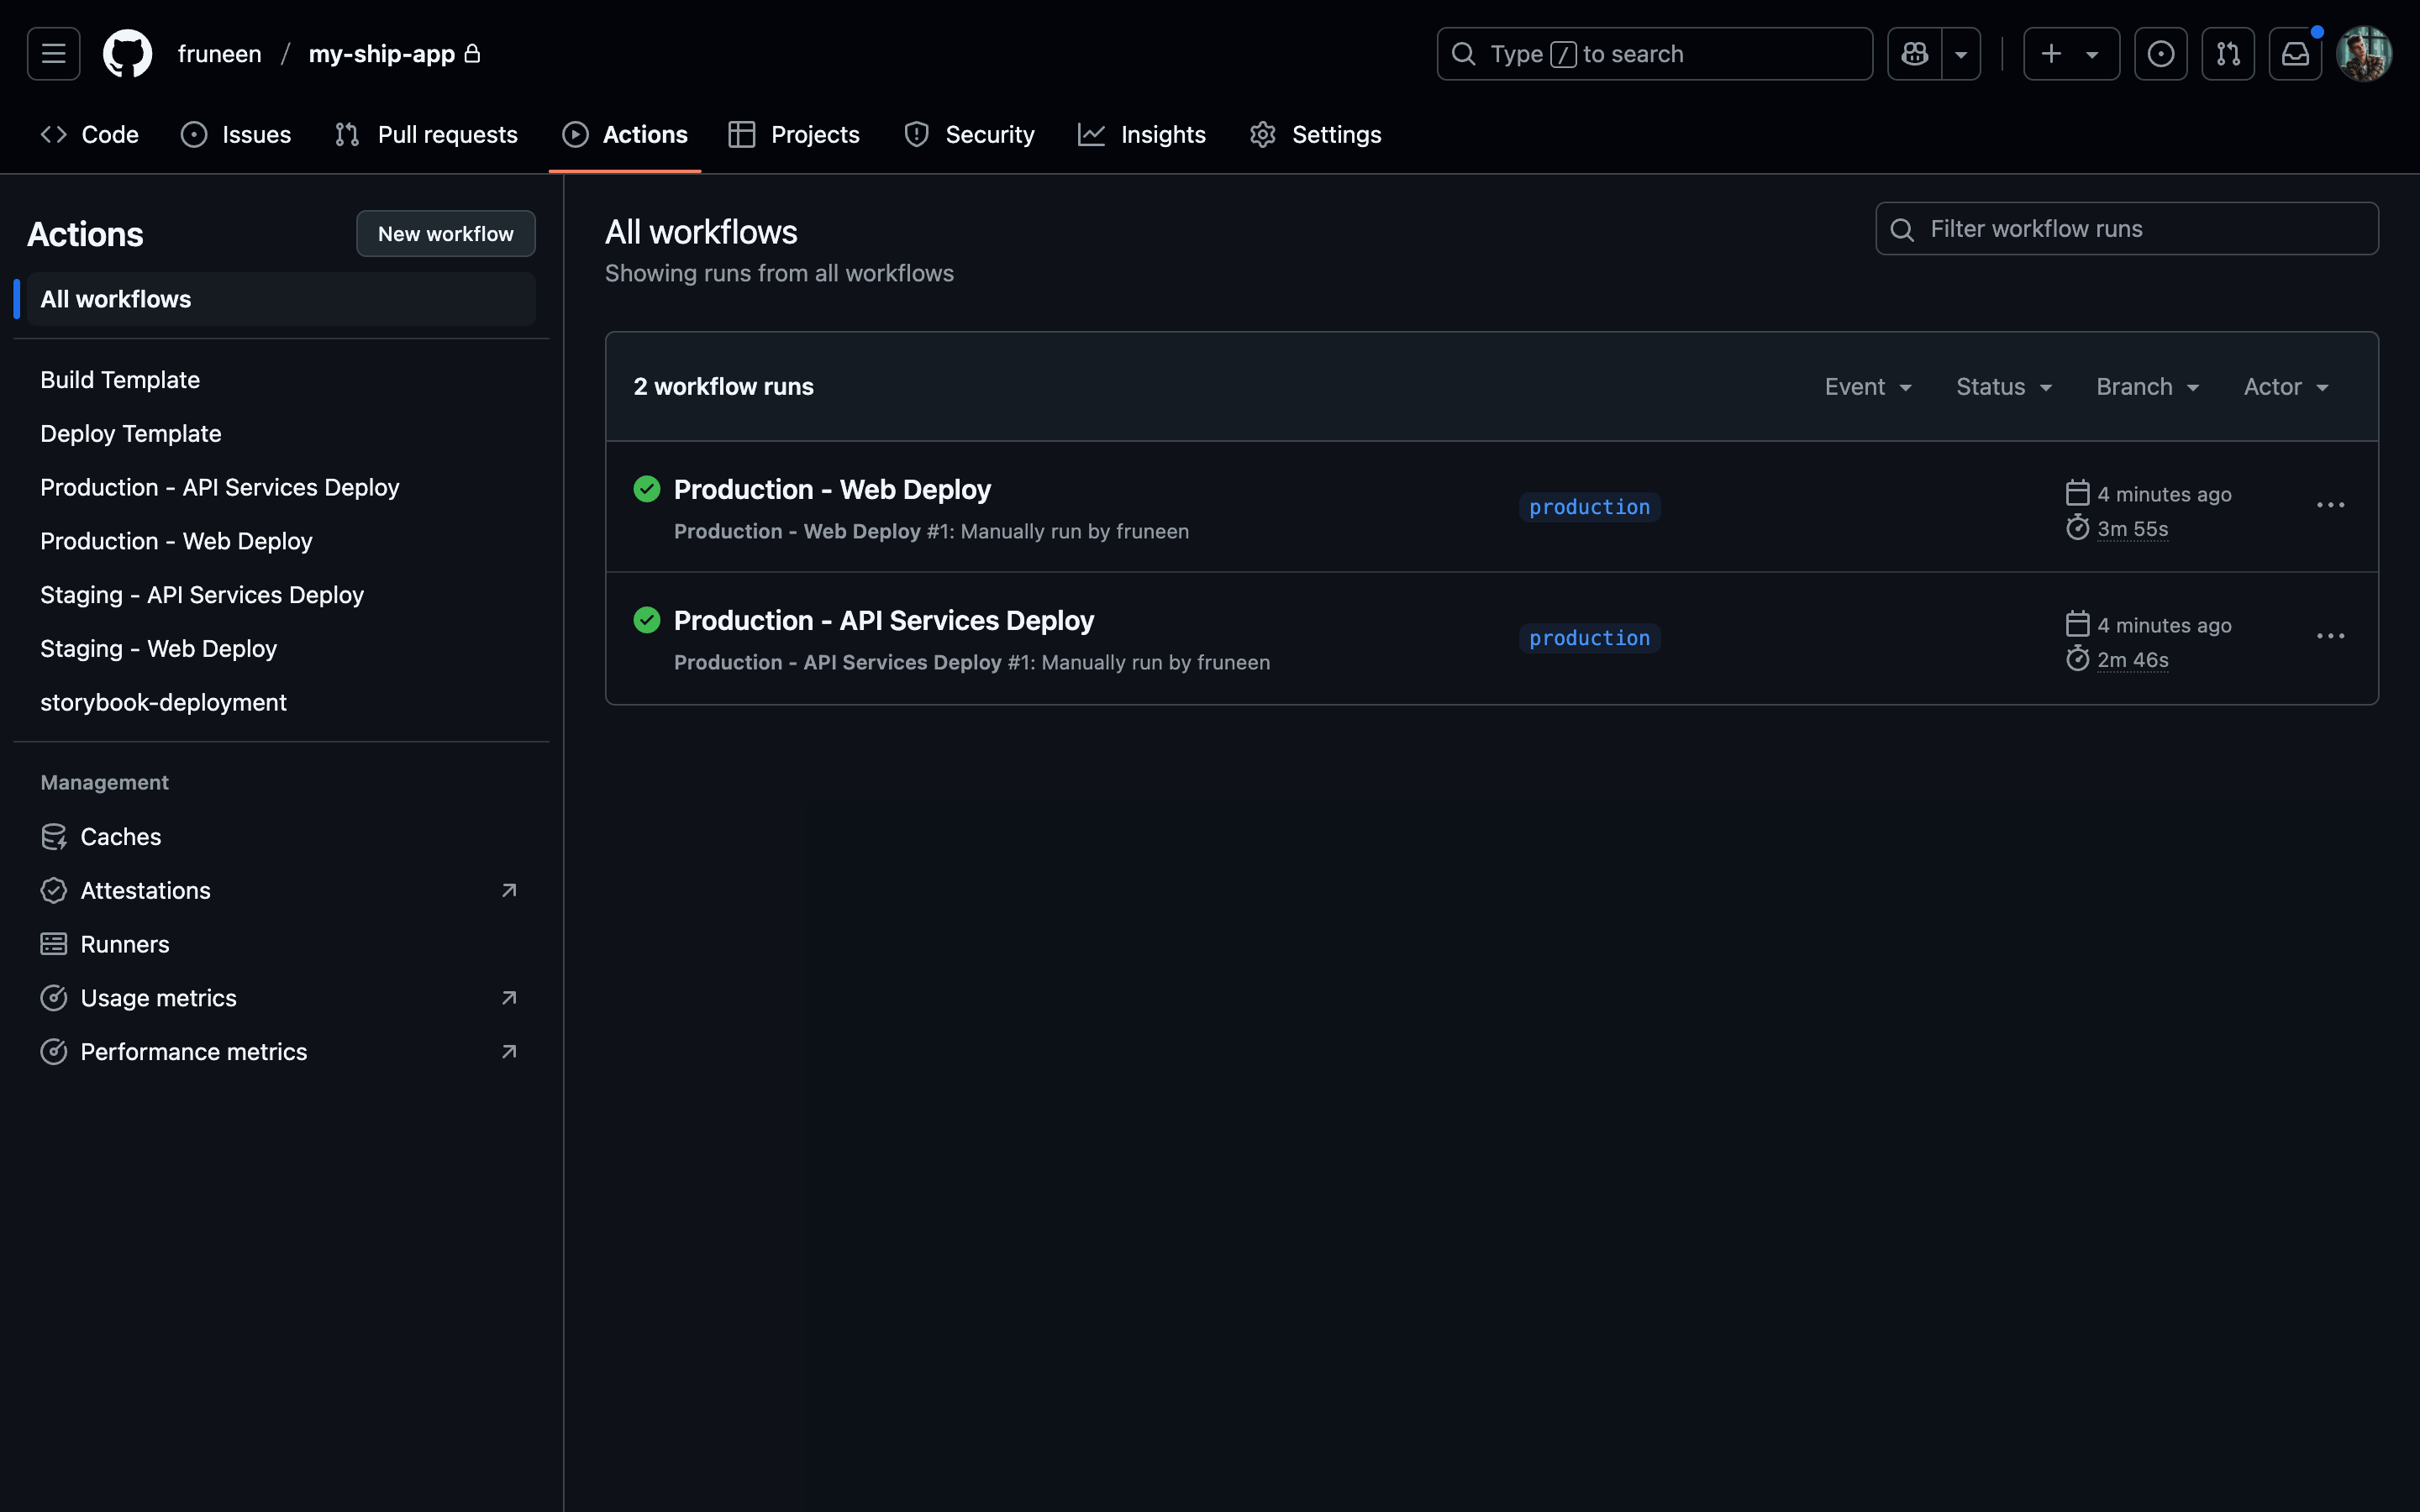
Setting up GitHub Actions CI/CD
Creating IAM user in AWS
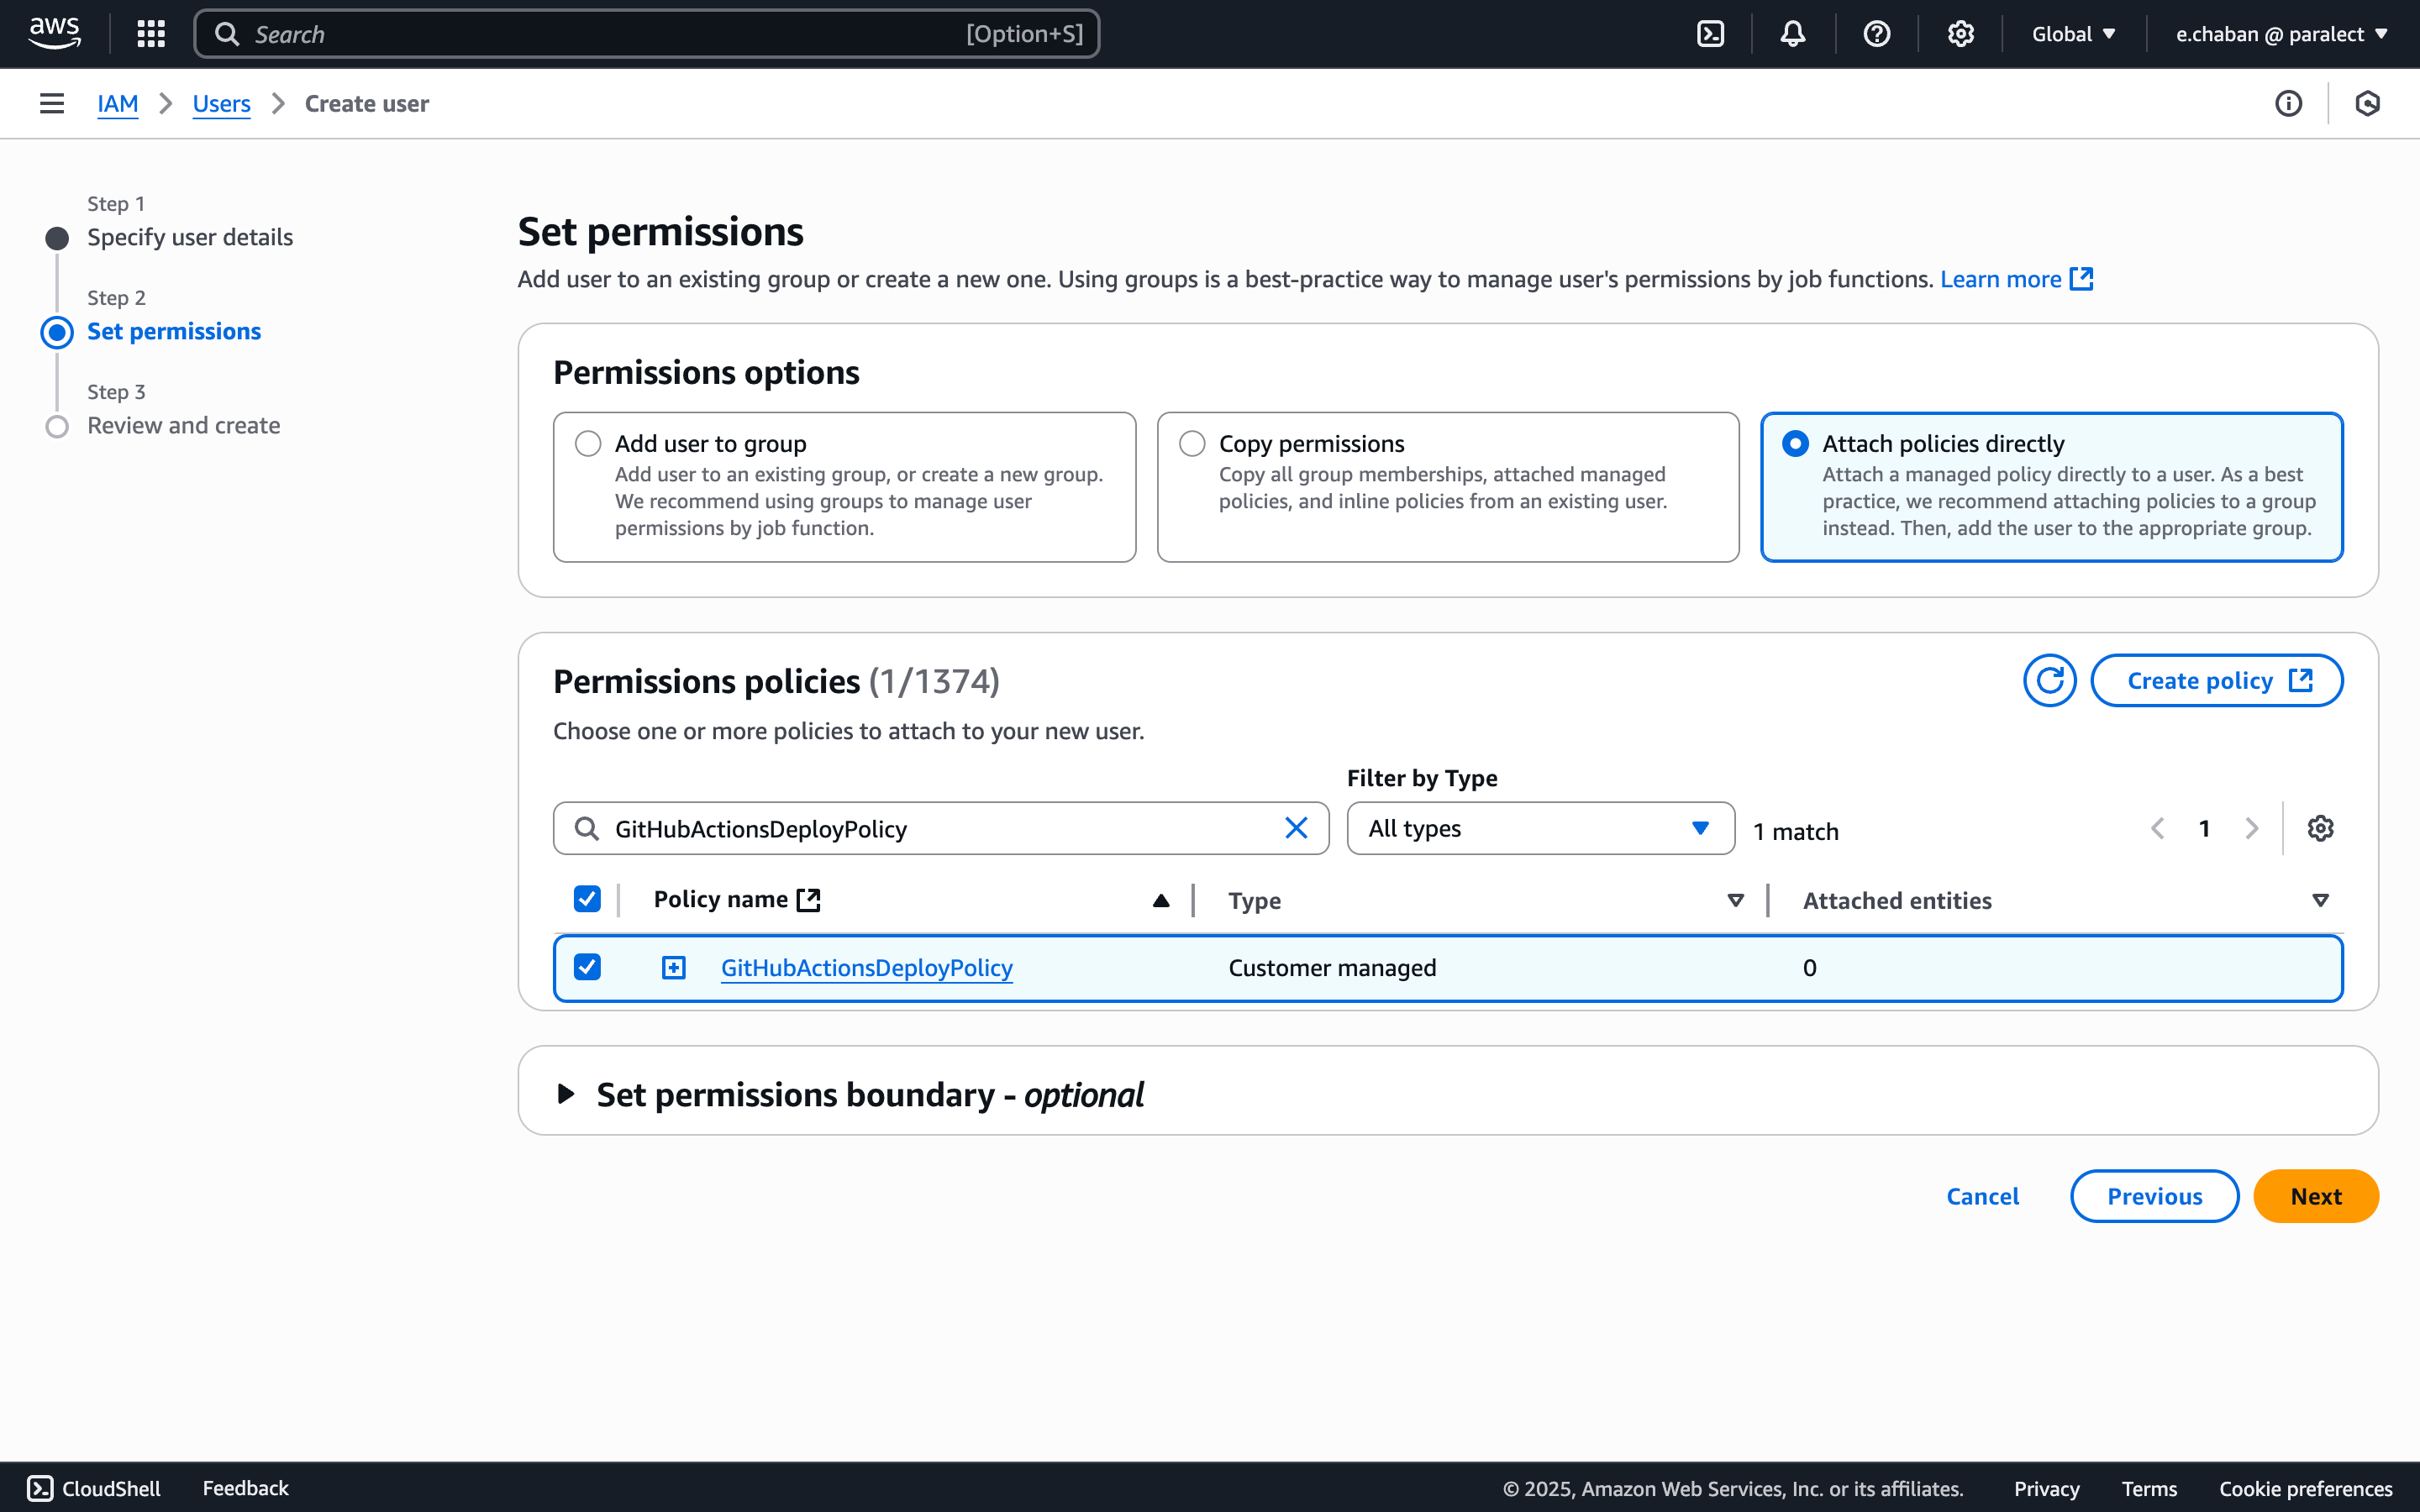
To set up CI/CD with GitHub Actions securely, we need to create a dedicated IAM user in AWS with specific permissions. This separate user will be used exclusively for CI/CD operations, following the principle of least privilege and keeping deployment credentials isolated from other system users.Create IAM Policy
- Go to AWS IAM Policies
- Click Create policy
- Select JSON tab and add the policy:
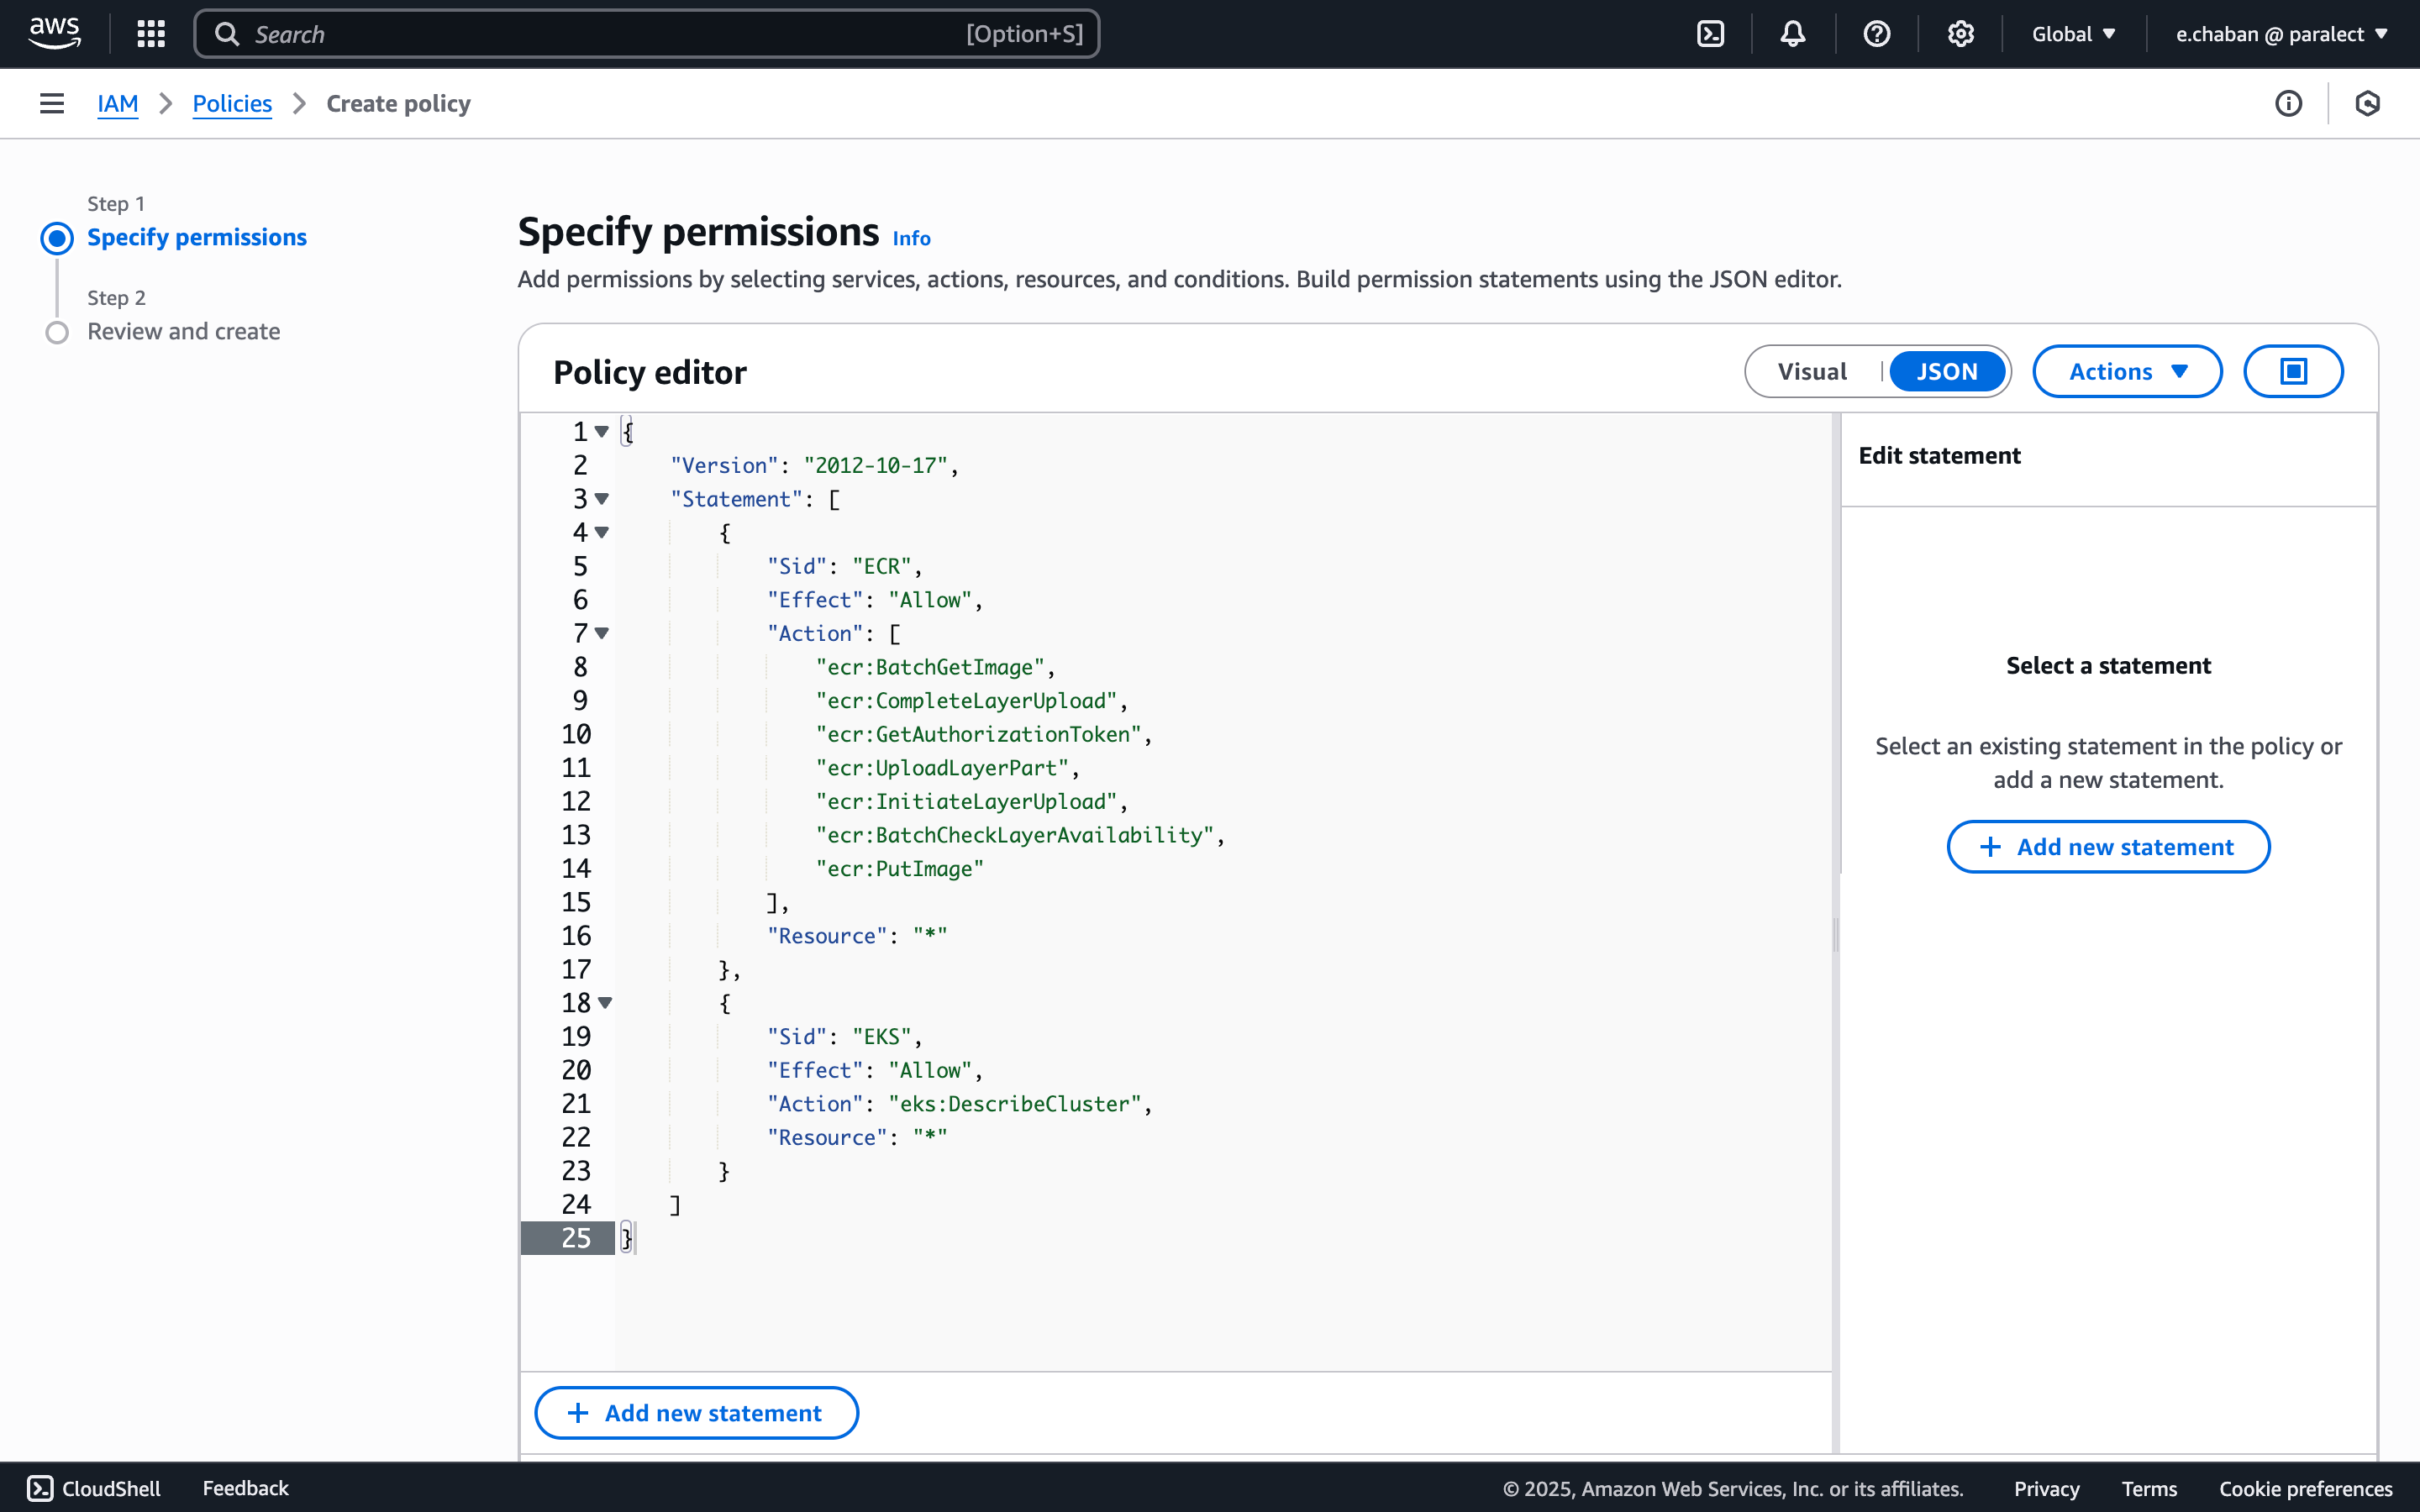
- (Optional) Add tags
- Give the policy a name (e.g.
GitHubActionsDeployPolicy) and create it

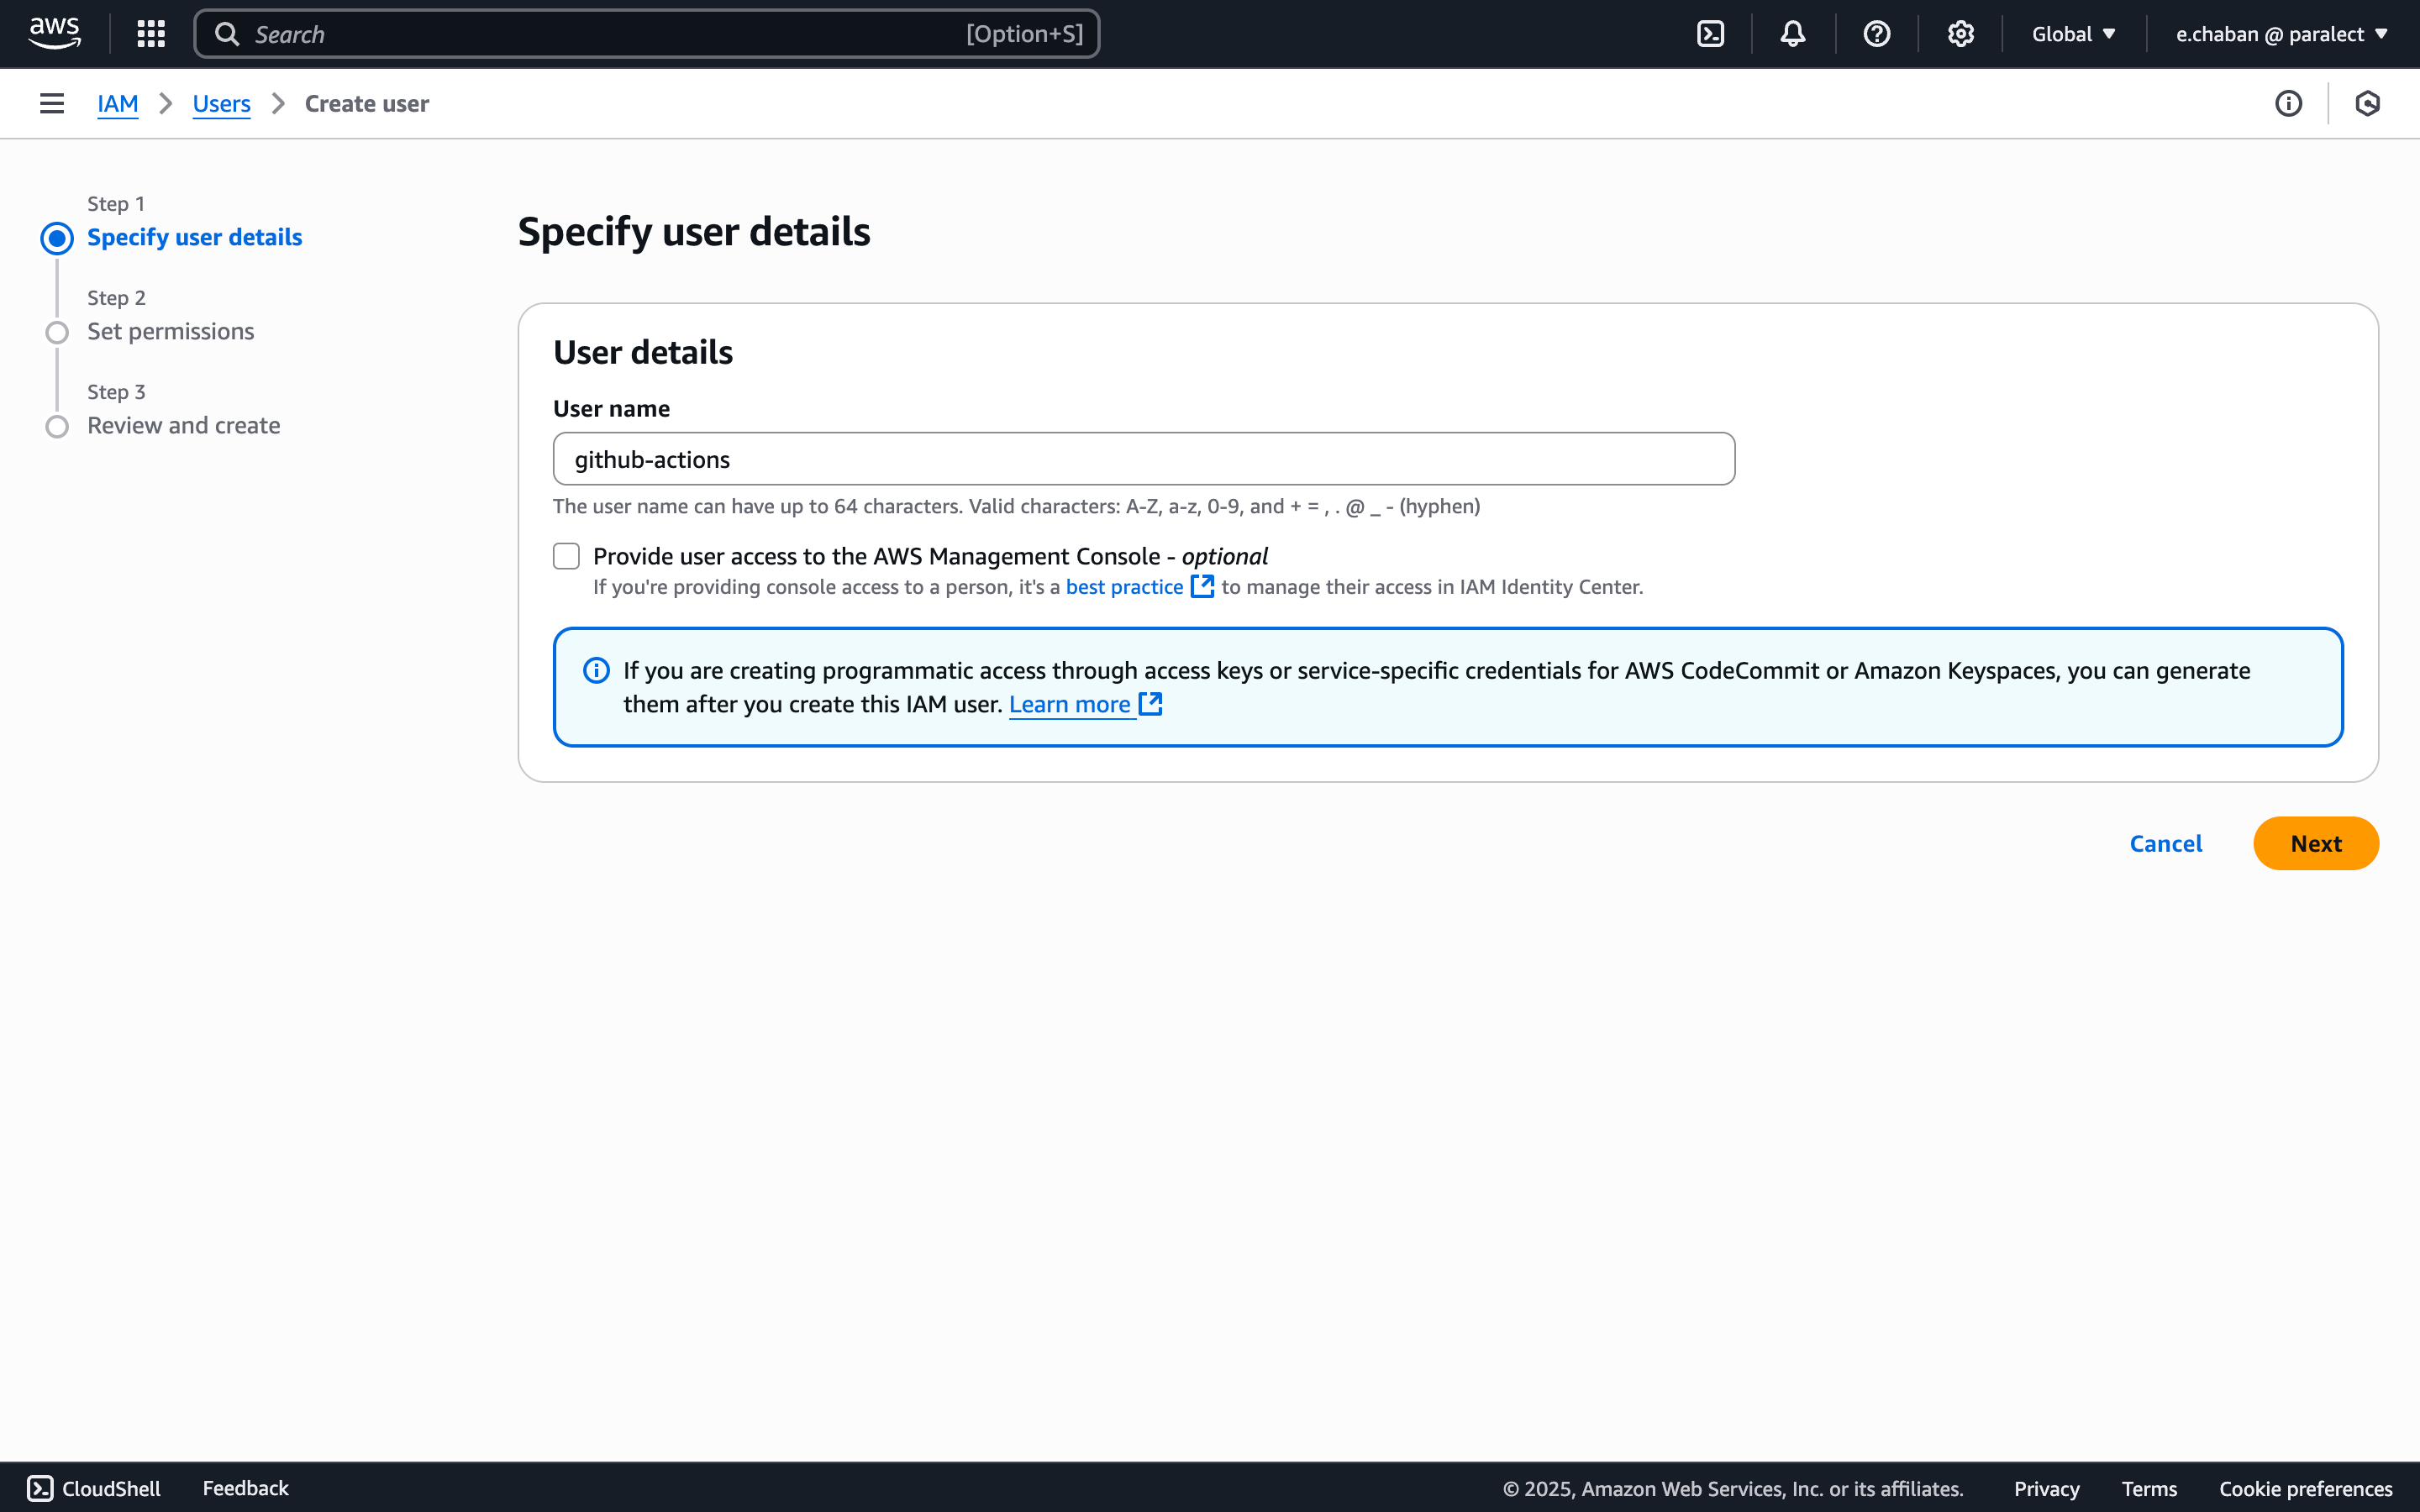
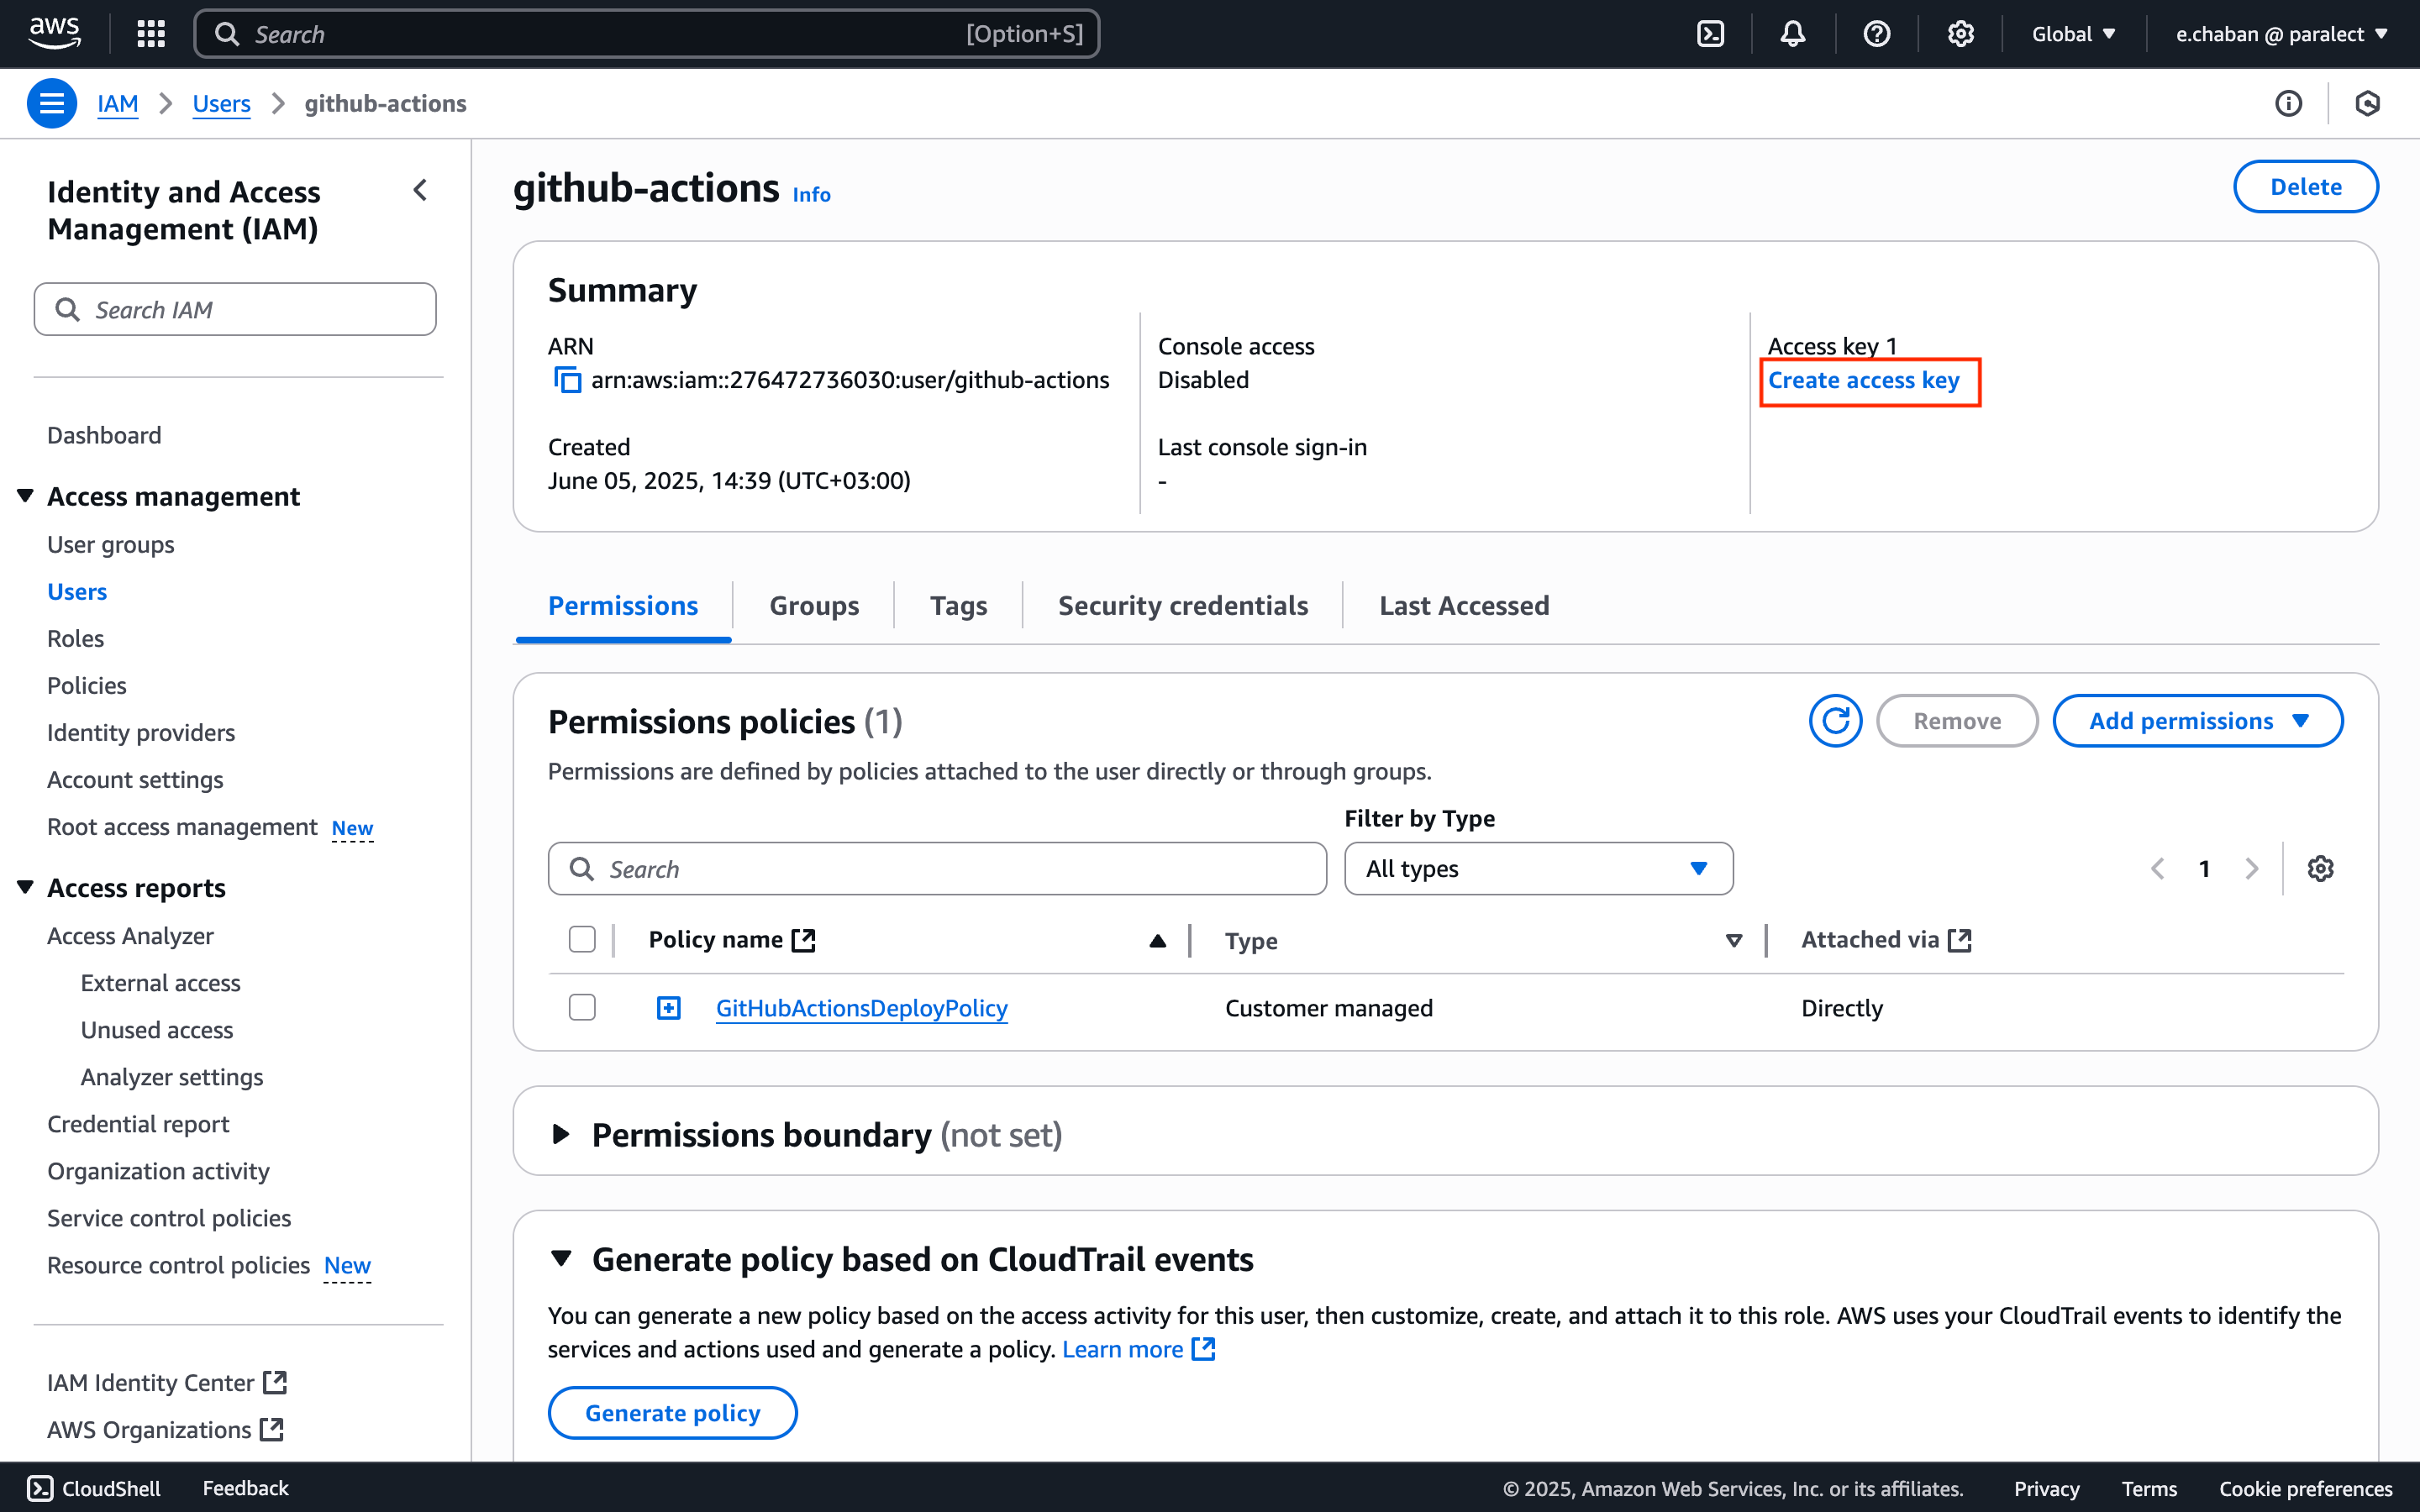
Create IAM User
- Navigate to Users in IAM console
- Click Create user
- Give the user a name (e.g.
github-actions)
- Attach the policy you created by selecting:
- Attach existing policies directly
- Choose the CI/CD policy created in previous step
- (Optional) Add user tags
- Review and create user
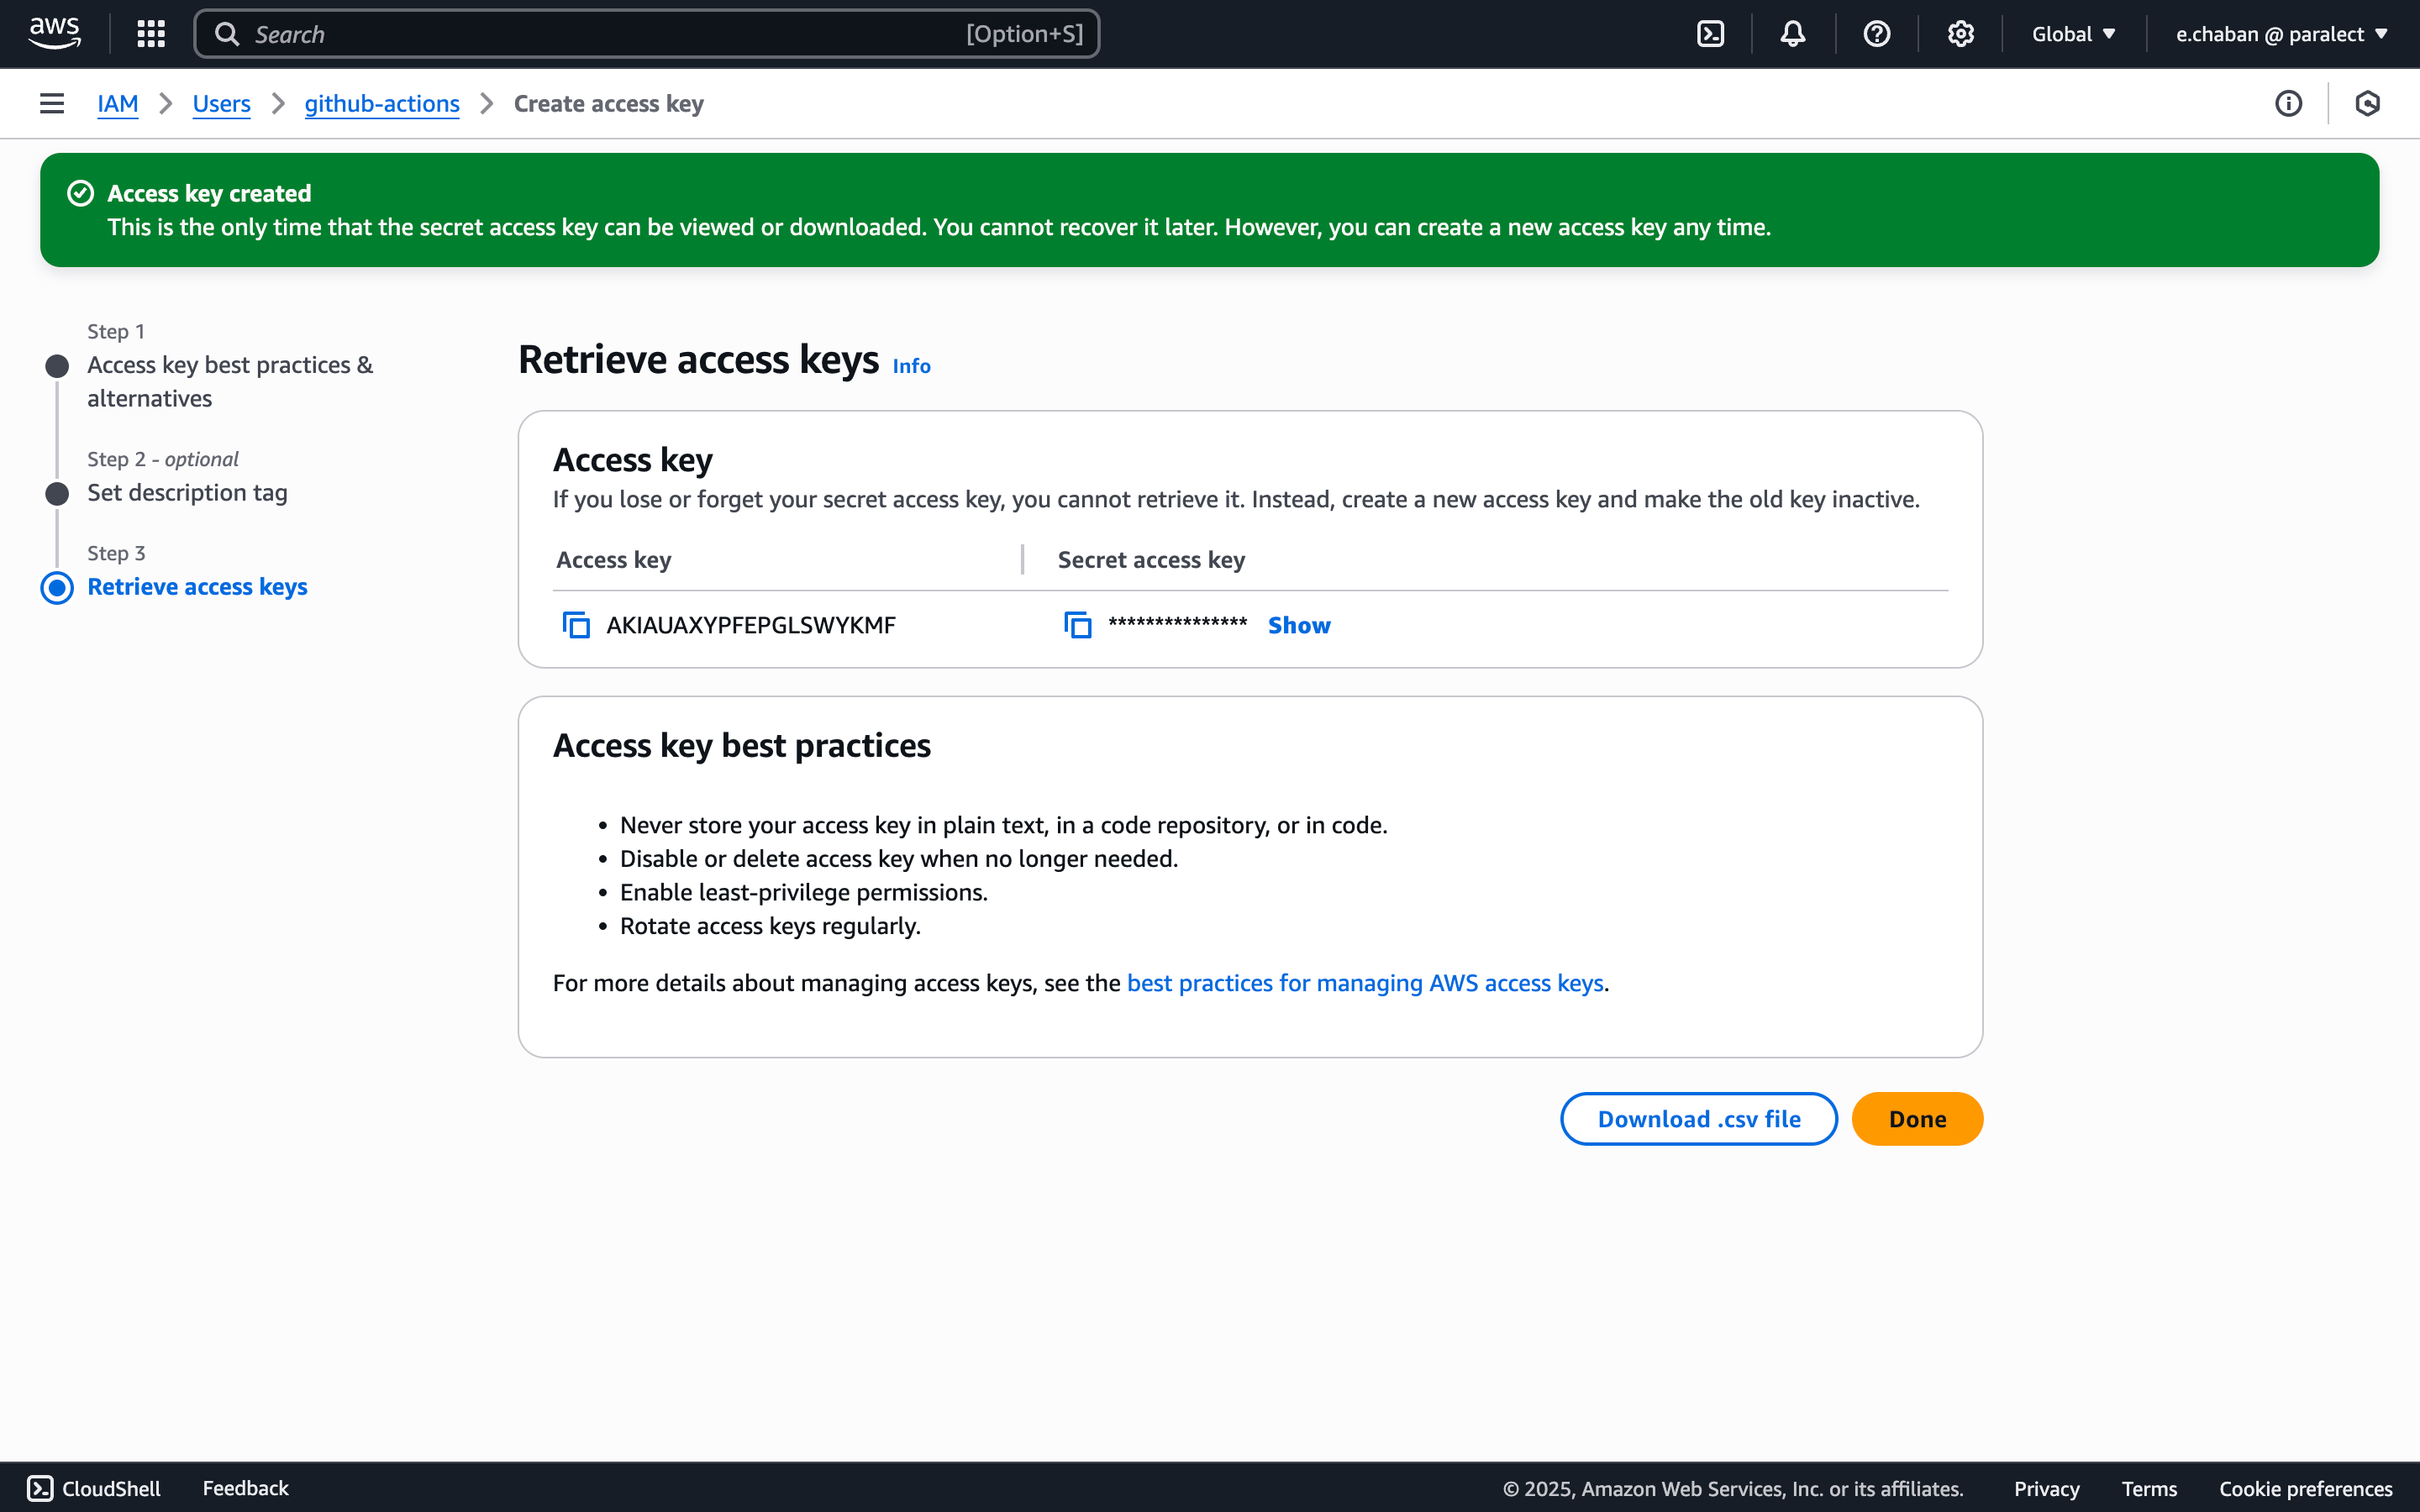
Generate Access Keys
- Find your new user in the users list and open user’s page
- Click Create access key
- Select use case: Third-party service
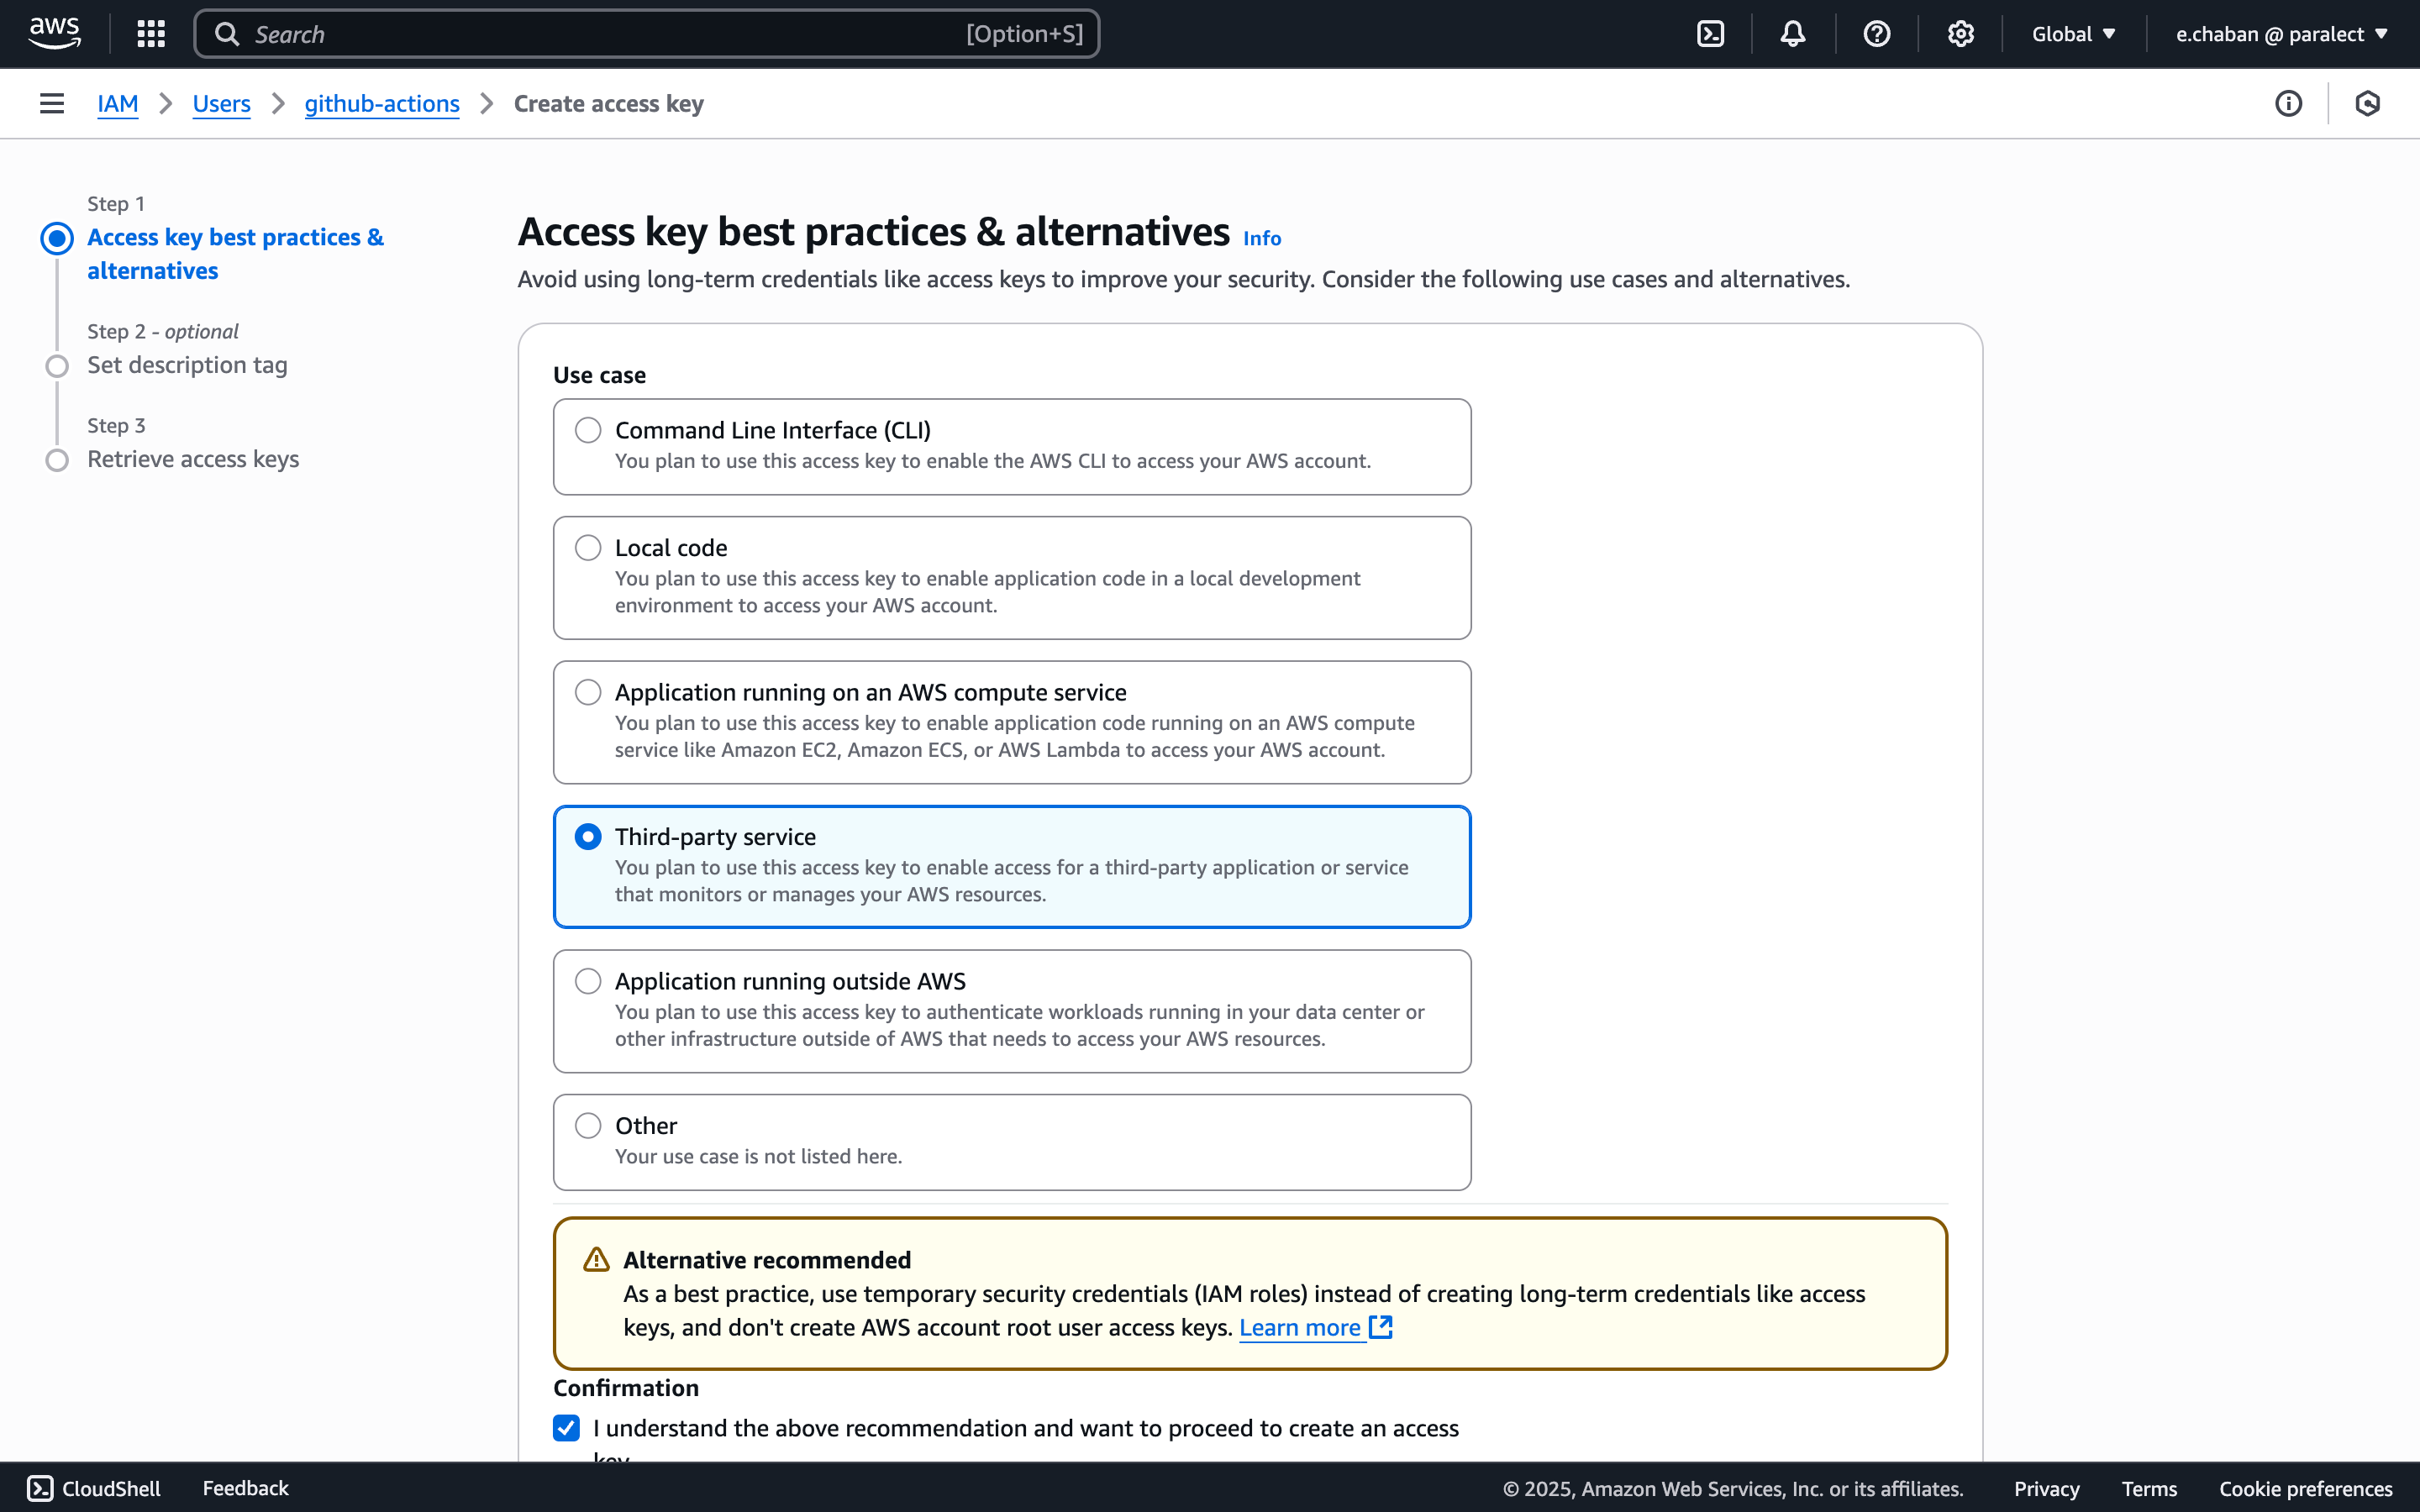
- Save the Access Key ID and Secret Access Key securely
Configure EKS Access
- Copy your user’s ARN from the IAM dashboard

- Run the following command to grant Kubernetes access:
YOUR_USER_ARN with the actual ARN copied earlier.- Minimal required permissions for ECR operations
- Limited EKS access for cluster management
- Dedicated CI/CD user separate from other IAM users
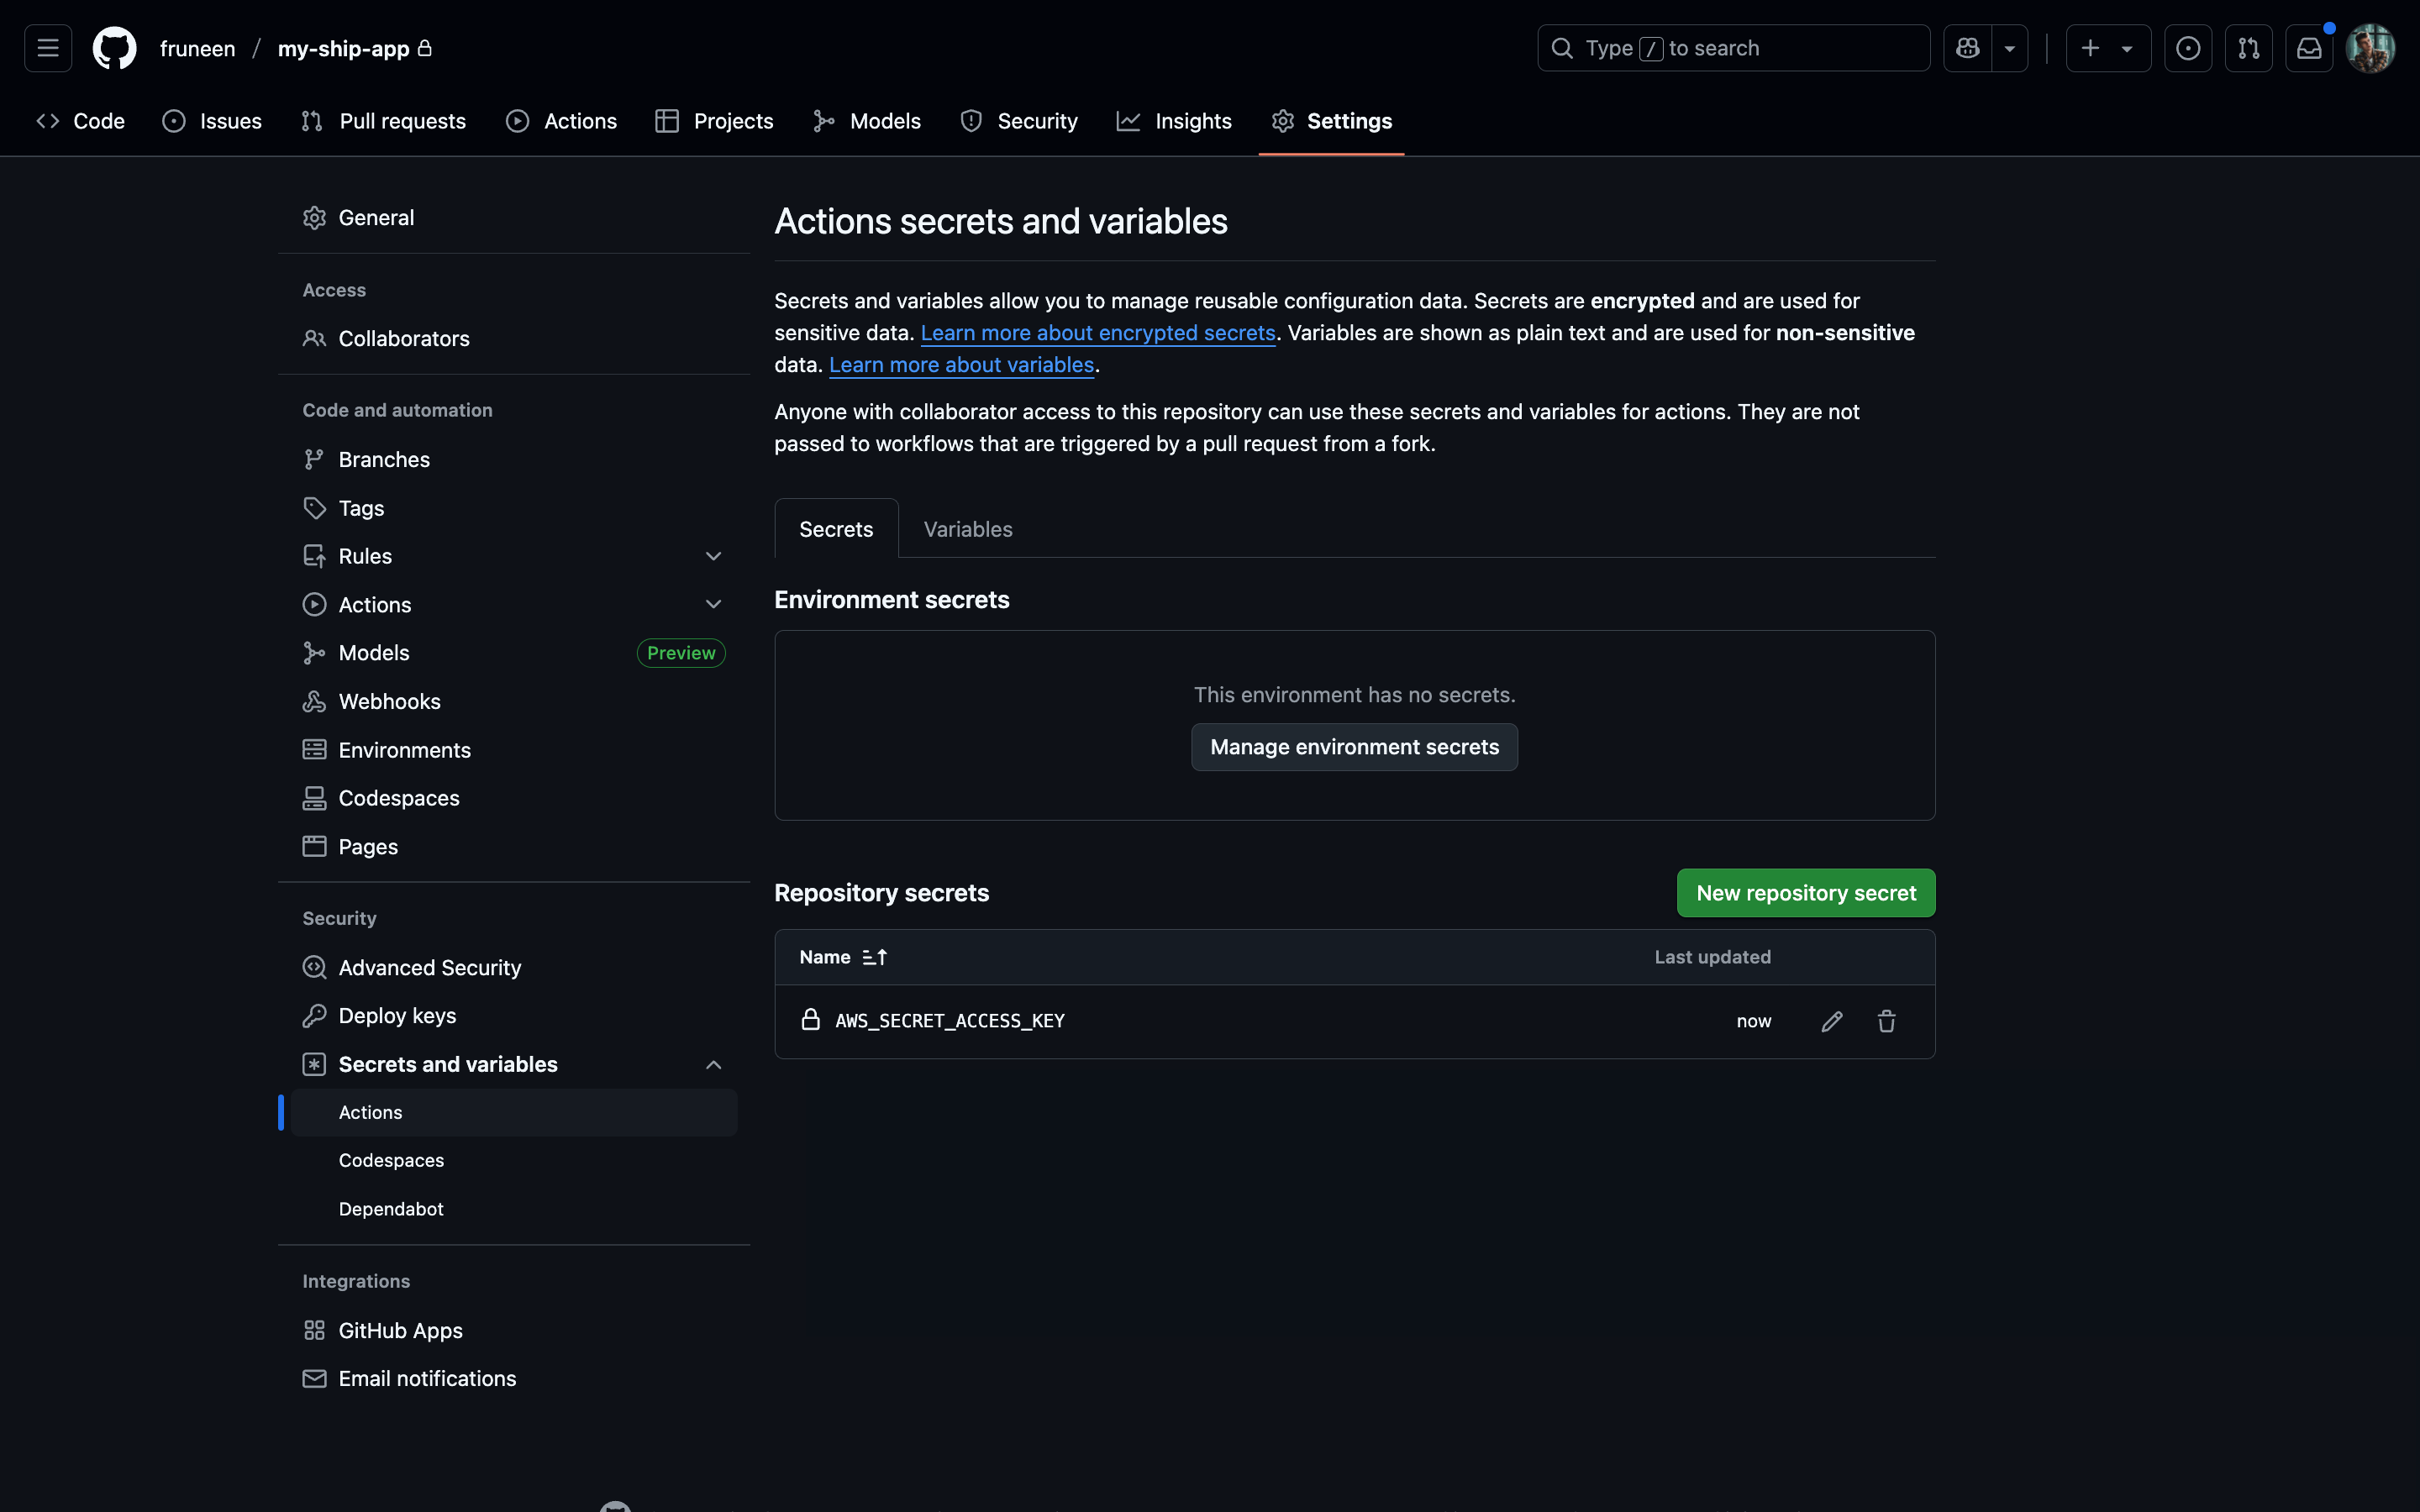
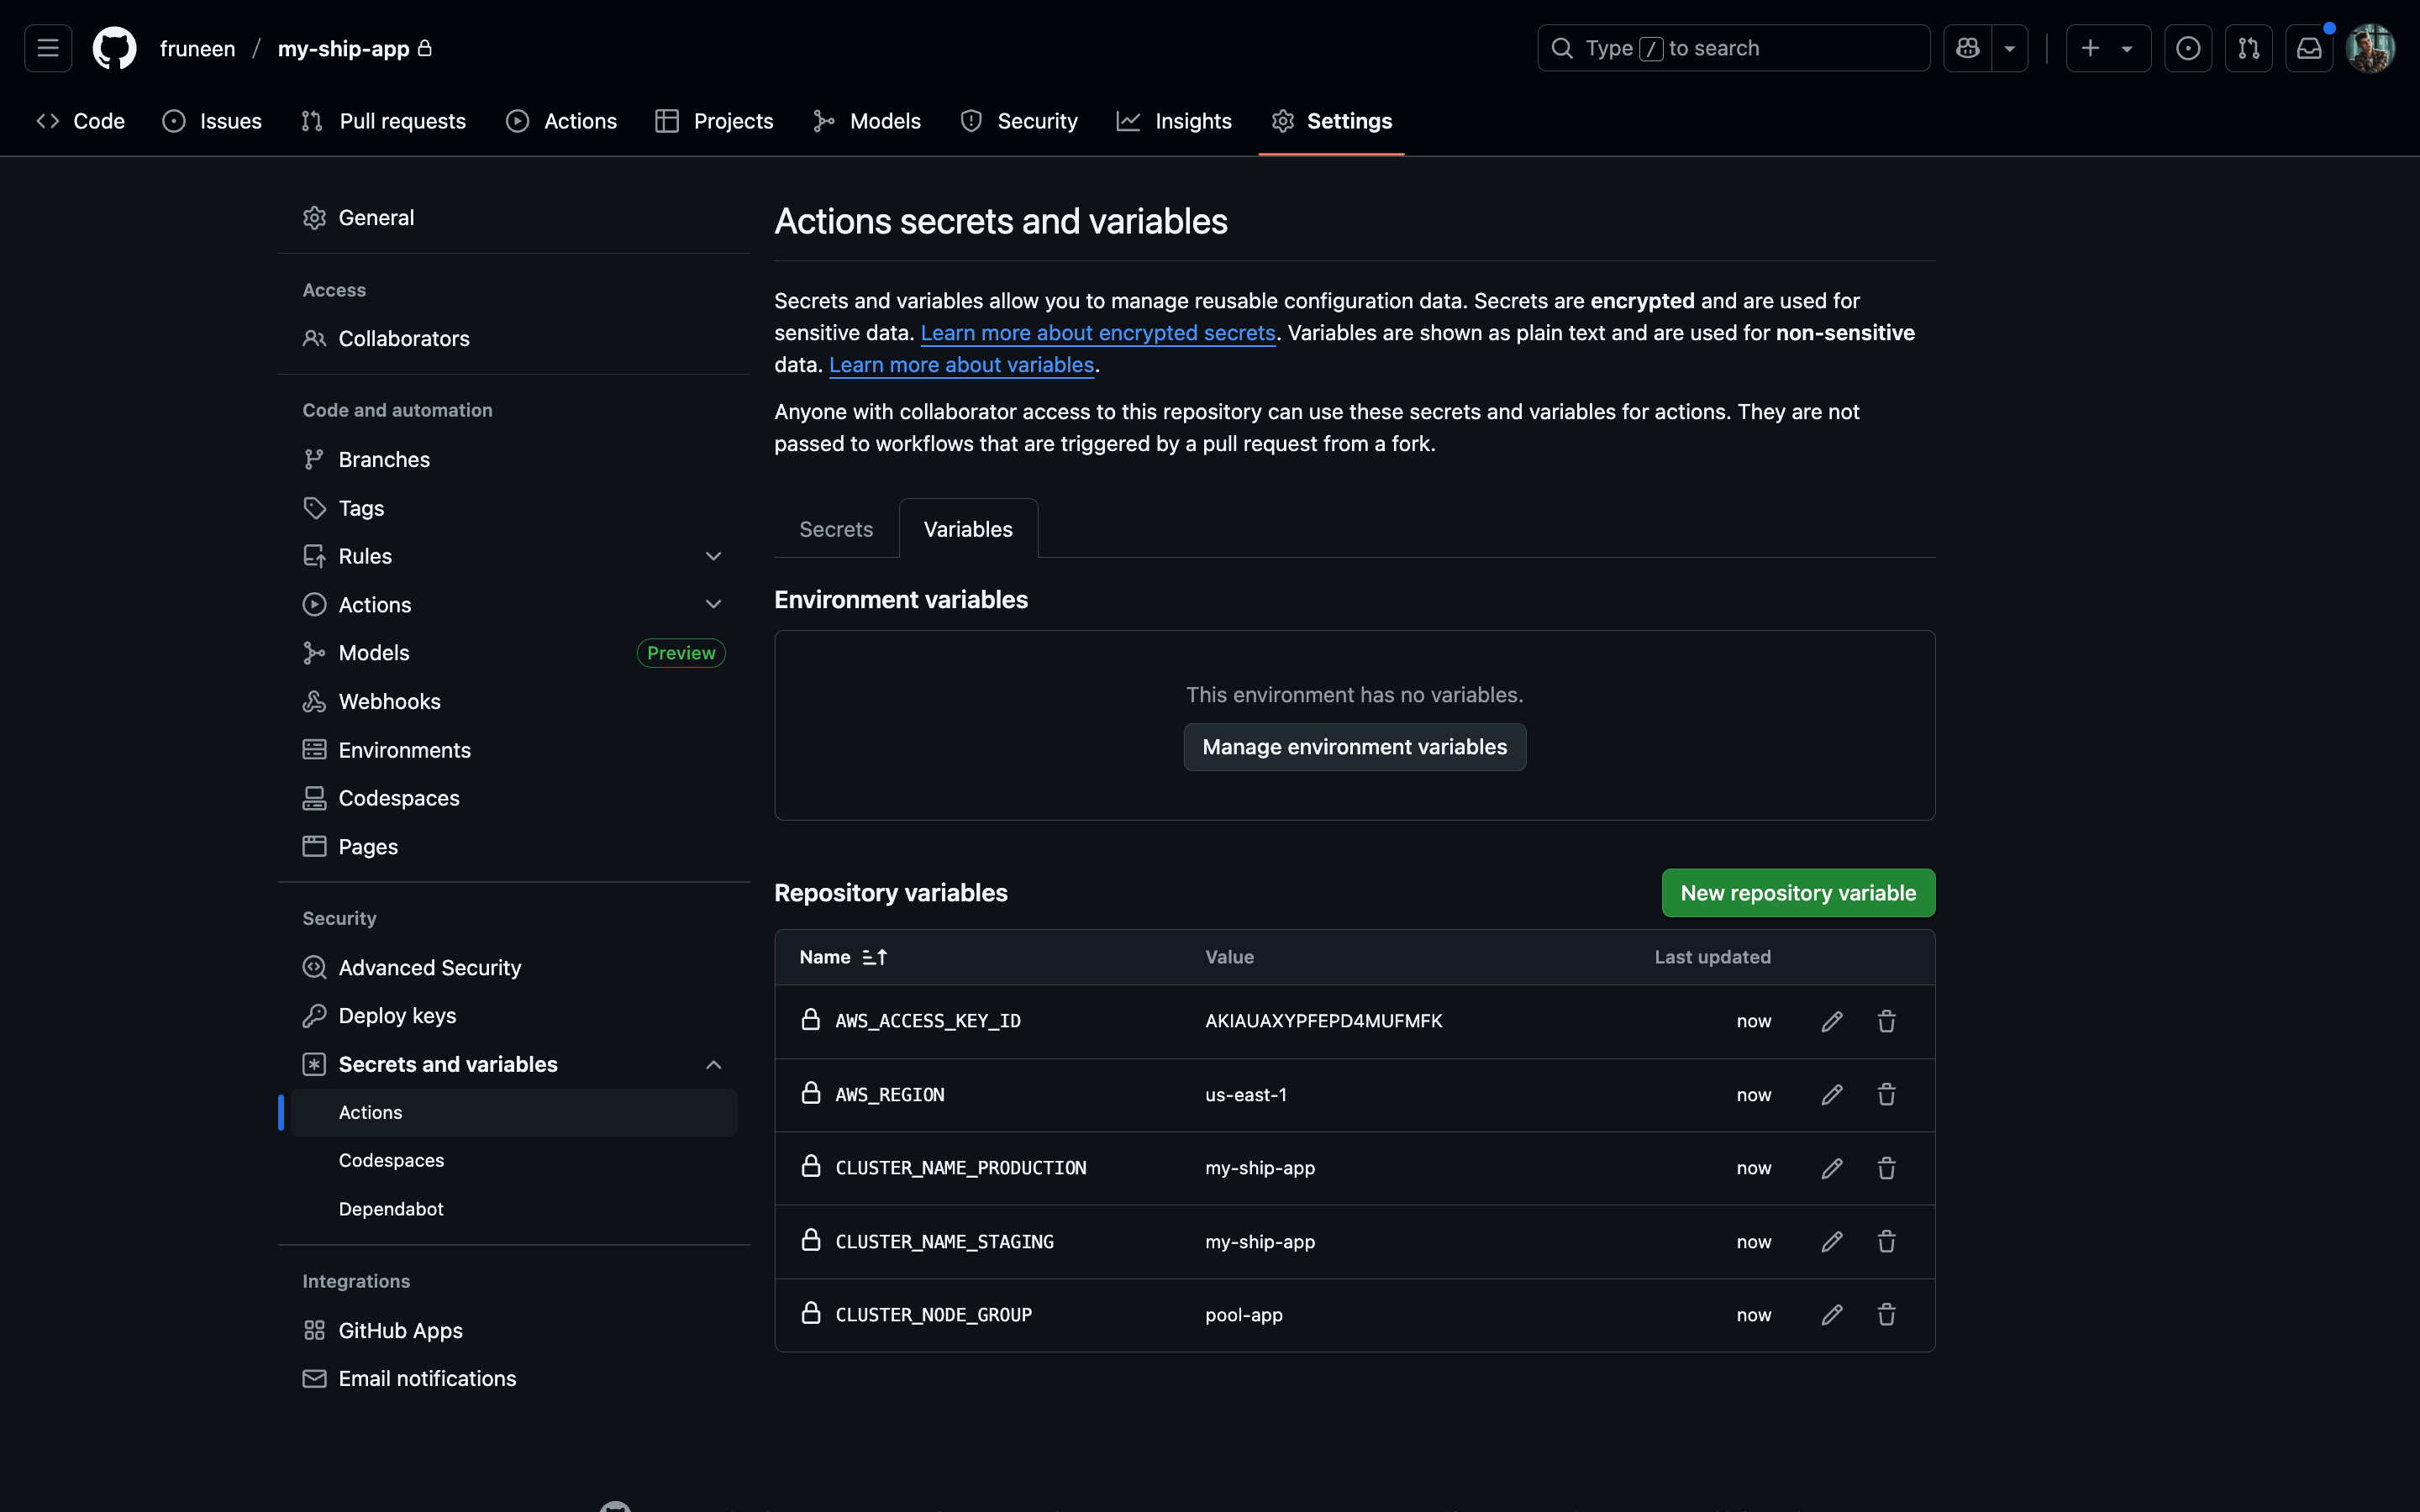
Configuring GitHub Actions secrets and variables

Setting up Upstash Redis database (recommended)
Upstash Redis Integration
Upstash Redis is a highly available, infinitely scalable Redis-compatible database that provides enterprise-grade features without the operational complexity.How Ship Uses Redis
Ship leverages Redis for several critical functionalities:Setting Up Upstash Redis
Create Your Database
Access Upstash Console
Create New Database
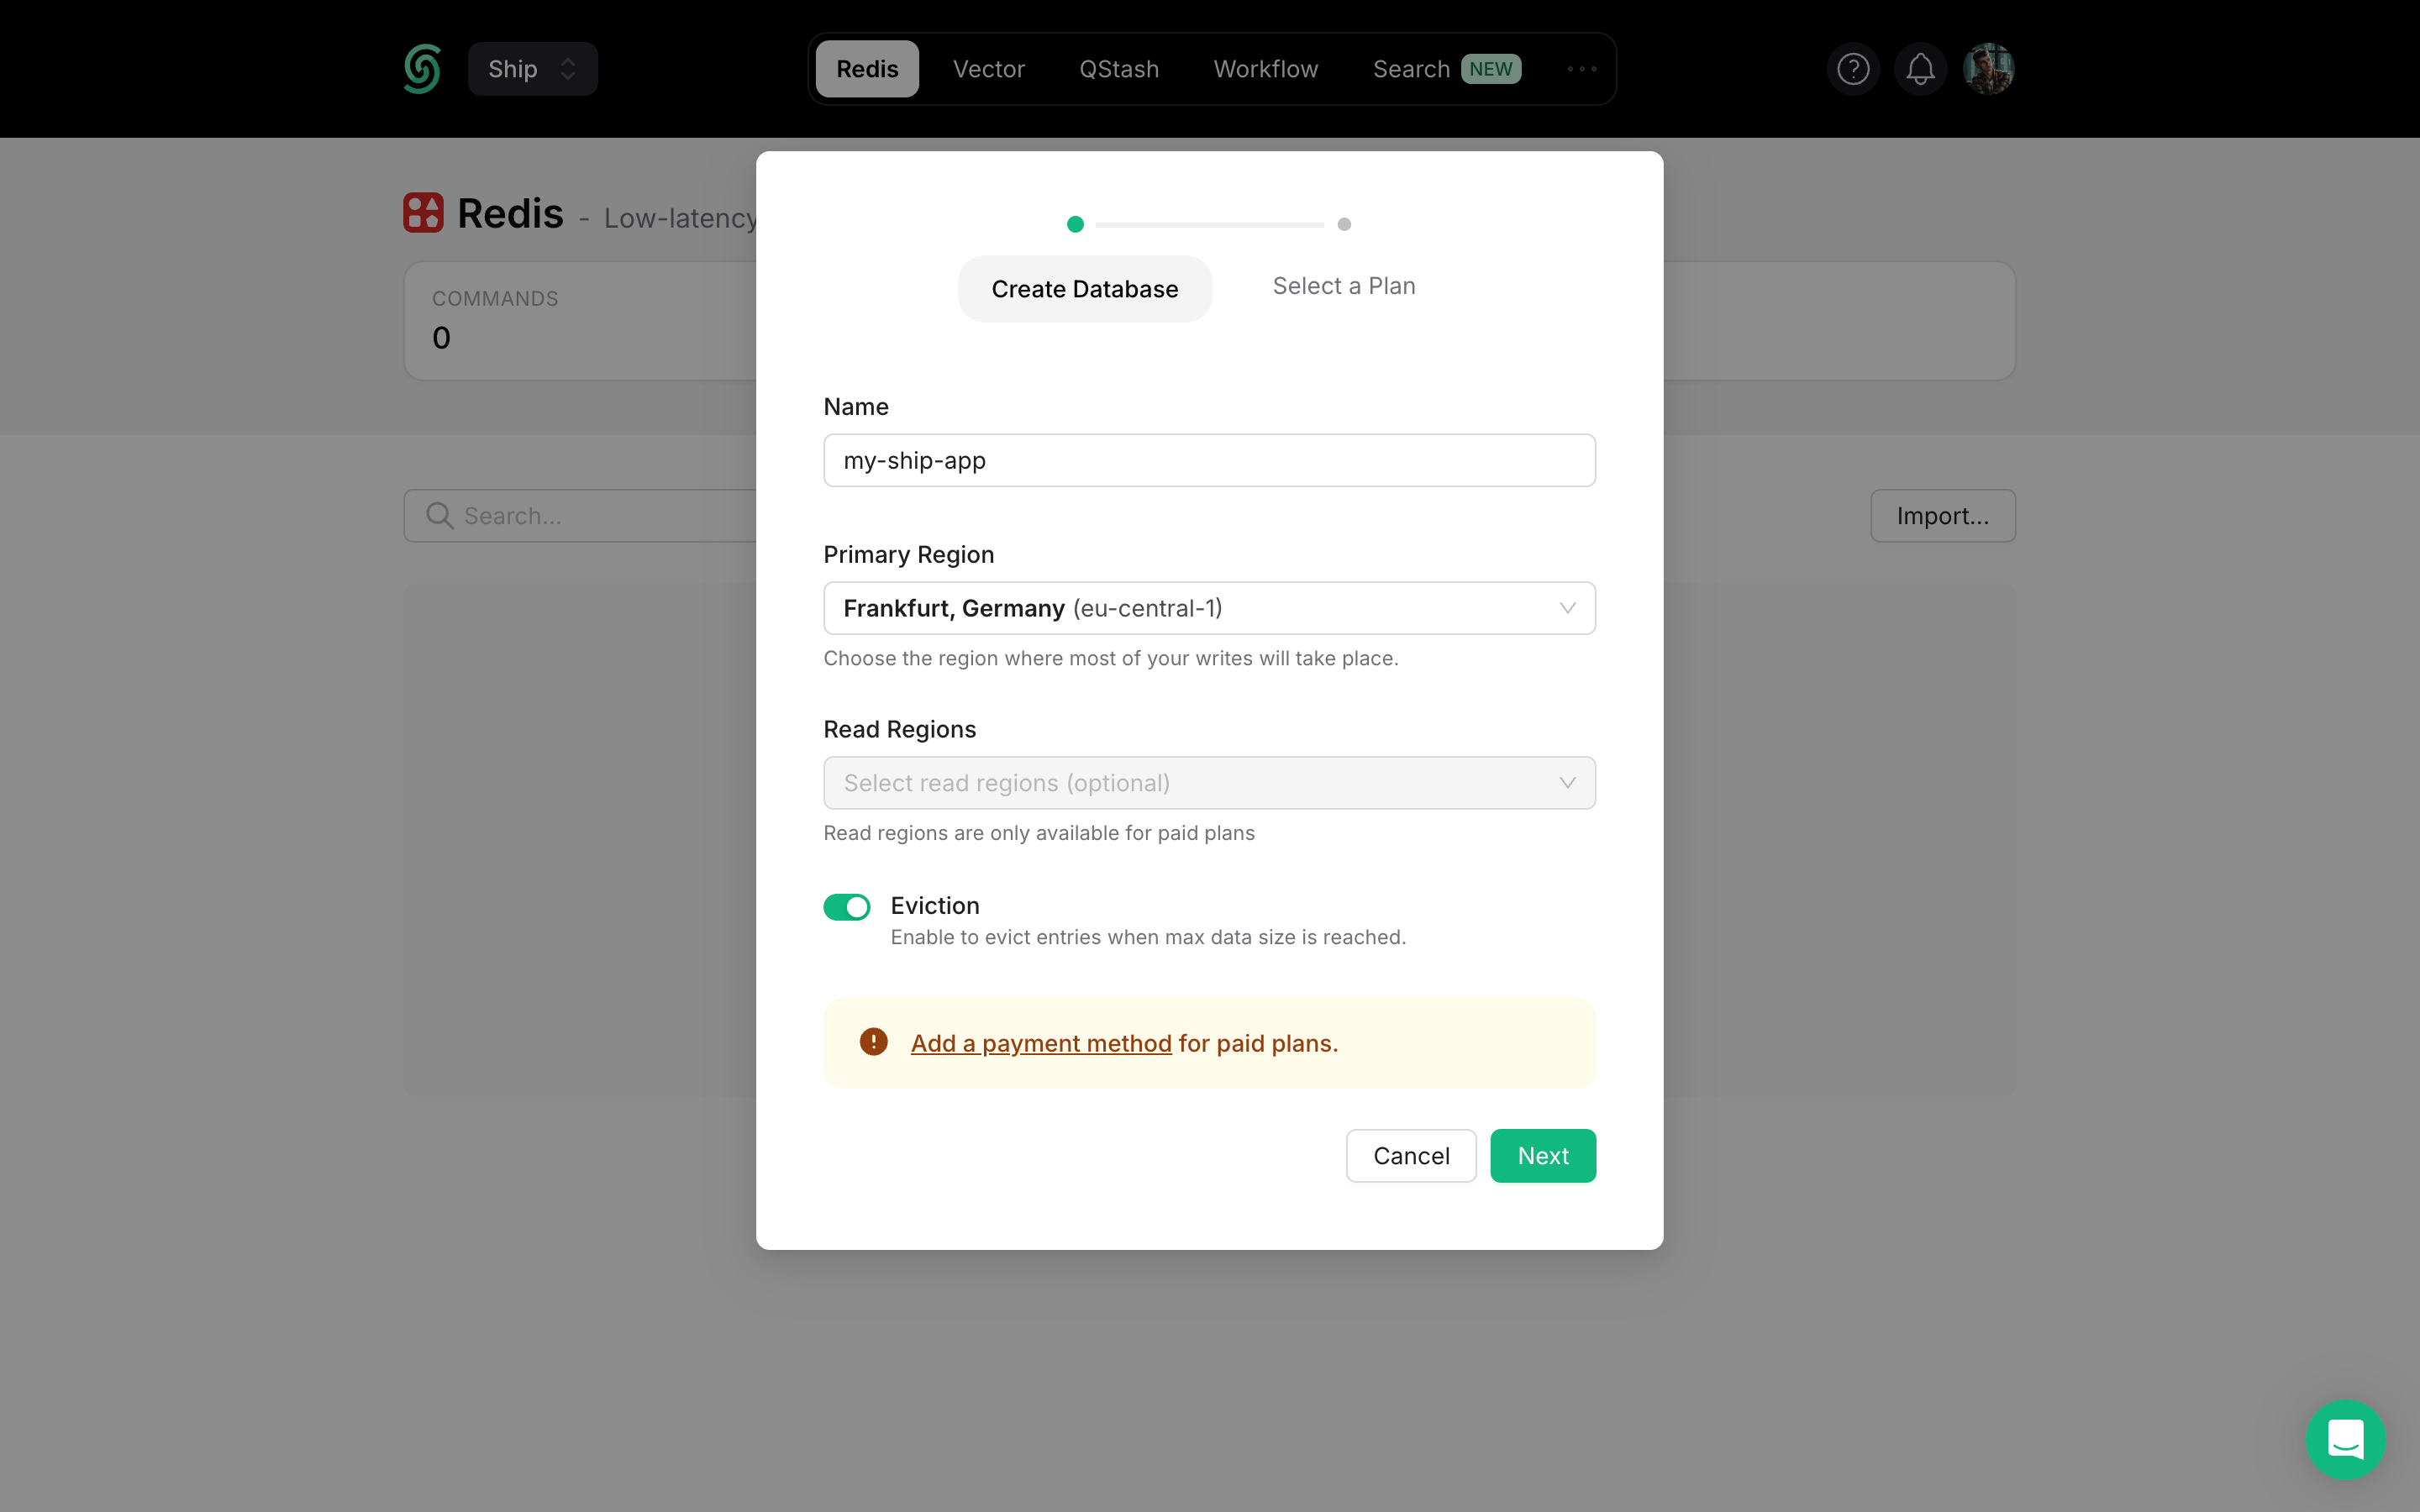
Configure Database Settings
my-ship-app-production)Primary Region: Select the region closest to your main application deployment for optimal write performance.Read Regions: Choose additional regions where you expect high read traffic for better global performance.Select Plan & Deploy
Navigate to Connection Info
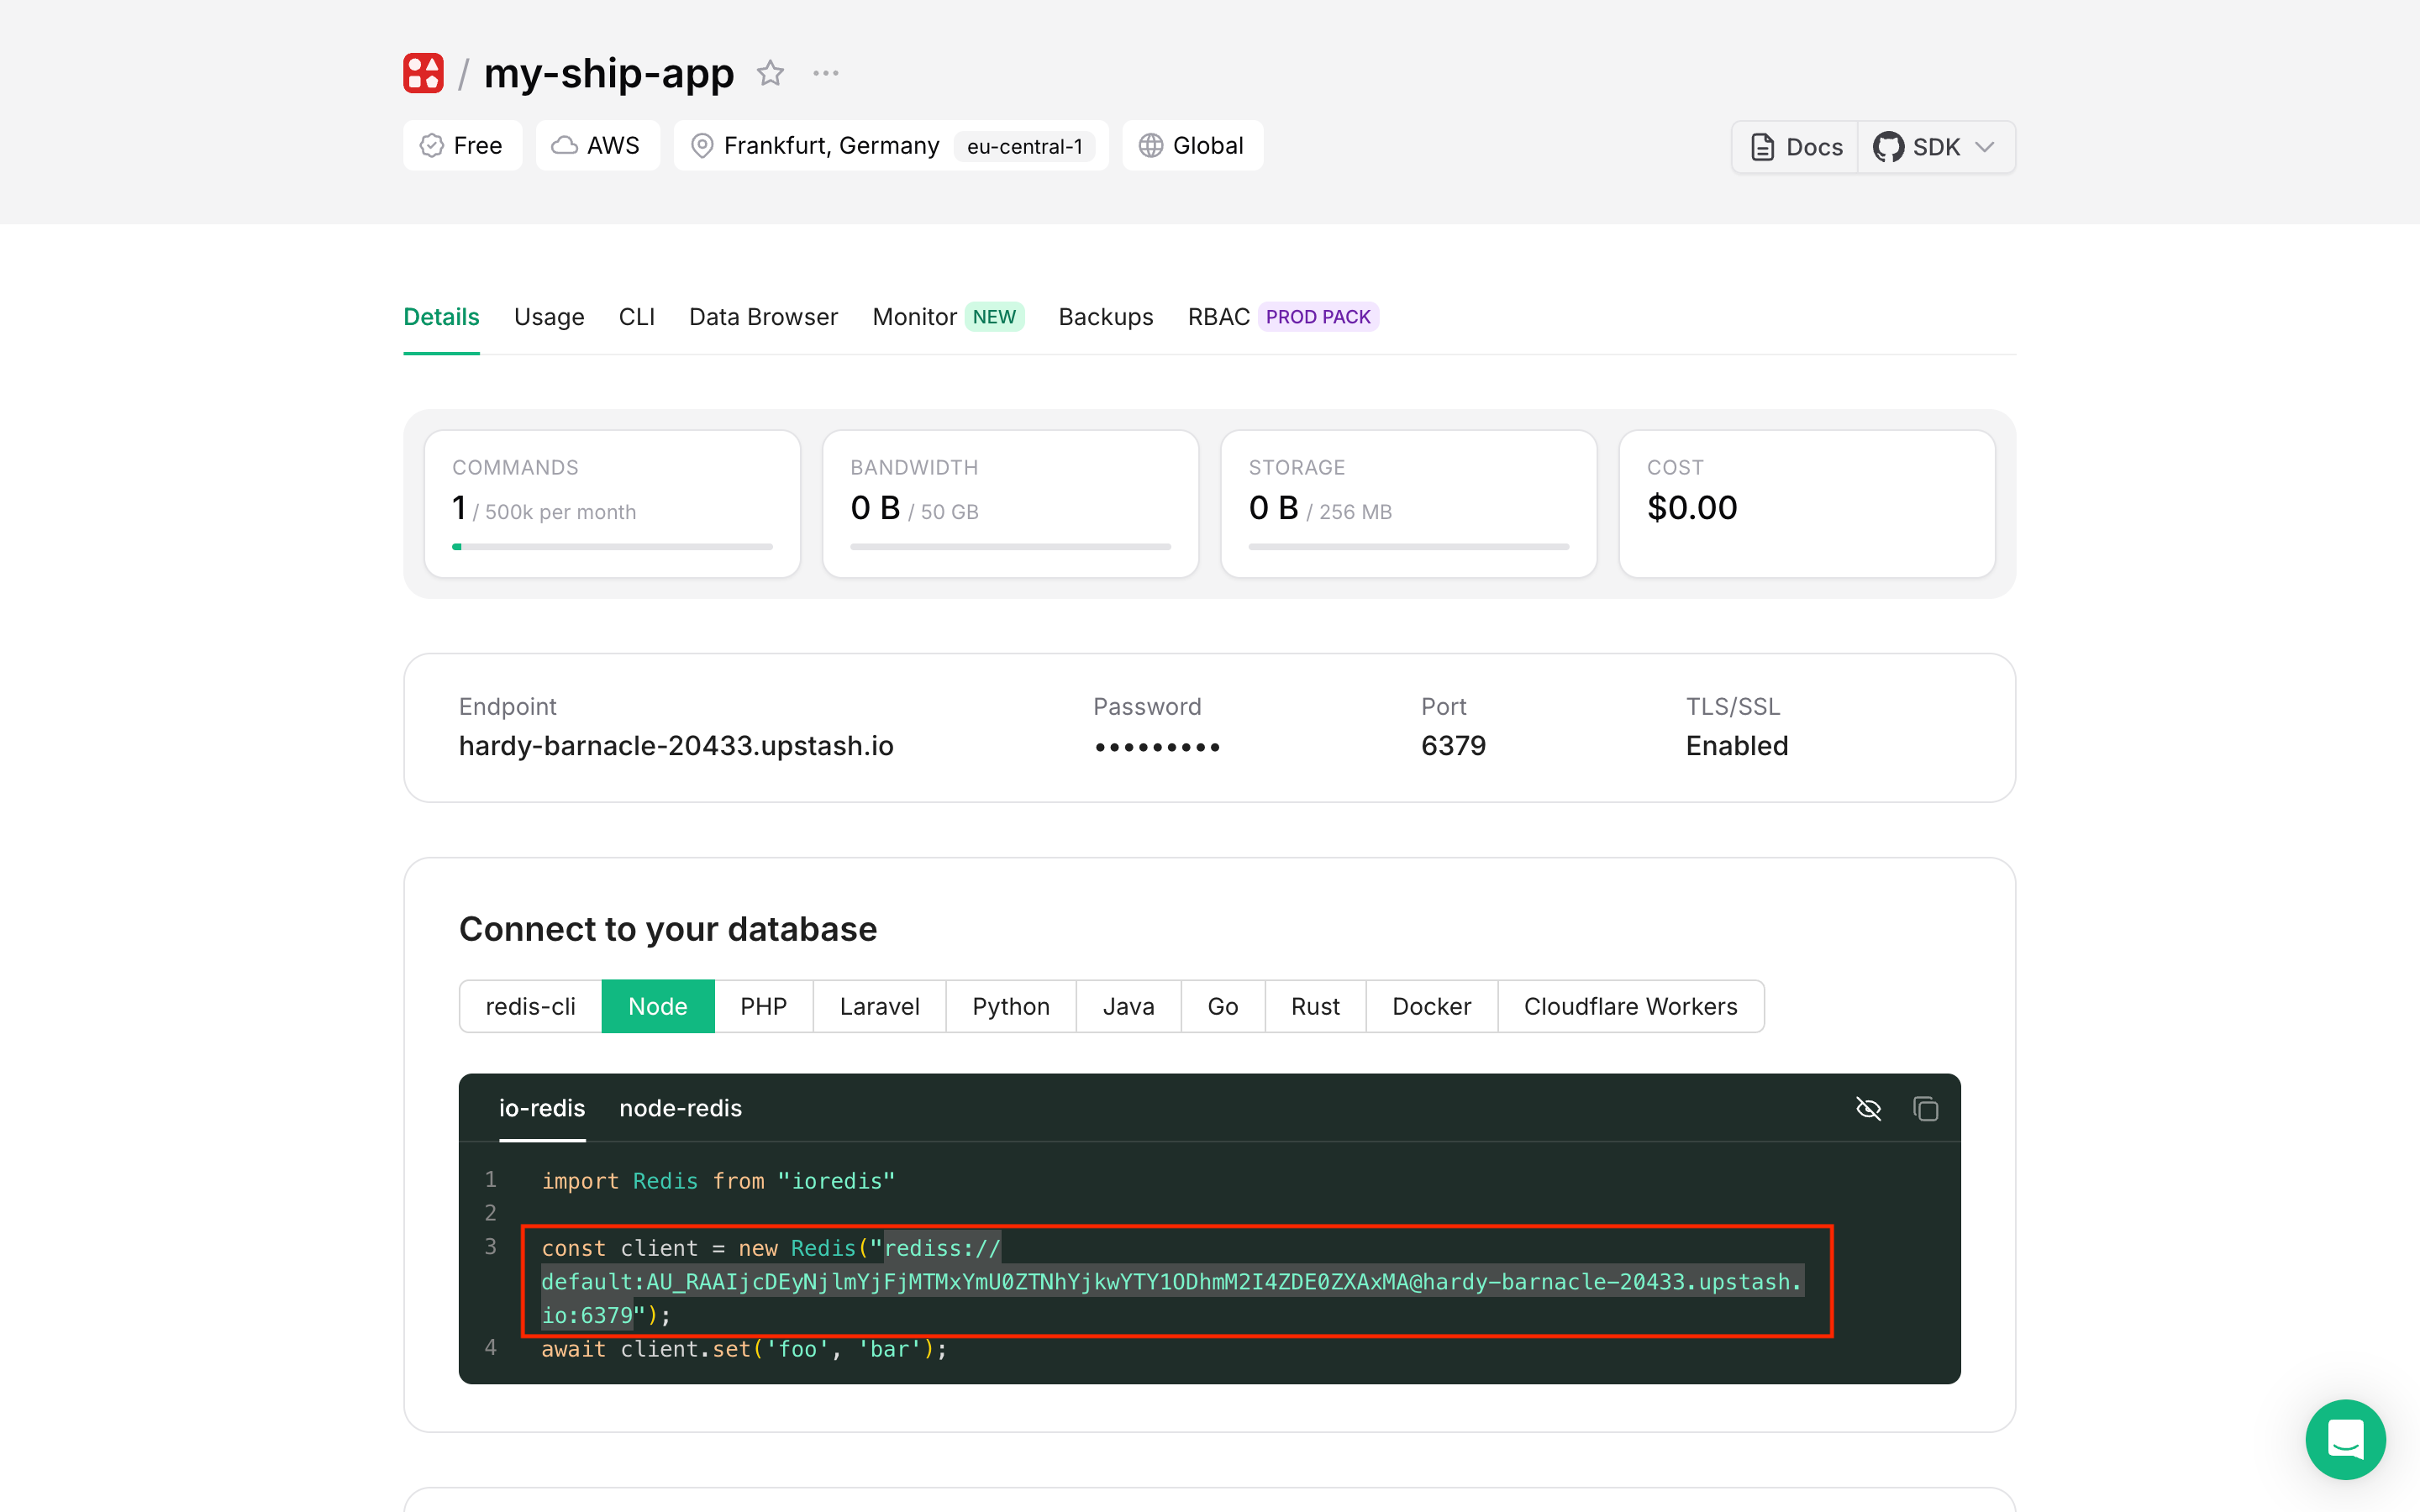
Copy Connection String
- Select the Node tab for the appropriate connection string format
- Click Reveal to show the hidden password
- Copy the complete Redis URI (format:
rediss://username:password@host:port)
Add to Environment Variables through k8sec
k8sec, add the Redis connection string to your environment configuration:Verify Connection with Redis Insight
Redis Insight is a powerful GUI tool for managing and debugging Redis databases.Install Redis Insight
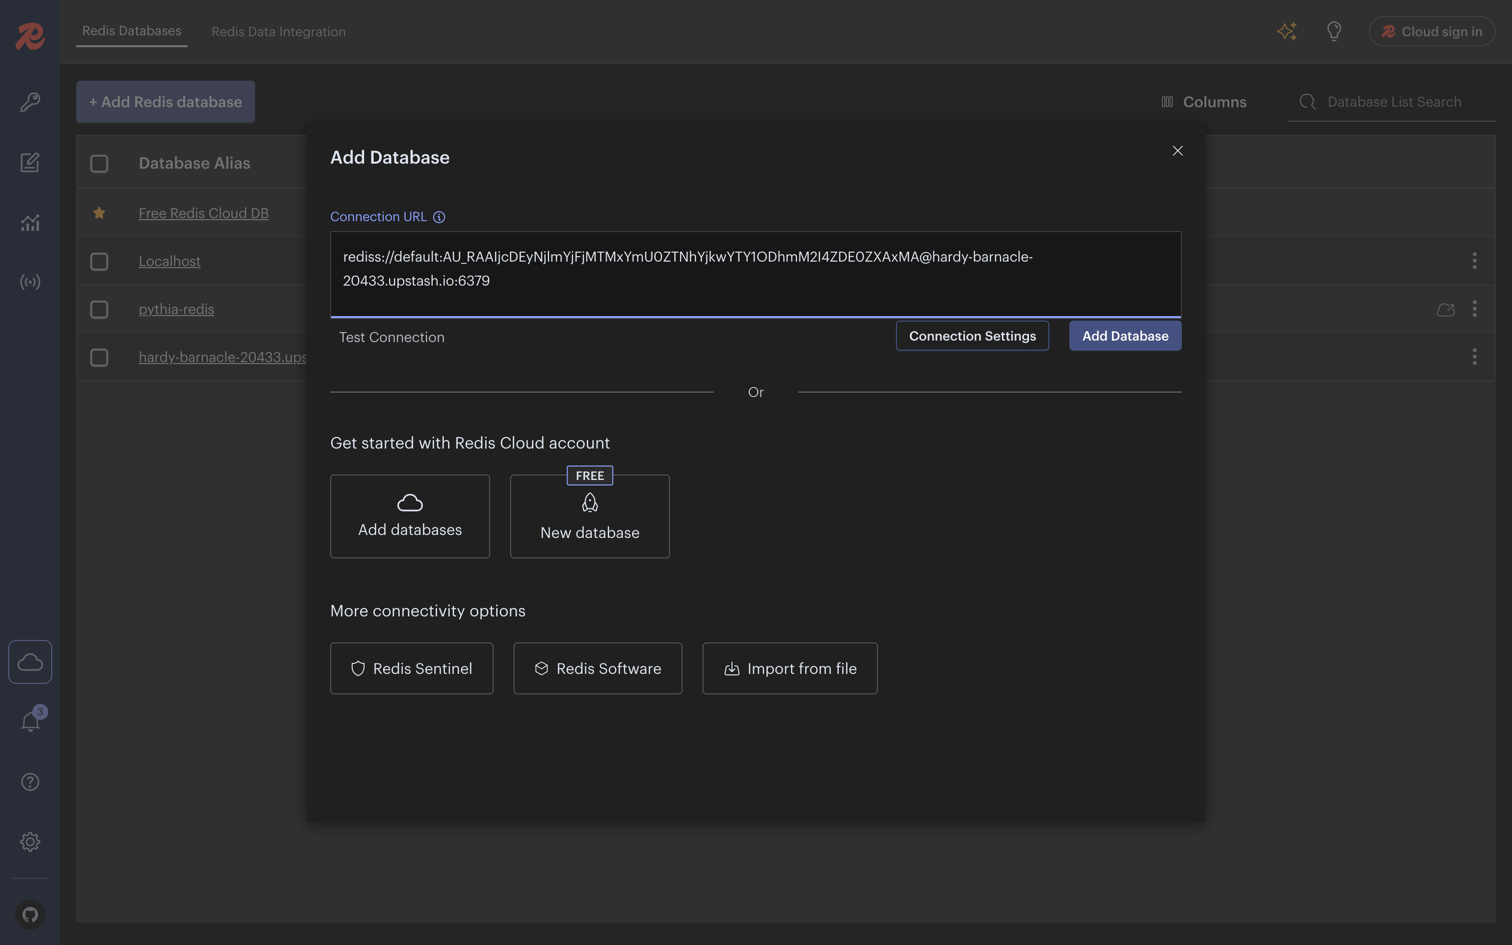
Add Database Connection
- Open Redis Insight
- Click Add Database
- Paste your Upstash Redis connection string in the Connection URL field
- Click Add Database
Explore Your Database
- Browse keys and data structures
- Execute Redis commands directly
- Monitor real-time performance metrics
- Debug application data storage